Bold Table Makeover (with Painted Antlers)
Um... normally not a lot...
...maybe flannel shirts? HA
But in this case it's antlers!
I don't hunt 'em, I paint 'em :)
Maybe I need a bumper sticker with that on it!
After seeing all the antlers in design for the last couple years, I finally took the plunge and jumped on the 'antler bandwagon'.
I didn't start out painting this table with the end design in mind...I was planning to paint some kind of French graphic on it....but I really wanted something bolder, to suit the sturdy table.
I wanted my design to be bold and edgy....different from my previous tables.
This is what I started with...dark, old and covered with the dings, scratches and gouges of its long history (it's a 'brother' to this old dresser than became a console table).
I was recently sent a sample of Southern Honey Chawk Paint and Wax and I decided to use the light grey color ('Stella') to paint my table.
If you're new to chalk paint, or painting furniture in general, that first coat will make you wonder if you've just committed a major blunder...because it looks really bad!
Just wait until the second coat goes on...
See how much better that looks! All the streaks and ick just start to vanish. And the beauty of chalk paint is that your piece is generally ready to be re-coated in about 30 minutes...it dries so fast!
I love how the Southern Honey Chawk Paint dried so smoothly and the brush strokes disappeared. It's like all the nicks, dings and gouges just vanish right before your eyes!
I just know the angels are singing the Halleluiah chorus! Another piece saved from the dumpster!
So the drawers that you can't see are propped up and each got a couple coats of the Stella grey color too.
Once everything dried, I lightly sanded it but I really didn't want to reveal the gouges so I didn't sand to distress, just to soften up the paint a bit.
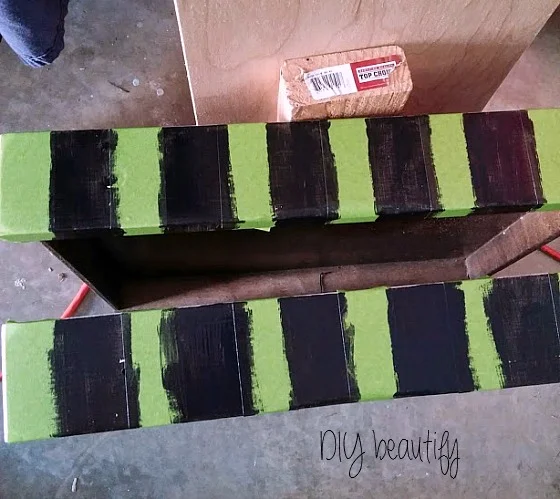
I used Frog Tape to stripe off the drawers and painted them black.
I reused the white/brass knobs and gave them a couple coats of black spray paint.
I was pondering design ideas for the top. I really wanted to paint antlers, but I wasn't sure if it was the right choice.
So what do you do when you need affirmation on design decisions?
Ask your 10-year old!
Little Diy's response was, "Mom, we live in Tennessee."
Like it was a no-brainer!
Awesome! Design confirmed! (I'm sure Mr Diy would have given me a completely different response...as he is not into painted furniture. I'm glad he was at work, hehe).
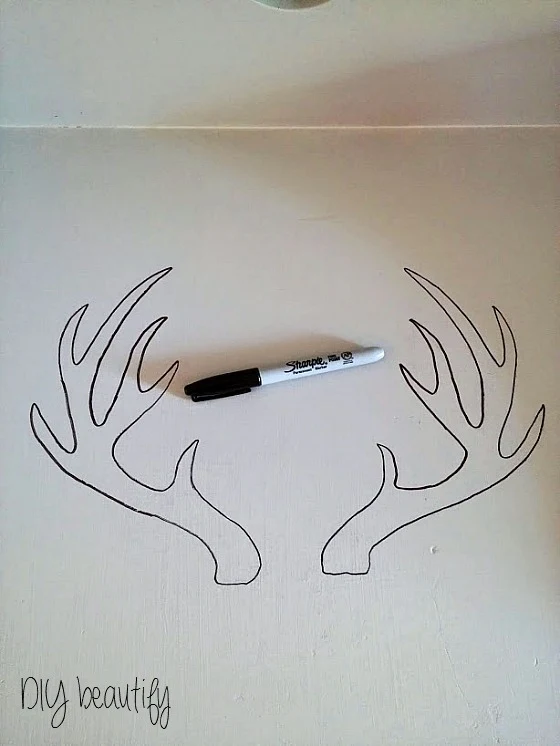
I found a pair of antlers online and printed them out. I transferred them to my table by rubbing gray chalk on the backside of the paper, flipping it over, taping it in place and tracing it with a pen. This is generally my favorite way to transfer images and/or words to furniture even though it means hand painting.
But here's my tip of the day...use a Sharpie to outline the design after you've traced it, and then just fill it in with black paint! Last winter I actually painted an entire design onto a tray using a Sharpie.
Sharpies are our friends :)
I just used black acrylic craft paint and a small brush to fill in the antlers, like coloring, but with a paintbrush! I really like painting...it's soothing to me and it goes a lot quicker than you'd think.
If you make a mistake, you can always go back and touch it up with your base paint color.
I gave everything a day to dry and then waxed it using Howard's Paste Wax (sold by Southern Honey). Their wax is citrus smelling, and softer than some on the market...it will actually liquify when it's warm outside. The texture makes it really easy to apply and it dries in just minutes so you can buff and be done! My table was waxed and buffed in about 15 minutes!
I was so excited to put the knobs on the drawers and the drawers back into the table and see how it all looked together.
I wasn't disappointed. It's bold, bright, a little bit edgy (but not too crazy) and now it's ready to be enjoyed again for another couple decades!
It's such a sturdy table with its dovetailed joints. I'm so glad I gave it a new makeover!
It's heading to the Community Street Festival this Saturday where it will be looking for a new owner.
If you live in the Nashville area, check out Southern Honey Workshop, a storefront/workshop combo. You can read about Ashley and Kim and how they started up Southern Honey Chawk Paint here. I had the opportunity to meet them both at The Strawberry Patch Barn Sale last month and they are sweet gals with a great product that is both affordable and offers wonderful color options. Just look at this color chart! Here is a link to the stores that carry Southern Honey Chawk Paint products.
Hope you have a wonderful weekend!
Coming up next week, I make over a candelabra for a cute Halloween display, and I reveal another painted table...this one with a completely different theme!
I'm so glad you are following!
bringing beauty to the ordinary,
Become a DIY insider!
You'll never miss a post, and you'll get all my FREE tutorials
and more...delivered straight to your inbox!
and more...delivered straight to your inbox!
Let's be Social! Follow along on Pinterest, FB, Twitter, Instagram
This blog's content is for entertainment purposes only and is not professional advice. By reading this blog and attempting to recreate any content shared on it, you assume all responsibility for any injuries or damages incurred. Read my full disclaimer here.


Very cute design! I'll have to check out that paint!
ReplyDeleteThank you Julie ☺
DeleteHow fun, Cindy! I love the antlers--great detailing. :) Thanks for linking up at the Pretty Preppy Party!
ReplyDeleteThe black and white looks great, I can't believe how much of difference the paint has made.
ReplyDeleteI love the lighter look too, thank goodness for paint! Thanks for stopping by ☺
DeleteCool idea, and I think you should definitely market the bumper sticker..LOL. I'm stopping by thanks to the Pin Junkie party!
ReplyDeleteThank you Christie ☺ I love your thrifted DIY pennant light, what a great idea!
DeleteCute table Cindy! I recently used that same antler pattern on a project for a baby's room (requested by the mother) believe it or not. Thank you for sharing it and your fun fall and Halloween decorations at What We Accomplished Wednesdays. Have a great week!
ReplyDeleteBlessings,
Deborah
That table is fun and funky! Well done!
ReplyDeleteVery creative. The original piece looked sturdy, but a bit sad. Your stripes and antlers are terrific additions. Good job!
ReplyDeleteHaha, thanks Ann Marie...I agree that it was a little more than sad! It was fun to add the funky and bold stencils and modernize it!
DeleteHow does this paint+wax hold up over time. I am considering doing a crib with this paint.
ReplyDeleteI have never had a problem. You need to give the wax about 3 weeks to 'cure', which hardens it to a very tough surface! I don't think you'll be disappointed!
DeleteThank you so much for sharing this post and that design looks perfect!
ReplyDelete