Easy Burlap Pillow plus a Free Printable
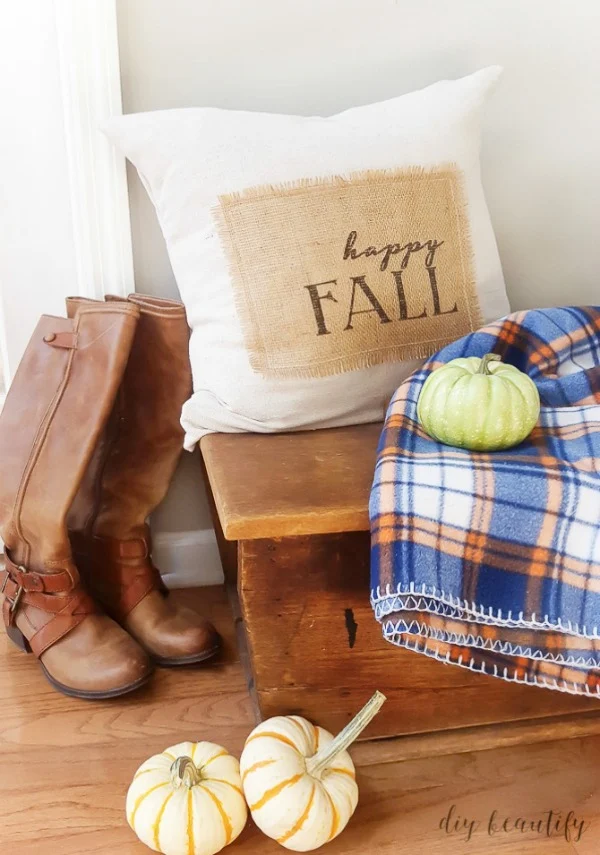
How to make a printed burlap pillow using your home printer!
Before we get to this easy fall project, can I just wax poetic about Fall for a minute...my favorite season! The weather has finally been cooling off a little and I feel like I have 'fall fever'. Kinda like spring fever, only I don't feel like cleaning! Which isn't very surprising as I rarely feel like cleaning...but I digress!
What I do feel like doing is pulling on my favorite flannel shirt and my tall boots and going for a walk in the leaves.
I want to curl up beside the fire with a good book, wrapped in a cozy throw, sipping hot apple cider.
I want to make a big pot of homemade chicken noodle soup.
Do you feel that way too?
This weather is totally teasing me...cooler, cooler, cooler...and then hot again. I can't wait for it to finally stay cool!!!
I could talk about fall all day, but I think you are probably eager for me to get to the pillow tutorial and show you how easy it is to print on burlap right at home!
When I read about this technique over at Domestically Speaking, I was ecstatic and couldn't wait to try it for myself. I've stenciled on burlap before...but it's a little tricky (and messy). Printing is quick and easy and delivers fabulous results!
My home decor better watch out...because with this easy trick in my arsenal, nothing is safe!
PRINTING ONTO BURLAP FROM YOUR HOME PRINTER
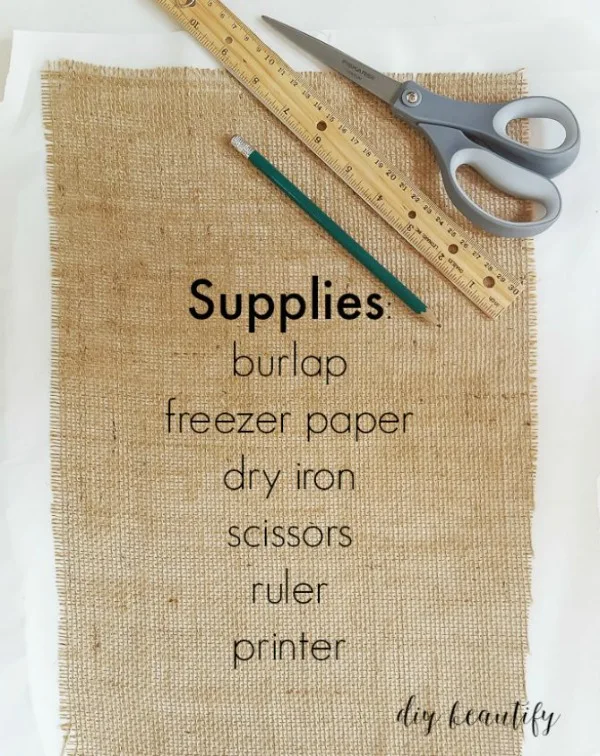
Materials Needed to Print On Burlap
- burlap (buying it on the roll is the easiest way to use it for this project)
- Reynolds Freezer Paper (not pictured)
- scissors
- ruler
- pencil/pen (these are some high tech tools, right?)
- inkjet printer
- iron
How to Print onto Burlap
Step One: Prepare the burlap
First, cut a piece of burlap that is a little bigger than a regular sheet of copy paper. If there are threads hanging off the edges, cut them off.Next, cut a piece of freezer paper to the same size as the burlap.
Heat an iron. You want hot, dry heat. If your burlap is really wrinkled, steam it first and then remove the water from the iron. Place the freezer paper waxy side down onto the burlap and iron. Go over it a few times, paying special attention to the edges. You want it to be stuck well, all the way around.
Leave the freezer paper stuck to the burlap and measure, mark and cut it so it's exactly 81/2 x 11.
Note: from this point on when I mention 'burlap', it's with the understanding that the freezer paper is still stuck to the back of it.
Step two: Create a printable
The printable I used for this pillow, 'happy FALL', was created in PicMonkey, You are welcome to grab it here and use it (as always, my free printables are for your personal use only please)...or use something else you have created. Just make sure your printable doesn't have any really fine details. You want to pick fonts/images that are bold and well defined.
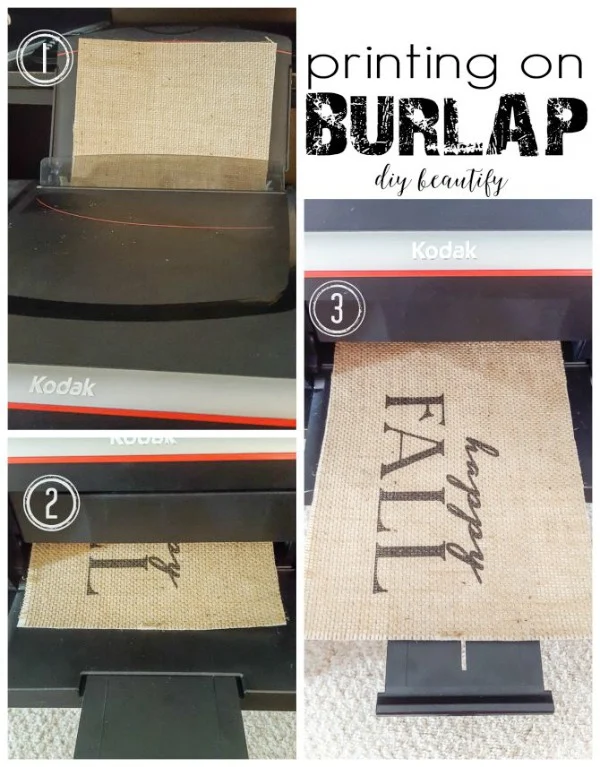
Step Three: Send burlap through the printer
My printer, a Kodak Hero, was being a little bit testy and either couldn't recognize the edges or told me I had a paper jam. I had to feed the burlap through the machine several times to get it to actually print on the burlap. I found it helped to have a small stack of printer paper behind the burlap/freezer paper.Note: If you get to the end of your rope and your burlap just will not print, head to Michael's or Hobby Lobby and pick up a package of laminated burlap sheets. Only the back is laminated, but it makes the burlap sturdy and each to send through a printer.
Once it comes out of the printer, peel the freezer paper away and you are ready to create something with your beautiful new printed burlap!
You can frame the burlap like I did here with this burlap printed pumpkin, or create a pillow like I did. Keep reading for the instructions on making a pillow using the printed burlap that we just made.
How to Make A Pillow Using Printed Burlap
Materials Needed:
- sewing machine
- fabric (I used a canvas drop cloth because I love the nubby texture and oatmeal color; this is the one I bought. Feel free to use any fabric you want; canvas duck cloth would be a great choice)
- iron and ironing board
- straight pins
- scissors or rotary cutter and self-healing mat
- pillow form
Step One:
Measure your pillow or insert and then add 1/2" - 1" (depending on how snug you want your cover to fit) and cut one piece of fabric. This will be the front.
Step Two:
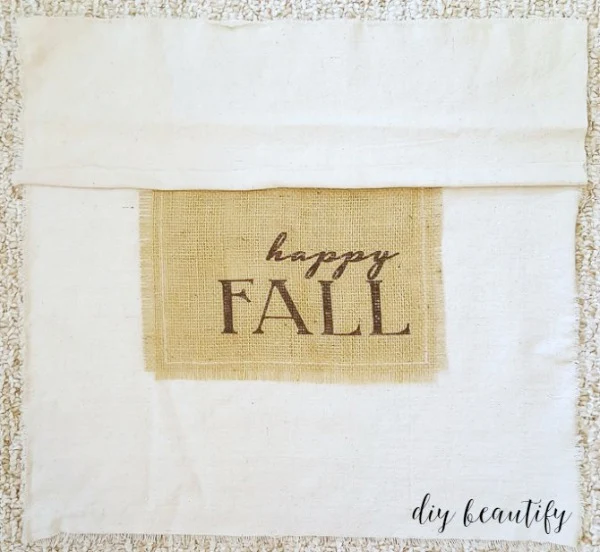
We're going to sew the printed burlap piece that we created above onto our pillow cover front. You may want to cut it down to size a little, and pull a few threads to fringe the edges. Pin it to your pillow cover front and then sew it on. I have my mom's vintage Pfaff machine from the 70's...still going strong!
Step Three:
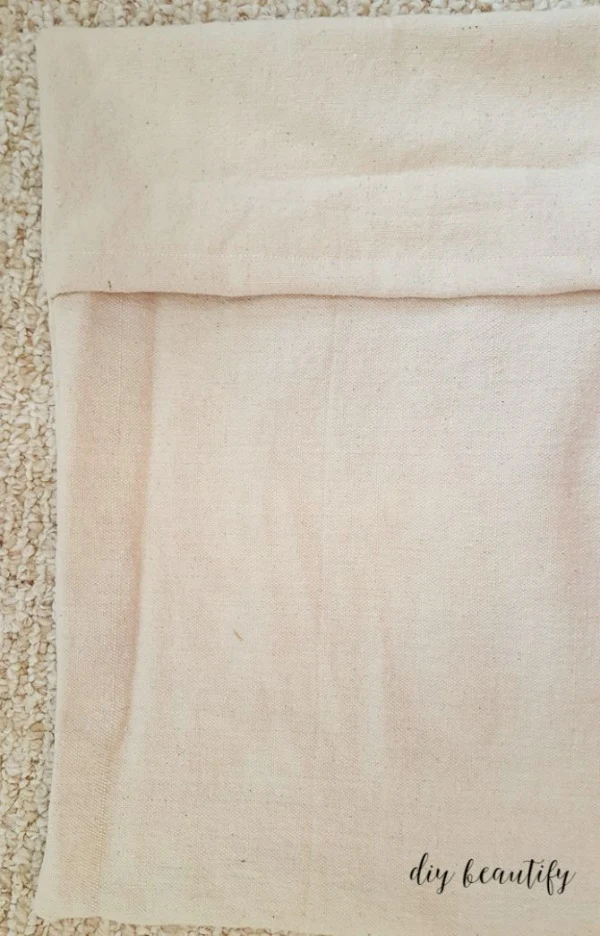
Cut the pieces for the back of the pillow cover. The back is treated a little differently. To make the pillow cover removable, we're going to create a pocket opening at the back using two pieces of fabric.
Do you want to know a dirty little secret?
I don't really measure...I eyeball! I know, I know, I'm sorry (insert sheepish face here).
For those of you who do measure, you are going to cut the first piece of fabric 1/3 the size of your front cover plus 2 inches (just the length...that gives you some extra fabric to iron under and hem for the edge of the pocket opening). The second back piece of fabric will be 2/3 the size of the front plus 4-6 inches (enough to hem, plus some overlap!)
For those of you who do measure, you are going to cut the first piece of fabric 1/3 the size of your front cover plus 2 inches (just the length...that gives you some extra fabric to iron under and hem for the edge of the pocket opening). The second back piece of fabric will be 2/3 the size of the front plus 4-6 inches (enough to hem, plus some overlap!)
Make sense? If you're an eye-baller like I am, you want your top piece to be about 1/3 of the size of the front. Make sure you add that extra 2 inches (just on the side of the opening) before you cut it out.
Step Four:
Cut and hem the second back piece and lay it over the first. Remember, the fronts of the pillow cover need to be on the INSIDE!! So I have my pillow front with the burlap piece FACE UP and I will lay the two hemmed back pieces FACE DOWN on top (front sides are together!)Pin it all the way around and sew.
Step Five:
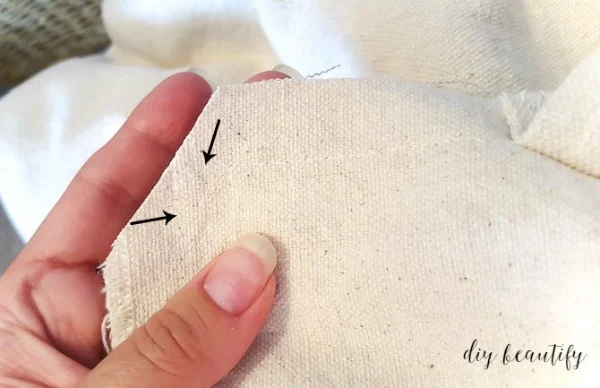
Once it is completely sewn, all the way around, trim the corners. That will reduce some of the bulk when we turn it right-side out.Step Six:
Turn the pillow cover right side out. Push out the corners, using a straight pin if needed.Here is what the back of mind looks like before adding the pillow. Excuse the wrinkles...looks like I need to iron it again!
The beauty of this type of closure is that your pillow cover is so easy to remove when it's time to change it out!
I hope you found this tutorial useful and are ready to make some pillow covers of your own, with printed burlap fronts!
I know I'll be using this technique to print on more burlap to use in many ways around my home. It's a great technique for making budget-friendly home decor like this printed burlap sign.
Have a fabulous weekend!
bringing beauty to the ordinary,
Follow me here! Pinterest, FB, G+, Twitter, Instagram
Featured at: Country Living, French Country Cottage, Blesser House, Maison de Pax
Sharing with: French Country Cottage, Tatertots and Jello, The Turquoise Home, Maison de Pax, Designer Trapped, Blesser House, The Pin Junkie, Design Dining and Diapers, House by Hoff, 24 Cottonwood Lane,









So pretty Cindy! I love this pillow...what a great idea about printing on the burlap. Thank you for visiting my blog and leaving me a sweet comment. Lead me here to your fabulous blog!
ReplyDeleteThank you so much Deb! I'm delighted to have you visit!
DeleteLove this idea Cindy and excellent tutorial too. Thanks so much for the inspiration! These are definitely happening in my living room this weekend ☺ Pinned to share and to refer back to.
ReplyDeleteI'm so glad you love the pillow! Thank you for the post love and pin!! Happy crafting this weekend :)
DeleteHow clever! Love your lively tutorial, and the pillow looks great. If you felt like it, I would love to have you come link up at the Free and Fun Friday party I host each weekend! It just went live. :)
ReplyDeleteFound you via the Pin Junkie Link-Up!
Thank you so much Sarah Eliza!
DeleteI had no idea you could print on burlap! That pillow is so pretty and you give a great tutorial. We'd love it if you could link up with us at Best of the Weekend Link Party.
ReplyDeleteI know, isn't it amazing? Thank you for your sweet words!
DeleteSuch a beautiful pillow Cindy! Once my sewing machine gets fixed I hope to make one:)
ReplyDeleteThank you SO much Tara! Although I don't love sewing, I do love being able to quickly whip up things like pillow covers; I hope your machine is fixed soon!
DeleteBeautiful pillow! Thanks so much for the detailed tutorial.
ReplyDeletePaula
You're so welcome Paula, thanks for your sweet words! Have a fabulous weekend!
DeleteI love burlap and have no idea why I haven't tried to print on burlap. I'm gonna give it a try as soon as I pick up some freezer paper. Thanks so much for the inspiration!
ReplyDeleteHi Pam, thanks so much for your sweet comments! Printing on burlap is my new addiction! Make sure you're using only Reynolds Freezer Paper, the others don't work for some reason.
Delete