How to make a Pedestal Rope Bowl (using just 2 items)
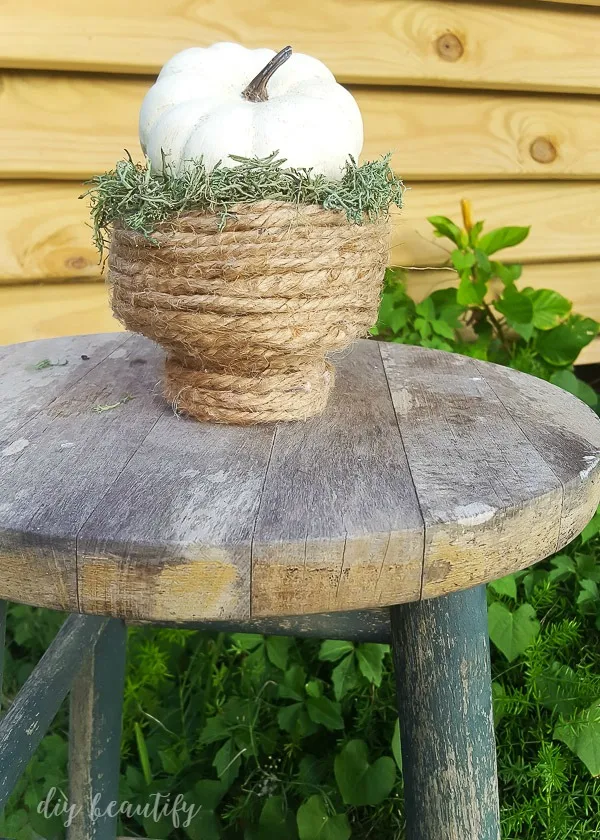
Sometimes living with the bare necessities challenges us to be more creative, to think outside of the box! That's how this Create and Share Challenge project started...with just 2 basic supplies! Using just hot glue and rope, I created this little pedestal bowl. It's full of texture and interest, and makes a great complement for the rest of my fall decor! I'm sharing the tutorial below.
This month's Create and Share blogger challenge was to make something with rope. We could use other supplies as well, but were encouraged to think outside of the box.
In case you don't know, our recent move to TX has found us living temporarily at the beach. Our new house closes in just over 2 weeks, so we are living out of suitcases and are without all of the stuff that normally surrounds us and fills our lives.
It's been a nice break...but a bit of a challenge when it comes to creating.
I didn't want to spend money on replacing items that I already own, that are currently packed away...like empty frames that I could wrap with rope, or jars that could be cleverly transformed with rope.
Instead, I took it down to the very bare basics...just rope...and glue.
Affiliate links are provided below for your convenience. Find my full disclosure policy here.
SUPPLIES TO MAKE A ROPE PEDESTAL BOWL
- 1-lb spool of 4 ply jute rope
- high temp hot glue
All the other supplies I've listed are secondary, and optional
- wood tags
- chalk paint, acrylic paint
- brush
- natural raffia
- reindeer moss (find moss here, here or here)
DIRECTIONS TO MAKE A ROPE BOWL
I'm going to let the pictures do the talking, then I'll add some explanation below.
You might want to PIN THIS now for future reference!
The first thing to do is start making a rope 'snail'. Just hot glue along the edge of the snail as you twist and add more rope to increase the size.Initially I only added dabs of glue here and there, but I quickly realized if I wanted to make this rope bowl secure and stable, it was going to need a continuous run of glue all along the rope.
Please be cautious when using hot glue, as it can lead to serious burns!
In the top row of how-to pictures above, you can see how I started the rope bowl. I just kept adding glue and increasing the size of the coil until it was big enough to fit my pumpkin (see below).
The second row of how-to pictures above shows the next step...adding sides to the bowl. I simply starting gluing the rope to the top, rather than the sides. Every loop around took the sides higher. Once my rope bowl was the height I wanted, I repeated these steps going back down in a continuous loop, adding stability to the sides of the rope bowl.
Remember, I was making this up as I was going along...with no clue if it would actually work! I wanted to avoid cutting the rope too...trying to see if I could make this bowl all in once piece.
Once I had glued the rope all the way to the bottom of the bowl, I flipped it over (see how-to pictures in the bottom row). I repeated that rope snail, this time gluing it smaller as I went, until I just had a small section left.
At this point, I decided to add a pedestal and glued the rope in a continuous circle on top of itself (like I did for the bowl) and then back down to add stability. I cut my rope, glued the end in place, and the rope bowl was done.
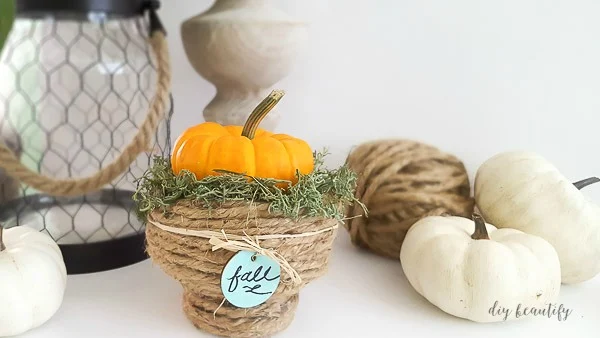
Filling it with moss and a mini pumpkin was the next logical step for my fall decorating here at the beach!
I love the texture of the rope...and the moss...and can't decide if I like it better with this mini pumpkin or the faux painted pumpkin (I'll be sharing that project soon!).
Thoughts?
I'm thinking I'll just have to make a few more!
Either way, it's an inexpensive, quick project that adds a rustic, natural look to your fall decor. I'm pretty sure I'll find a use for it all year long though!
I painted one of the wooden tags, wrote 'fall' on it with black sharpie and attached it to the basket with a length of jute.
It adds a cute finishing touch.
And here's a little chalk paint tip: you can mix acrylic paints with white chalk paint to create custom colors!
I hope you're inspired to make your own pedestal rope bowl! Bigger or even smaller, it's sure to become a piece you'll use often!
And now be sure to check out all the other rope projects by my fellow bloggers:
Twelve on Main - DIY Rope Plate Charger
My Life From Home - DIY Sisal Rope Tassel Basket
Green with Decor - DIY Christmas Joy Sign
Our House Now A Home - Storage Box Using Rope and a Cardboard Box
A Shade of Teal - How to Make a Rope Lamp
Pocketful of Posies - DIY Boho Macrame Play Tent
Iris Nacole - Bohemian Wall Hanging
Kim Six Fix - Rope Wrapped Dollar Store Pumpkin
Vintage Romance Style - Easy Barn Wood Child's Rope Name Sign
DIY Beautify - How to Make A Pedestal Rope Bowl
Farmhouse 40 - DIY Upcycled Bar Stool
Knock It Off Kim - Fall Braided Rope and Burlap Wreath
C'Mon Get Crafty - DIY Rope Wire Basket
Casa Watikins Living - DIY African Inspired Jute Planter
Don't forget to check out more of my DIY Fall projects, like these:
bringing beauty to the ordinary,
Cindy


This is really adorable Cindy. The power of rope! Sharing and pinning !
ReplyDeleteHa, yes...the power of rope, I like that Mary! It's such a quick and fun craft! Appreciate the words and the pin!!
DeleteReally cute, Cindy! I made a similar bowl, but I like the pedestal on yours. Great job!
ReplyDeleteThanks Amy, pedestal was a big of an afterthought...but I'm glad I added it! Love your bowl too!!
DeleteThis is just so perfect.. for any season really! What a fabulous way to add texture to shelves or tablescapes. Love it! Pinning!
ReplyDeleteThanks so much Kim! I agree that it's a great little item to use for any season! Thanks for the Pin!!
DeleteWhat a great idea! I just love it with the white pumpkin!
ReplyDeleteThanks Meg!
DeleteCindy I love that you made a pedestal as well!! Super cute and so wonderfully perfect for fall. Thanks for sharing your creativity in the challenge!!!
ReplyDeleteThank you Stephanie, I love little footed bowls...they have character! Thanks for hosting the challenge :)
DeleteThis turned out so great! I love that the bowl even has a little stand.
ReplyDeleteThank you Katy!
DeleteSuch a fun and easy project! I really love that it's a pedestal as well.. super cute!
ReplyDeleteThanks so much Kim!
DeleteCindy,
ReplyDeleteThis bowl is so cute! I love that you figured out a way to make it into a pedestal bowl! It adds so much extra interest! Thank you! Pinning!
Thank you!
Delete