Painting the Laundry Room (Week 2 of the $100 Room Challenge)
Week Two of my $100 Laundry Room Makeover is complete!
Affiliate links are included for your convenience; my full disclosure policy is here.
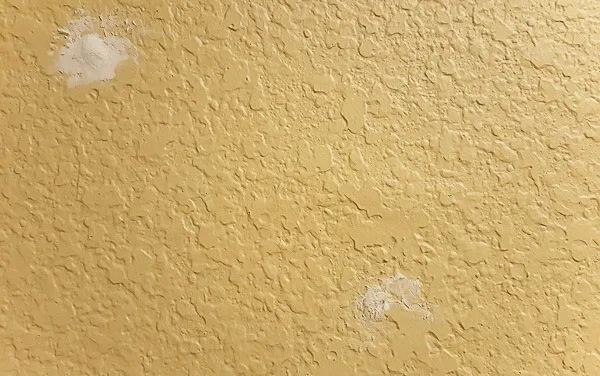
Peachy-beige walls seem to follow me wherever I go!
I hate to say that they're the bane of my existence because that sounds so dramatic buut...
For some of you, this warm color works. I personally do not care for it. My home is filled with neutral furnishings, and this color makes them look dingy and blah!
Don't believe me? Check this out...
and this...
See what I mean? Gray paint just works better with our furnishings!
Maybe it's the contrast between warm furnishings and cool walls that I like, I'm not sure. It just looks fresher!
You can read more about the dining room and sitting rooms in my new home here. I've also painted the kitchen; you can see the before and after here.
This month I'm working on a total laundry room transformation...for only $100!
I'll let you know how the budget is doing as we get further into this project. So far, I haven't had to spend a single red cent! I had leftover gray wall paint from my other recent projects, which I used in this tight space.
I'm afraid there aren't too many pretty pictures in today's post. Making over a room starts with some grunt work...and cleaning.
Affiliate links are included for your convenience; my full disclosure policy is here.
I decided to paint our laundry room over the course of two days...mainly because I was really needing to wash some clothes!
But before I started painted, I needed to do a little prep. Never my favorite part of painting, but always an important step to get the best results!
You need a few basics to prep for paint. I really should have a broom in this picture because that's where I started.
I wiped down the walls, starting at the ceiling and working my way to the baseboards. I removed dust, cobwebs and lint.
Next, I used Mr DIY's cordless drill to remove the hooks that were on the wall behind the door. I had to pull out some anchors too, which left some big holes in the wall.
That, my friends, is where DAP comes in. Otherwise known as patch 'n paint. This stuff is easy to apply with the spackle knife, and fills those holes right up.
You want to be sure to smooth it as much as possible. With my textured walls, that wasn't such a big deal, but I did my best.
I'm not sure yet exactly where I'll be hanging stuff, and it's always nice to start with a fresh surface and no visible holes!
The last step was to remove all the switch plate covers with a flat head screwdriver. I'm pretty sure I'll be replacing some of those covers, and maybe even the switches because they are uuuugly!
I laid out a tarp under my ladder to catch any spills and painted the long wall across from the machines, as well as the two end walls.
Over the years I have mastered the skill of cutting in with an angled paint brush. It saves so much time when you don't need to tape your edges!
My favorite way to paint is top, bottom, middle. I climb the ladder, cut in as far as I can reach, do the same at the baseboards and then fill in the middle with the roller.
The painting went fairly quickly and I had just enough room to squeeze the ladder between the machines and the wall.
That evening, Mr DIY and my 19-year old
Of course, there was prep to do first, including cleaning all the gunk on the floor that has been accumulating for who knows how long!
As much as I dislike cleaning, I do like a clean space!
At the end of the day, I was left with a freshly painted gray room...no more peachy-beige! Yay!
The white trim and door look so much brighter and fresher with the gray paint!
My next project for this space is to paint the cabinet. It is currently sitting on my back porch awaiting my paintbrush!
I'll be sharing that project next week. And then we'll get to the fun stuff!
You can follow along with my progress during each week of the challenge by clicking on the links below:
Interested in seeing how the other $100 Room Challenge makeovers are coming along? You can see them all here:


you are right - the gray is SO much better! can't wait to see the space!
ReplyDeleteThanks Morgan! I can't wait to pretty it up!
DeleteThe gray walls look beautiful. I can't wait to see complete makeover.
ReplyDeleteThank you so much Sherry, I love the gray walls too!
DeleteWhat a huge difference a little paint makes! The gray is so much better!
ReplyDeleteI agree, thank you!
DeleteSuch a difference! And I love the grey you used. :)
ReplyDeleteThanks so much!
DeleteLooks lovely! I was so lazy and didn't move our washer and dryer to paint our space *hangs head in shame*
ReplyDeleteHaha, thank you! I'm sure your space will be beautiful, and no one but you will know ;)
DeleteWhat a difference! The gray paint looks so fresh and bright. Love it!!!
ReplyDeleteLOL! Peachy beige follows you everywhere! That is too funny and so true.
ReplyDeleteLoving the new color and can't wait to see how your space comes together!
Thanks Ashley, looking forward to having this room done!
DeleteLooking good so far! Grey is such a better neutral than peachy beige! Can't wait to see the transformation!
ReplyDeleteThanks Nicki!
Delete