Blue and White Transferware Stenciled Sign
How to make a stenciled sign reminiscent of blue and white transferware
Hey friends, welcome back to another fun tutorial!
Before we get into this stenciled sign, I just want to share some stuff going on in my life right now. First of all, please pray for my m-i-l Joan! Without going into too many details, she will be having surgery soon and the big C word is our biggest fear! She is the world's greatest m-i-l and I love her so very much! Really trying to trust God with this...if you're a pray-er, would appreciate your prayers over Joan!
If you follow me on Instagram, you'll know that I'm attempting to get into shape by exercising and eating healthy. Y'all, last week kicked my butt! I have been so incredibly fatigued and literally some days have been just dragging myself around the house, waiting for bedtime! Giving up sugar and fighting that addiction is no joke! I need to be on Vitamins too...if you have any recommendations, please share!
If you only came for a pretty trash-to-treasure tutorial and got more than you bargained for...welcome! My life is far from perfect and I am really trying to be more authentic this year as I share on my blog...so I hope you don't mind getting a little more "real life"!
But that's it for today, I am really excited to share this blue and white stenciled sign with you!
I've had this idea percolating in my mind for awhile now. That's just how it is with us "creatives"!
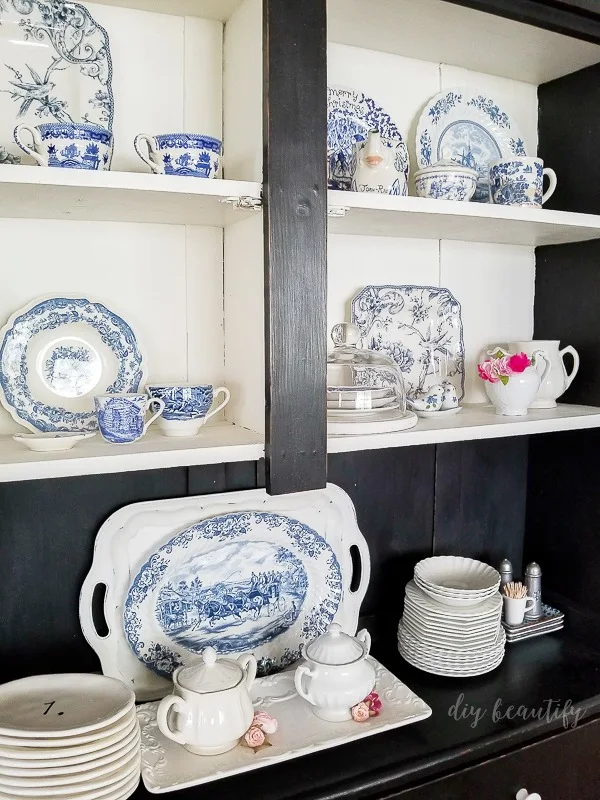
It all started with the blue and white dishes I've been collecting from thrift stores for several years. I recently moved it all into my black hutch for spring and love it against the white!
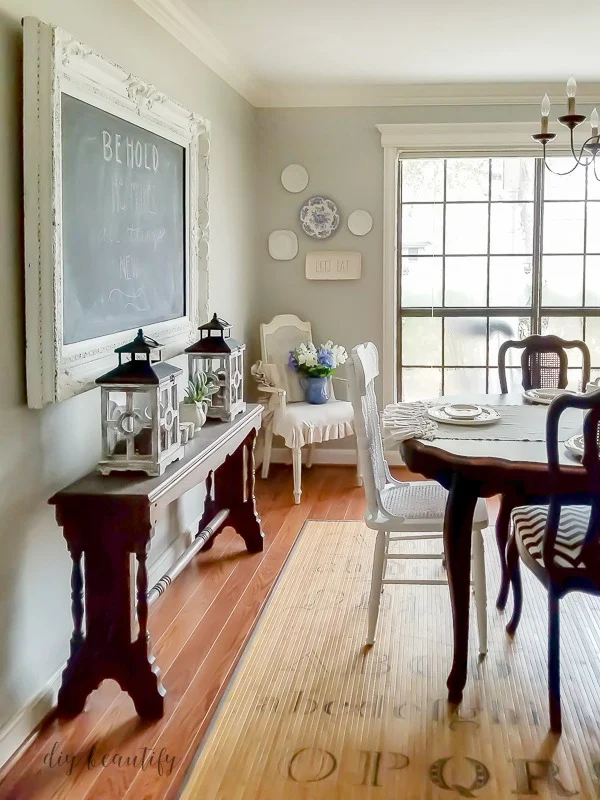
Something about blue and white just makes me smile! It's long been my favorite color combination and it just feels so fresh! I love it in my dining room.
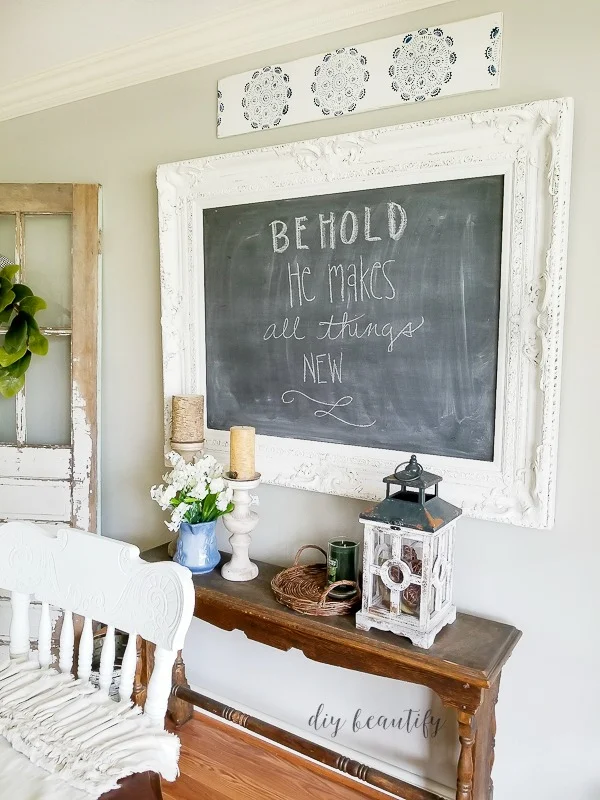
So back to this sign idea. I thought it would be really cool to make a painted sign that looked like my transferware plates! There was just enough room above my DIY chalkboard (boy that's an old post...one of my very first!) and I liked the idea of adding a little pop of color to this wall.
If you've read any of my sign tutorials you'll know that I'm a real cheapskate...I like to use discarded wood that I find by the side of the road, or repurpose shelves or even recycle an old sign! If I have to buy wood, it's going to be something cheap like plywood or MDF. Why?? Well did I mention that I'm cheap? haha
Plus if I save money where I can, it means I've got more to spend on other things!
This sign started off the same way. I actually rescued it from the garbage before Mr DIY could haul it out to the street!
It was a cheapo piece of wood that the previous owners had used in the living room cabinet to make an extra shelf. In fact, it had shelf liner stuck to it.
There was absolutely nothing redeeming about this piece of wood! And to anyone else it was just garbage!
But honestly...those are the pieces I like best! There is something incredibly satisfying about turning a piece of garbage into some beautiful!
And there are all sorts of parallels here between what Jesus did for us on the cross, redeeming us and turning our lives into a masterpiece! It's truly an ashes to beauty kind of story!
Here are the supplies I used for this transformation:
SUPPLIES
- junk piece of wood
- palm sander
- white chalk paint
- blue acrylic paints
- doily stencil
- stencil brushes
I had to do a bit of work with this piece of wood first, to ready it for sign-making. Mr DIY helped to remove the base pieces that were nailed to the wood. Then I peeled all the shelf liner off, and finished by sanding the sign well on all sides to smooth it, remove splinters, and prep it for paint.
I didn't take pictures of the sanding or the painting because those are self-explanatory! I found that one good coat of white chalk paint was enough for the base of this sign.
Once the paint dried, I grabbed my stencil and figured out the placement. I knew I wanted three "plates" on my board. My stencil was just a wee bit too tall, so I was going to tape off all the little outside edges so that it looked totally uniform but then I just decided that no one would even notice those bits!
After marking the center of my board, I taped my stencil down. Initially I was just going to use one blue, a nice dark navy color. So I stenciled my three plates and stepped back to look, but realized it needed more dimension. I grabbed two lighter acrylic blues from my cabinet and went over the piece again with the lighter colors in select areas.
Is it perfect? Nope. But I love it! You can see in the picture below how much more dimension it has with the additional colors!
Stenciling Tips: When you stencil, you should be making a pouncing motion with the brush, up and down. This prevents any bleed-through. You also should remove most of the paint first by blotting the brush on some paper towel, but I didn't bother doing that. I pounced my brush in the paint to load it, and then pounced a little of it off on the side of the Styrofoam bowl that I was using. The little bit of bleed-through I had doesn't bother me but if you are more of a perfectionist, keep these tips in mind!
And just so you know, plastic stencils are so easy to wash! Just run under water after using them and the paint will come right off.
You can see that I ended up stenciling some partial plates to the edges of my sign...I found I liked a continuous run.
And just like that, there is a new pop of color in the form of painted transferware dishes on this wall of our dining room, super easy to remove when I tire of it or change the color in here because I hung the sign with 3M hanging strips rather than nails! This is my favorite new way to hang stuff on my walls...perfect for the commitment-phobe!
Do you collect transferware? I hope I've encouraged you to stencil your own sign for spring inspired by these pretty dishes! Please let me know if you do!
bringing beauty to the ordinary,
Become a DIY insider!
You'll never miss a post, and you'll get all my FREE tutorials
and more...delivered straight to your inbox!
and more...delivered straight to your inbox!
Let's be Social! Follow along on Pinterest, FB, G+, Twitter, Instagram
Popular Posts You Might Have Missed
This blog's content is for entertainment purposes only and is not professional advice. By reading this blog and attempting to recreate any content shared on it, you assume all responsibility for any injuries or damages incurred. Read my full disclaimer here.


Love this project. White and blue are also my favorite color combo! I find vitamins a must for me and I use AdvoCare vitamins. If you want more info I'd be happy to share. Thanks for sharing all your decorating and DIY projects.
ReplyDeleteThanks so much Annette! I appreciate your comment so much :)
DeleteI am hoping that God will take good care of your MIL and wishing her a quick recovery.
ReplyDeleteI am not an instagram follower but would love it if you could share more of the sugar issues etc on here. I realise this is not a health site but I'm sure that most people wouldn't mind the odd tip.
Best wishes to you and your family.
Suzanne (Australia)
Thank you Suzanne! Nothing profound, I just cut out as much sugar and processed foods as possible. Substituted with raw veggies, also grilled. Trying to be more aware of what I'm eating.
DeleteThey sign came out so adorable.
ReplyDeleteThanks Taina, so sweet of you to say so!
Delete