Create a DIY sign that's perfectly weathered
An easy and inexpensive way to create a DIY farmhouse sign that's perfectly weathered. No expensive die-cut machine needed!
This post may contain Amazon or other affiliate links. As an Amazon affiliate I earn from qualifying purchases.
My full disclosure policy can be found here.
...move you to tears
...move you to unspeakable joy
...move you to feel
...move you to remember
There is power in remembering!
Remembering how it felt to wake up on the morning of my wedding...
Remembering the pleasure of donning my beautiful wedding dress and being treated like a princess for the day.
Remembering the eyes of my groom waiting at the end of the church aisle.
Remembering these words that we spoke to one another.
I created this sign to help us remember. Because not every day feels like a fairy tale, and because we're both human and we hurt one another.
The sign itself couldn't be easier to make. Let me show you how I did it!
Supplies
- saw
- three lengths of wood, cut to desired size (mine are plywood planks from Home Depot, 24" long)
- sanding tool ( this is the one I use and love)
- scraps of wood shims (or flat metal braces)
- staple gun
- white chalk paint (I used my DIY recipe which you can find here) or I like this one
- access to a computer and printer (or a diecut machine like a Silhouette or Cricut)
- black chalk (I found mine at Target but you can also get it here)
- black acrylic paint (I actually used some leftover black sample paint from Home Depot, but it doesn't cover as well as acrylic paint and I had to go back over it)
- paintbrushes (I use various tips so a set like this one is a great investment for very little)
How to make a weathered DIY sign
I had Mr DIY cut some pieces of wood to the lengths I wanted (about 24"). He's always a big help when I tackle projects that need cutting, but after this part I took over.I wanted the sign to be weathered and distressed and a little wonky...kind of like the wood they pull out of old homes. Why?
I created this sign to look aged and weathered because old wood is not perfect...it has a story to tell. Think of an old home or barn that's filled with old wood. Those boards are proof that the storms of life can be weathered and the ups and downs of life give it patina and character...just like a marriage!
I used scraps of wood shims to attach the boards together at the back. I simply stapled them together.
Yeah, it looks a little goofy from the back, but it has allowed my sign to bow a little bit...think of a tree that bends in a storm...bends but doesn't break.
Of course, if you want your sign to be perfectly aligned and straight, you can use metal plates like these to secure the boards together!
I sanded and painted my sign, then distressed it well.
The words I chose to include, 'Love never fails' are taken straight out of 1 Corinthians 13. We included them in our marriage vows and I wanted a way to remember.
Visually remember.
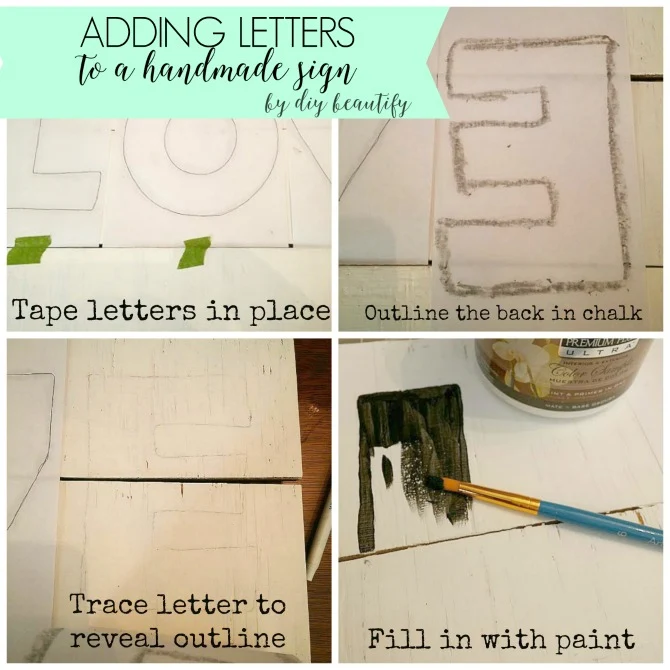
I made this sign before I owned my Silhouette machine. You'll need to do a little measuring first, to figure out how big to print the letters. Using my computer, I created and printed out my words onto several sheets of paper. My tip is to print your letters transparent with a black outline to save on ink! Each letter was printed onto a separate piece of paper.
I flipped the paper over and applied black chalk to the back (I needed something dark to show up on the white painted sign). You could also use a pencil.
Then I taped the words to my sign and traced over the letters with a pen. When I removed the paper, I was left with a chalk outline that I painted in by hand. It's really not as hard as you think if you take your time and use a variety of brush sizes to assist you. I actually find it very cathartic!
After the black paint had dried for a couple days, I lightly sanded the sign again to distress the letters and make the words blend with the boards for an aged look. A palm sander is such an easy way to remove some of the perfection of painted letters and give you a weathered and aged look.
This handmade, planked sign looks like it's been around for a hundred years or so, getting dusty and bowed in somebody's attic. I love that because it reminds me that even though my marriage isn't perfect, there is still beauty to be found.
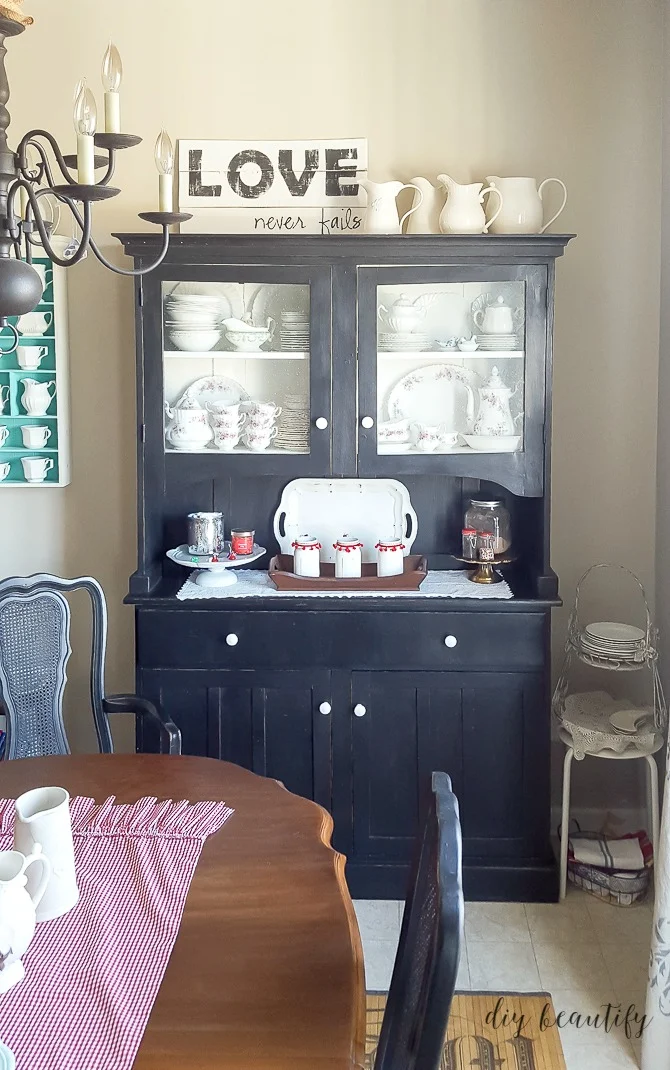
My DIY planked sign has been displayed all over our home and is currently residing on the antique hutch in the dining room. It adds a neutral touch to my winter decor (especially with Valentines just around the corner!).
The neutral color and farmhouse style means it can work pretty much anywhere, no matter the season. I like the character that this DIY distressed and planked sign adds to my home!
Remember, perfection is highly over-rated!
bringing beauty to the ordinary,


So pretty! And perfect timing. I already have my wood planks together and painted white, but I could not figure out a) what to put on the sign and b) how to do the letters since my printer will not print in mirror image to transfer, etc. So thank you!
ReplyDeleteI don't know if you'll see my response, but I'm so glad this tutorial helped you out! I love putting personal sayings onto signs and the chalk transfer method is a great one!
Delete