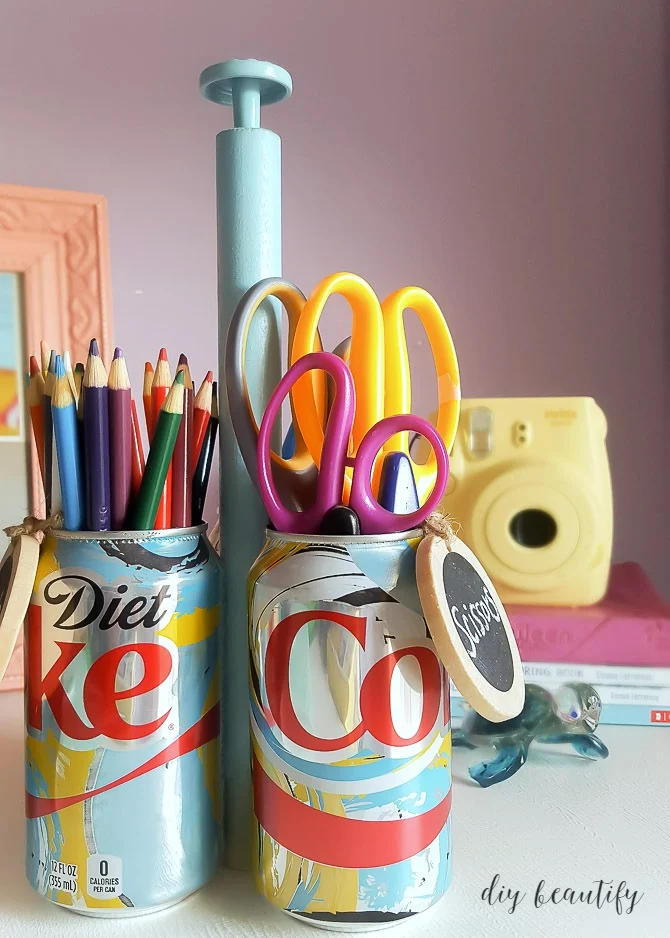
How to Make a DIY Craft Caddy with Soda Cans
This shop has been compensated by Collective Bias, Inc. and its advertiser. All opinions are mine alone. #UniquelyMine #CollectiveBias
A unique craft caddy, made by recycling Coke cans!
Affiliate links may be included for your convenience; my full disclosure policy can be found here. If you click through and make a purchase I'll receive a small commission at no extra cost to you!
When shopping at Kroger recently, I spotted the new "It's Mine" Diet Coke bottles and cans. Coca-Cola has created these bottles in a riot of color and no two bottles are the same (kinda like our kids).
The bright colors caught my eye and I decided to incorporate their fun design in Little DIY's room and up-cycle the items into something functional and as unique as she is.
One of the things Little DIY has an overflow of is markers, colored pencils, scissors and other writing implements that take up a lot of space in her room. Three Diet Coke cans came together to make a sweet craft caddy. Here's how I made it.
I purchased a 3/4" dowel rod, which Mr DIY cut down to size for me (10 inches) and added a small drawer knob to the top of the dowel for a handle.
The dowel and knob got a couple light coats of blue spray paint (see Step 1). While the paint was drying, I removed the lids of my Diet Coke cans using a cheap can opener. It made a clean cut and left no sharp edges. I drank the Diet Coke with my favorite additions...a maraschino cherry, some of the cherry juice and ice! Yum! Then I rinsed out the cans and let them air dry.
Perfectly spaced!
While the glue dried, I grabbed some chalkboard tags that were left-over from my 5-minute Thanksgiving banner. I sharpened my chalk to a point and wet the tip so it would dry bright white on my chalkboard tags.
I wrote the words 'Markers', 'Pencils' and 'Scissors' on them and attached them to the soda cans.
Everything is cuter with a chalkboard tag, right? Plus it's easier to put things away when the storage container is labeled!
Little DIY loves her new craft caddy made from Diet Coke "It's Mine" cans! The bright colors are a perfect match for her room, and the caddy corrals her craft supplies without taking up much space. Plus, it's unique (just like her) and looks adorable on her shelf!
I didn't stop there however. The Diet Coke "It's Mine" bottles I purchased are beautiful and I thought they'd make ideal vases. It really couldn't be simpler.
Every girl likes to have real flowers in her room. It makes her feel special and it's a very small way to say, "I love you"!
The pretty bottles with their vibrant colors add energy and fun to Little DIY's dresser, and they coordinate with her collection of accessories and crafts.
To learn more about the Diet Coke launch of the limited time "It's Mine" bottles and cans, click here. Have you ever up-cycled soda cans or bottles? I'd love to know if you try this project, please drop me a note in the comments below.
As always, if you loved this post, please pin it, share it, forward it, etc!
In just a few days I'll be sharing a painted furniture project with you, so be watching for that.
Happy weekend!
bringing beauty to the ordinary,
Become a DIY insider!
You'll never miss a post, and you'll get all my FREE tutorials
and more...delivered straight to your inbox!
and more...delivered straight to your inbox!
Let's be Social! Follow along on Pinterest, FB, G+, Twitter, Instagram
Popular Posts You Might Have Missed
This blog's content is for entertainment purposes only and is not professional advice. By reading this blog and attempting to recreate any content shared on it, you assume all responsibility for any injuries or damages incurred. Read my full disclaimer here.


Genius idea! I love it!
ReplyDeleteGreat upcycle!
Thank you so much Helen!
DeleteThere is something just SO special about being blessed with a little "mini-me" daughter (I have one, too!!) I love your daughter's space, it's beautiful and I love what you did with the gorgeous "It's Mine" products! They fit in so perfectly with her fun space! ~ Client
ReplyDeleteThank you Nicole! I am blessed and I appreciate your kind words!
DeleteI made pin cushions out of the Pepsi Joy soda cans a couple of years ago for my mom, Joy!
ReplyDeleteThat's such a great idea Misty! Thanks for sharing :)
DeleteThank you for a great explanation. I was looking online for a similar idea and really appreciate it
ReplyDeleteYou're welcome!
Delete