How to Antique a New Wood Crate (Hiding in Plain Sight)
This tutorial will show you how to antique a brand new, plain wood crate using just stain and stencils.
Affiliate links are provided below for your convenience. You can find my full disclosure policy here.
Hiding the Necessities
Sometimes the necessities of life aren't very pretty and they need to be hidden away in plain sight. You know, so you can access them easily but don't have to stare at them cluttering up valuable floor or counter space. This antiqued wood crate turned out to be the perfect hiding place for my Soma Care heating packs.I used to be quite the little dare devil growing up. I had to compete with my older brother, who was a master on his dirt bike...and a younger brother whose bravery knew no bounds.
So it's no surprise that one summer, while water skiing on Okanagan Lake where I grew up, I nearly lost my head attempting a beach landing. That's where the boat brings you in close to the beach and you pull on the rope, let go and effortlessly glide onto the sandy beach, inspiring and amazing on-lookers.
My uncle had just done it successfully and made it look easy so I decided to try it. Unfortunately, I aimed straight for the dock instead of the beach...and my grandma who was sitting on the dock nearly had a heart attack as she saw me careening toward her, full speed! I managed to fall sideways, sliding under the dock and saving my skin...and my grandma!
My teenage ego took a serious bruising, as did the rest of my body. And I'm not sure if it was strictly this incident (or a combo of daring childhood escapades) that led to my chronic back and neck problems.
My recent purchase of Soma Care hot and cold packs has helped to relieve much of the pain in my back and shoulders.
But here's the problem...I needed somewhere to store them. An attractive storage vessel that would hide them in plain site so I could get to them quickly!
This antiqued wood crate is the inexpensive solution I came up with. Pretty enough to look good in any room, large enough to hide my heat packs, with room to spare for a decorative pillow or throw.
I think it's the perfect solution! Read on to find out how to transform a plain crate into an antiqued crate, complete with lettering.
SUPPLIES FOR ANTIQUING A WOOD CRATE
- obviously you'll need an unfinished wood crate! I bought mine during a recent trip to IKEA, but you can find similar ones on Amazon, Walmart.com and Etsy.
- stain (I used Americana gel stain in Walnut)
- stencil - check Etsy or make your own using a die cut machine
- black acrylic paint
- stencil brush
- rags, old paint brush
- latex gloves
HOW TO ANTIQUE A WOOD CRATE
STEP ONE:
Use the claw end of a hammer and bang the crate up a bit, creating dings and gouges to mimic age and wear.STEP TWO:
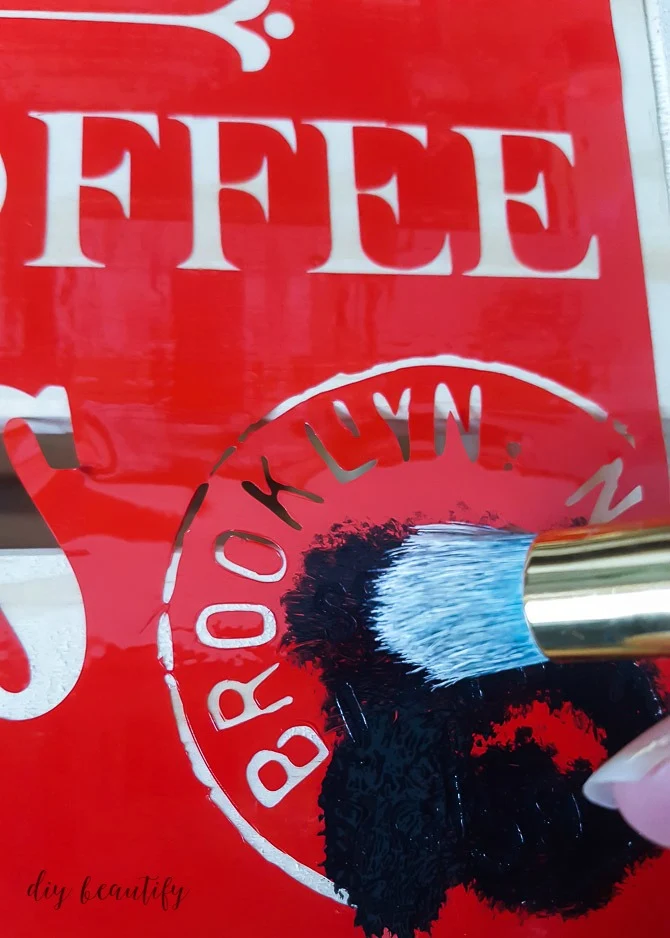
Apply stencil and paint with black acrylic paint, a stencil brush and a pouncing, up and down motion.My stencil is one I created in PicMonkey (I have the paid version, which is only $33/year and allows me access to all their features). I uploaded my design and cut using my Silhouette die cut machine.
STEP THREE:
Lightly sand the stencil to distress a bit (I love my palm sander for this).
STEP FOUR:
Stain the crate, inside and out.I should have a video of this process to share with you. I set my camera up on the tripod outside where I was working, pressed the ON button and got to staining. But it never recorded. Which may be a good thing, seeing as how the wind knocked my phone over a couple times, as well as the Styrofoam bowl of stain that I was working with! Suffice it to say that I likely spared you from a bad word or two!
So, no pictures...no video...but you can see the beautiful results below!
Tip: please wear gloves during this process because it's messy...and try not to stain on a windy day!
I used both a rag and a brush to apply the stain. I found that the rag didn't allow me to get the stain into the gouges I created and I needed the brush for that.
STEP FIVE:
Once the stain is dry, going over the crate with the palm sander to lightly distress it adds to the aged look. I focused on the edges and corners, letting a little of the bare wood show through.
That plain wood crate became a beautiful piece of weathered, antique-looking storage.
And only you and I know what's hiding under those dreamy accessories...
...hidden in plain sight!
Disclosure: I'm a Deco Art Blogger, and received product in order to complete this tutorial. My opinions as always, are my own!
bringing beauty to the ordinary,
Become a DIY insider!
You'll never miss a post, and you'll get all my FREE tutorials
and more...delivered straight to your inbox!
and more...delivered straight to your inbox!
Let's be Social! Follow along on Pinterest, FB, Twitter, Instagram
Popular Posts You Might Have Missed
This blog's content is for entertainment purposes only and is not professional advice. By reading this blog and attempting to recreate any content shared on it, you assume all responsibility for any injuries or damages incurred. Read my full disclaimer here.


I really like your stencil. Nice project.
ReplyDeleteQuestion: why did you stencil and then stain rather than staining first and then stenciling? Does it make a difference?
ReplyDeleteI really don't think it makes a difference if you're using black paint like I did.
Delete