How to Whitewash Pumpkins
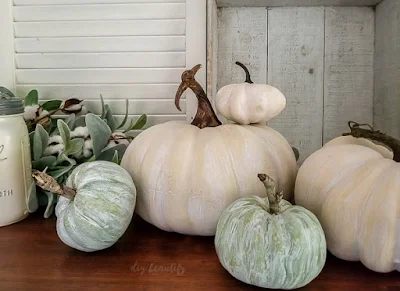
It's so easy to whitewash pumpkins with paint to soften the color so they work with farmhouse and neutral decor!
Good morning friends, it's time for another
Thrifty Style Team monthly dose of inspiration! That's when I, along with several blogger friends, team up to share ideas and projects that are both easy and super thrifty!
We do this to inspire you and show you that you don't need to be loaded to have a gorgeous home!
I used to think I had to use orange because everyone knows that orange is the color of fall, right??? The reality is that orange is probably my least favorite color on the 'ole wheel!
The truth is that there are NO RULES when it comes to decorating your home! For whatever season! Do what you love!
I'm no stranger to painting pumpkins, and last fall I created heirloom pumpkins from the dollar store with paint and wax so they would better match my neutral decor.
This is a similar technique but it's even easier!!!
Why would you want to whitewash pumpkins?
Whether you paint and glaze cheap pumpkins or whitewash them, you are adding dimension and taking store-bought pumpkins from eh to WOW!
Here's what you need to whitewash pumpkins.
Affiliate links are included for your convenience
; my full disclosure policy can be found
here.
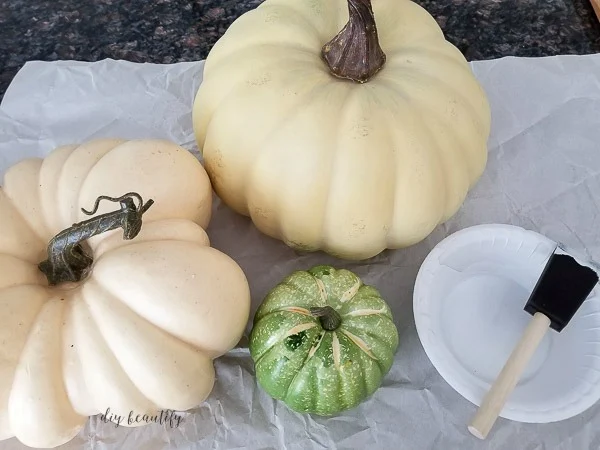
SUPPLIES TO WHITEWASH PUMPKINS
- pumpkins or gourds in various shapes, sizes and colors
- small amount of white craft paint (leftover chalk paint or acrylic paint)
- bowl
- sponge brush
- paper towels
- something to protect the surface you are working on (newspaper, plastic, etc)
HOW TO WHITEWASH PUMPKINS
Step 1
Remove the pumpkin stems. You should be able to twist and pull them straight out. Set them aside. I left the stems on the large pumpkins, but I had to touch up the stems with brown craft paint after.
Step 2
Water down your paint. Mix equal amounts of white paint and water in a bowl and mix. You need very little paint for this project, so start with 1 or 2 tablespoons of paint.
Step 3
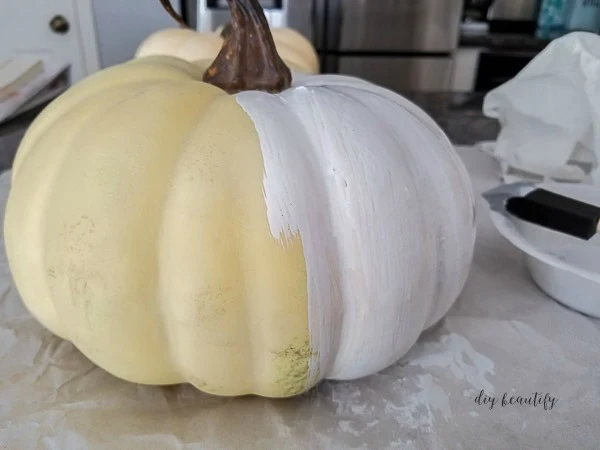
Dip the tip of your brush in the watery paint and press the brush against the edge of the bowl to remove the excess. Paint the pumpkin in sections.
Step 4
Have several damp paper towels on hand. Before the paint can dry on the pumpkin, use a damp paper towel to wipe off most of the paint. You can wipe straight down or pounce, whatever look you like best! I wiped off more paint on the larger pumpkins because the base color wasn't gaudy. If these pumpkins had been orange to start with, the whitewashing technique would make them look like those peach-y Cinderella pumpkins.Step 5
Reattach original stems or hot glue new ones in their place. I added some branches to my green pumpkins.Here's a little side-by-side of the green pumpkins. The original finish had several splotches that were completely covered up with the whitewash.
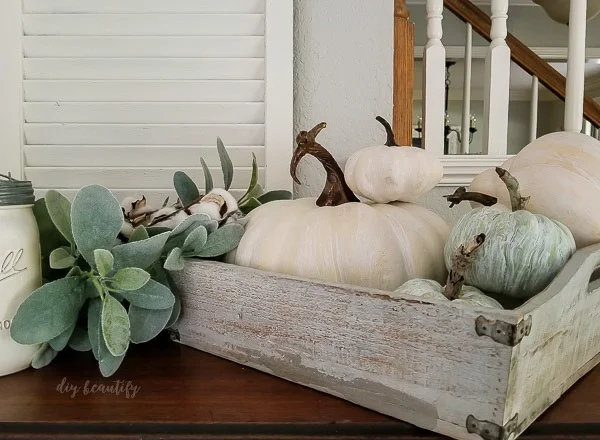
The color is muted, softer, and it just goes so well with everything farmhouse!
Even if you don't decorate with farmhouse style, I think you can appreciate the toned-down look of these whitewashed pumpkins.
They look so good with cotton stems and lambs ears and wicker!
Now I hope you'll check out these other projects from the Thrifty Style Team. Just click on the pictures below.
bringing beauty to the ordinary,


Cindy, I am loving this whitewashed technique. You would hardly know that they weren't real unless you got up close! I must search for some faux lambs' ear leaves because I love their texture.
ReplyDeleteThanks Jane, I love the texture and color of the lambs ears too! My mom always had them in her garden and I'd get in trouble for picking the soft, fuzzy leaves ☺
DeleteYour whitewashed pumpkins look so fantastic Cindy and I totally agree that it's the layers and dimensions that make them look so much more real!
ReplyDeleteThank you so much!
DeleteYour pumpkins are so darn pretty, Cindy!
ReplyDeleteThanks Mary Beth!
DeleteOh, I am a sucker for whitewash!! Love these so much
ReplyDeleteThank you Deborah!
DeleteYou did such a beautiful job, Cindy. Thanks for the tips on using a damp paper towel. You can see that makes a big difference. Have a wonderful Fall.
ReplyDeleteThanks Meegan, I hope you try this technique!
DeleteYou really made them look great. The shapes are very realistic and I love the muted colors.
ReplyDeleteThanks Jessica.
DeleteI love this technique Cindy! I especially love the white on white. They would go with any style decor.
ReplyDeleteThanks Kristi!
DeleteYour newly painted pumpkins are adorable! I'll be trying that technique on some hideously colored ones I have hidden away in my basement :)
ReplyDeleteThanks Pam, you will love how easy it is to make those hideous pumpkins look fabulous!
DeleteThese turned out great, Cindy! They added so much character to the pumpkins. LOVE them.
ReplyDeleteThanks Kristi, they definitely look more realistic now!
DeleteIt feels a little weird to tell you I love your pumpkins! And those stems, perfection!
ReplyDeleteHaha, yes it does Bliss... but I'll take it 😉 Thank you!
DeleteThey´re beautiful!! I love the white washed look on anything and on pumpkins it´s the best!
ReplyDelete