Outdoor Fall Decor Upcycle
Give that faded fall yard decor a fresh new look!
I wasn't sure what to call this post...what exactly is this thing anyway? A yard stake? Pumpkin yard stake? Regardless of what it's called, it was looking pretty sad...maybe that's why the previous owner of our home left it behind?
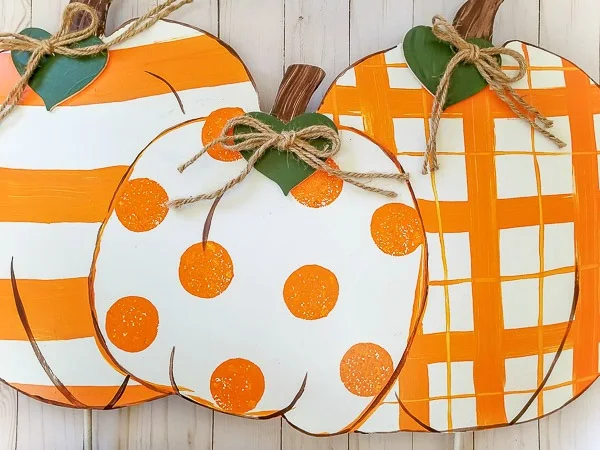
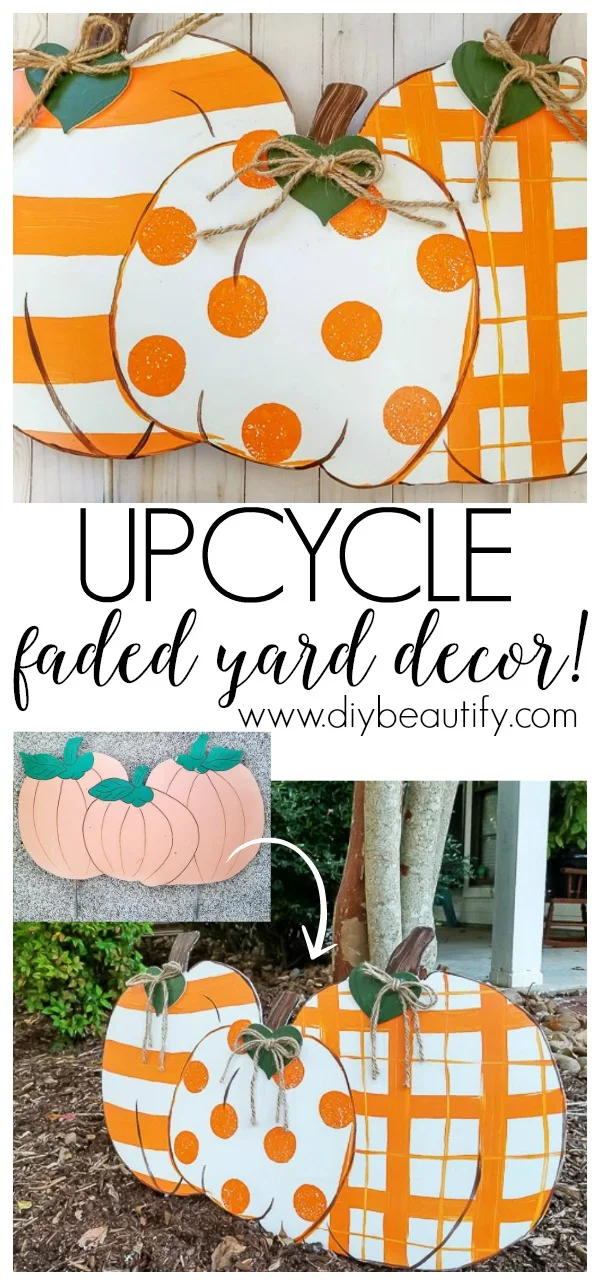
I'm guessing you know the answer 😃 It was surprisingly simple and quick to turn this faded piece of outdoor fall decor into a bright, cute and welcoming trio of pumpkins!
Let me show you what I did. Chances are you have a similar piece that you've turned your nose up at...don't toss it...remake it!
Affiliate links are included for your convenience; my full disclosure policy can be found here.
SUPPLIES TO UPCYCLE FADED FALL DECOR
- degreaser and cleaning cloth
- spray paint (make sure it's suitable for outdoor use!); I used this one
- acrylic craft paint
- foam brushes like this and this (for polka dots)
- large wood hearts for the leaves (mine are 3")
- jute twine
- clear spray sealer
HOW TO UPCYCLE OUTDOOR FALL DECOR
Step One: Clean
First things first! As you can imagine, this little pumpkin stake was dirty!! I sprayed it with Totally Awesome, let it sit a minute and wiped it off. Easy. Done.Step Two: Spray Paint
This project kind of evolved as I was working on it. I sprayed one coat of white paint and then realized the two outer pumpkins looked kind of goofy with the leaves poking out. So I had Mr DIY cut them off!I sanded the cut edges to smooth them and then gave the whole piece a second coat of spray paint.
Step Three: Decorative Paint
I was going for simple with this project. That meant no fancy painting! I opted for graphic shapes that I could easily paint using a foam brush. I decided to do a stripe, a plaid and polka dots.I started by lightly outlining the pumpkin in the middle with paint so that it would look like 3 pumpkins and not just a big white blob! That gave me some borders to work with.
Note the leaves that were cut off, indicated by the arrows
Painting the designs was super easy. I just swiped the brush across to create lines, and pounced the dots on. It's totally not perfect, my lines are a little wavy, but I like the handmade look 😉 #embracingimperfection
Step Four: Embellish
While browsing Pinterest, I came across a similar looking pumpkin with wood heart leaves. It was so cute with the added dimension that I chose to do this for my decor piece.I painted the hearts with green acrylic paint and let dry.
Then I hot glued them to each pumpkin, topping each with a jute bow!
I forgot to mention that I painted the stems brown...but that's kinda obvious!
I was about to finish this off with spray sealer but I was excited to see how it would look it my yard. I'm glad I tested it out because, while it looked great close up, from a distance it just looked like orange shapes. The pumpkins had no definition.
So back inside.
Step Five: Add Definition
I'm giving you the heads up so you see that this step should really come before adding all the embellishments. Luckily for me it wasn't a bit deal as my embellies didn't interfere with the paint I added.I used a small craft brush and some dark brown paint and edged around each pumpkin. I added a couple curvy highlight strokes as well. The pumpkins instantly came alive!
Step Six: Seal
The final step was spraying my painted decor with a couple coats of clear sealer. Once dry, it was out to the yard!
This piece that was headed for the trash is now a welcoming, bright and fun addition to my fall yard!
Want to remember this project? PIN THIS IMAGE!
Wow, that's quite a transformation isn't it? I'm really glad I didn't throw this piece out...I'm just not sure how Mr DIY will feel when I tell him I've decided to keep all the things...because who knows when we might want to upcycle and reuse them? 😜
The goal is to clear some clutter so at least one of us can park in the garage! We'll see how that goes.
I'll be back here with another fall tutorial later this week...hope you can make it!


This came out so cute! I have some faded and peeling yard art that I could upcycle like this! Thank you for the inspiration, Cindy! It's always a pleasure to find your posts in my email. Have a great week, friend!
ReplyDeleteThank you so much Michele, your sweet comments are always timely and make my day! So happy you were inspired!!
DeleteWhat a huge difference, they are really modern, bright and cheerful now. Very cute.
ReplyDeleteThanks Leanna ☺
DeleteSo fresh and cute--just subscribed...
ReplyDeleteThanks Cynthia, I'm so pleased to have you following along!
DeleteYou nailed it! Fabulous
ReplyDeleteThanks so much!
Delete