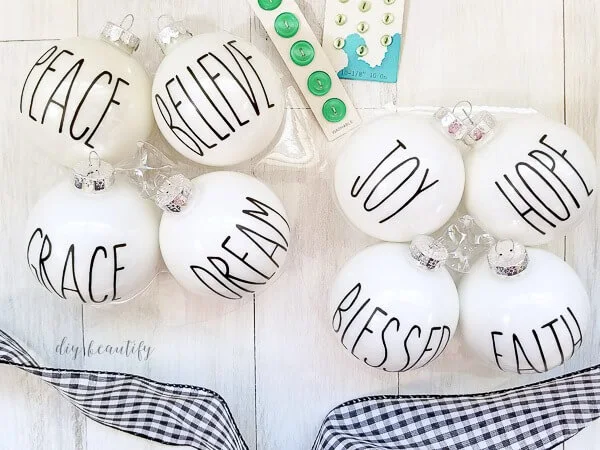
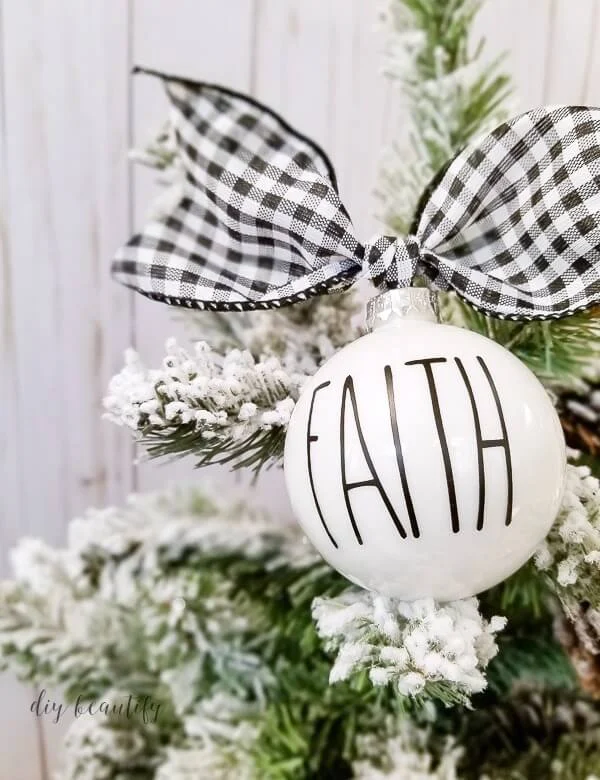
Rae Dunn Inspired Christmas Ornaments
Make your own look-alike Rae Dunn ornaments for a lot less than the real thing! I'm sharing my tips and tricks for working with vinyl and round ornaments!
Have you heard of Rae Dunn?
I've been collecting Rae Dunn pieces for several months. The large, skinny letters are my favorite. I've long been a lover of words...I find her one-word expressions to be spot on! I've got a cabinet full of mugs to suit any mood (whether it's a 'YASS' day or 'I WOKE UP LIKE THIS' kinda morning!) and I decided I needed to make a set of ornaments for Christmas.
You probably know someone (or many someones) who would love a set of these for Christmas! The beauty of making your own ornaments is the customization! Newlyweds, a new baby, a graduation, anniversary, you get the idea! You decide what the ornament says!
If you've ever tried to attach a word or picture to a round ornament, you know it's difficult to get it to lay flat and look right.
If this has ever frustrated you, you're going to love my tip for getting your vinyl or sticker to lay perfectly straight on a round ornament! Keep reading to find out how to do it!
Affiliate links are included for your convenience;
my full disclosure policy can be found here.
SUPPLIES FOR RAE DUN INSPIRED ORNAMENTS
- shiny white ornaments
- black craft vinyl
- die cut machine (I love my Silhouette but Cricut is very popular too)
- cutting mat
- weeding hook
- transfer paper ( this is the exact transfer paper I use)
- ribbon (I used this black gingham)
- computer
HOW TO MAKE RAE DUNN INSPIRED ORNAMENTS
STEP ONE
Create your design in your Silhouette program. I typed a bunch of holiday words that I wanted to use. I used a free font from dafont, The Skinny. It's the closest match I've found to the Rae Dunn font.*Designer Tip - I don't use the bold form of the font, I think it's looks better and more authentic in its normal, skinny version!
STEP TWO
Cut your words onto black craft vinyl. Remove them from the cutting mat and separate by cutting into individual words.STEP THREE
Weed the extra vinyl using the hook tool. Don't forget to remove the insides of letters like P, O and B.Use the transfer paper to transfer the design off the vinyl mat to the transfer paper.
STEP FOUR
Here's the trick to getting your word to fit on the ornament properly. Using scissors, snip the transfer paper between each letter. You can see this clearly in the picture below, indicated by the arrows.You don't need to cut too deep, just a little snip will do. The cuts release the tension created by the straight paper and allows the ornament to lie flat over the curve of the ornament. The letters are still straight, but each letter is allowed to lie where it wants to.
Remove the transfer paper and make sure each letter is pressed firmly onto the ornament. Start pressing the middle letters first and work your way out.
I added some black gingham ribbon.
UPDATE: check out my farmhouse Christmas tree here!!
Please feel free to PIN THIS IMAGE for future reference!
FAQs for Making DIY Rae Dunn Inspired Ornaments
What size ornaments do you use?
I've used both 3" and 4" ornaments for this project.What size do you cut your words?
If I'm using a 3" ornament, I'll cut the words to be about half that in height, so 1.5-2"...and the same goes for larger ornaments. I like the word to "fill" the ornament rather than being small and just sitting in the middle. Do a test cut with one word and see how it fits and then make adjustments from there.Where do you find the font?
You can download a free version of the font, 'The Skinny' from dafont.Are your ornaments matte or shiny?
I prefer to use shiny white ornaments, rather than matte ones. The shiny looks better in my opinion, but it's the creator's choice!Did you add a layer of modpodge on top of the vinyl?
No I did not. If you are concerned about wear and tear, make sure you purchase permanent vinyl! I swear by the Oracal 651 vinyl that I purchase from Amazon. It lasts 4 years outdoors and 6 years indoors!Where did you find your white ornaments?
I bought mine at Hobby Lobby (see the link in the Supplies list). I have found that they tend to go fast, so stock up at the beginning of the season!Did that answer your questions? If not, feel free to ask in the comments or send me an email!
bringing beauty to the ordinary,
Become a DIY insider!
You'll never miss a post, and you'll get all my FREE tutorials
and more...delivered straight to your inbox!
and more...delivered straight to your inbox!
Let's be Social! Follow along on Pinterest, FB, G+, Twitter, Instagram
Popular Posts You Might Have Missed
This blog's content is for entertainment purposes only and is not professional advice. By reading this blog and attempting to recreate any content shared on it, you assume all responsibility for any injuries or damages incurred. Read my full disclaimer
here.


What size font are the letters on the ornaments?
ReplyDeleteThey're about 2 inches.
DeleteThese are just the cutest! Thanks for sharing! And I too collect Rae Dunn!:)
ReplyDeleteThese are adorable! Do you by chance have a shop? I would love to purchase some!
ReplyDeleteYou can send a private email to cindydiybeautify@gmail.com
DeleteWhere did you find your ornaments ? These are so cute, thanks for the transferring tip!
ReplyDeleteThey're from Hobby Lobby.
DeleteVery cute! Pinned.
ReplyDeleteDid you purchase the font from the silhouette store? I've been searching like crazy for a font like this!
ReplyDeleteSo adorable! Going to make some on black with white lettering to go with our buffalo check theme this year. My daughter is obsessed with it. What spacing did you use on your words? Some of mine look squished in DesignSpace.
ReplyDeleteThanks Jane, I actually didn't do anything to space the letters, I just typed them out in my Silhouette. Black ones sound really cute!
DeleteCindy, these are precious and I am in the process of making some! My question is whether you used The Skinny as is or did you bold it? Thanks so much!
ReplyDeleteThanks Tausha, I didn't bold it.
DeleteLove these ornaments. You have quite the impressive collection of Rae Dunn mugs :-)
ReplyDeleteHi, thank you for sharing this. I love your style=) What size are the balls you used and are they glass?
ReplyDeleteDid you mod podge after vinyl? I to am obsessed with these ornaments and font. I am worried about wear and tear. Thanks for the tips.
ReplyDeleteI love these so much!! I love Rae Dunn, too! And I just figured out how to use my silhouette again, too. I'm going to try to make some, thanks for the tutorial!
ReplyDeleteI found a font on Dafont.com called potatoes and peas and it’s just about identical to rae Dunn. If anybody was looking for another dupe.
ReplyDeleteThanks for this tutorial because when I found that font I just knew I would be using it for something special and here it is!
Also currently target has the white balls for $1 each shatter proof for those of use with babies and cats lol
I just got finished making a set of these with the white plastic ornaments from Target! You can’t beat $1 each and shatterproof!
Delete