Buffalo Check Ottoman DIY
A tutorial for covering an ottoman in buffalo check fabric
New Puppy!
If you follow me on Instagram or FB, you already know that we made one of our daughter's dreams come true with a brand new fluffy little poopy...I mean puppy (but really, at this age, poopy is more appropriate!) 😃 I forgot how much work babies take, whether they're human or canine! It's a good thing this little peanut is cute!
And our little Millie-bean is little...this bowl is just a little larger than a cereal bowl! Our little shih-poo will only get to 8-10 pounds full grown! She's a pint-sized little fur-ball of needy love 😍
So even though I'm sleep-deprived and my head is spinning with all the puppy-potty-training advice I've been reading about...I finally tore myself away to write this post.
I have received numerous questions about where to buy the ottoman that I featured in our sunroom makeover.
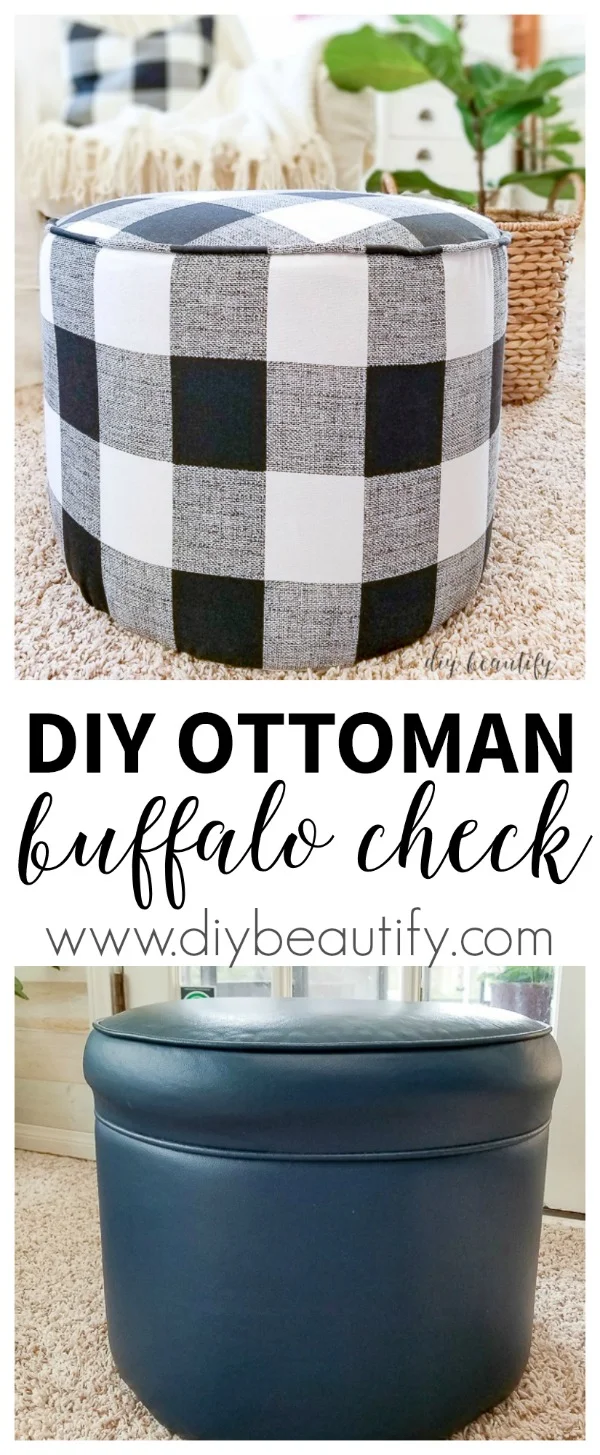
The truth is that it was a $6 Goodwill find that I recovered with one yard of buffalo plaid fabric! It set me back about $17!!! How's that for a thrifty score?
New 'Old' Ottoman
Here's how the ottoman looked when I found it.This is not a new find. I sewed a drop cloth slipcover for it when we lived in Tennessee. I added some little pleats to the bottom and it turned out really cute.
However, the drop cloth had pilled over time and we were always having to adjust the slipcover because of the loose fit. It was time for a change!
I bought a yard of buffalo plaid fabric online and was pleasantly surprised that it was enough yardage to recover the ottoman.
Affiliate links are included for your convenience; my full disclosure policy can be found
here.
I promise this is not difficult sewing! I don't sew anything fancy...straight lines are my friend! In fact, you could spend the money you save (by not buying a new ottoman) and buy yourself a sewing machine!! You will save so much money if you can learn to sew your own curtains, pillow covers (easy stuff!). Okay, rant over. Let's get to the tutorial!
Supply List:
- sewing machine
- buffalo check fabric (you may need more than a yard depending on the size of your ottoman)
- piping
- straight pins
- fabric scissors
- heavy duty staple gun
How to Recover an Ottoman
The ottoman ends up being three pieces: the main piece, the piping and the top.
We'll start with the main, body piece first. To determine the amount of fabric you'll need, hold fabric around ottoman and pin sides together, wrong sides out! We're essentially going to sew a tube with open ends. Cut off excess fabric, leaving about an inch seam allowance at the top and 2-3 inches at the bottom. Pull it off and sew pinned edges.
I don't have any more "how-to" pictures for you. I do apologize. Sometimes when I'm really into a project, taking pictures doesn't even enter my mind.
I think what really makes this recovered ottoman look store-bought (or professional), is the piping and the snug fit.
Piping is actually very easy to make. There are a ton of helpful videos and tutorials out there, so I'm not going to reinvent the wheel. I used cotton filler cord and a 2-3" wide strip of my buffalo check fabric to sew matching piping. You can also find colored piping that may be easier for your first use.
Tip: If you're making your own piping, you'll need a presser foot (also called a "zipper foot") for your sewing machine! Most sewing machines come with one. It enables you to sew right up against the cording and holds it in place so you get a straight seam.
The last piece to cut is the circle for the top. I laid my remaining fabric on top of the ottoman and trimmed around the edges, leaving a 1" seam allowance. Then I pinned the piping around the edge of this piece (always keep right sides together!) and sewed with a basting stitch to make sure it fit nicely.
Then you'll need to pin the top/piping layer to the bottom piece, pin and sew. (I found it easiest to pin it all together while the base piece was on the ottoman.)
At this point you can turn the sewed cover right side out and pull it on to the ottoman. It should fit nice and snug, with several extra inches of fabric hanging at the bottom.
Lastly, use a heavy duty staple gun to staple the fabric to the bottom. To get that nice tight fit, make sure to pull the fabric snugly before stapling. Staple at opposite ends first, then fill in between. Looks like I need to use some fray check on my cut fabric!
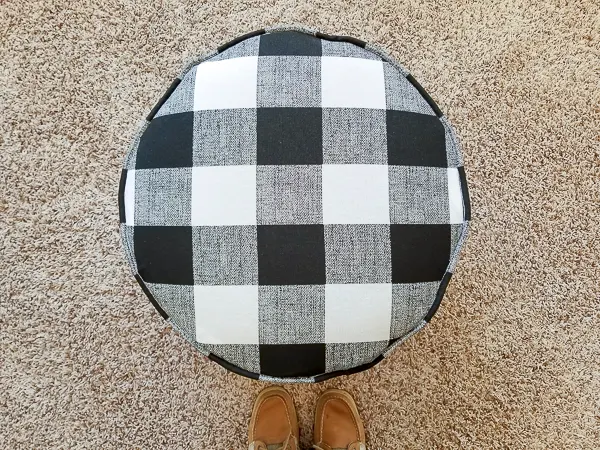
And here is the finished ottoman. I love that the piping matches the fabric, and you can see I sewed it so that the black part of the piping would line up with a lighter part of the top cover.
Working with a pattern can be tricky. Just work slowly, pinning as you go. It's better to over pin, and have to remove pins and adjust...than have to rip out seams (I do know a thing or two about that!)
I'll be honest with you... sewing is not my favorite thing! I don't do it often. However, I am all about saving money and having a sewing machine has been a huge bonus for me in decorating our home!
This fabric covered ottoman took me about an hour to complete. To see more pictures of it in my sunroom, you can visit this link. There's a lot of black and white buffalo plaid in this room!
As always, if you enjoyed this post and may want to refer back, please PIN THIS IMAGE!
If you need me to explain any of the steps of this tutorial better, please send me an email! I'll be happy to help you through recovering your own ottoman!
And if you have any great puppy training tips (specifically with potty training a tiny pup), we need them! We're trying to use potty sheets, but our little stinker only gets it right maybe 1/3 of the time!
bringing beauty to the ordinary,


Potty training...oh my! LOL I was blessed and only had to do it with one dog! 23 years ago is a LONG time ago. LOL I had an older dog so the pup caught on pretty fast...not to say she didn't have accidents! We kept her in the kitchen or bathroom with a gate when we didn't want to be "watching" her for accidents. We did use the pads. But she did well. Just like a kid....it's easier when you have an older "sibling", and we did. But pups have to go out more often...that is a drag. (AND the puppy crying at night was also something I didn't PREFER. lol)
ReplyDeleteMy 1st dog was potty trained by my then boyfriend so by the time we got married I had it easy in that department. My 2nd and 3rd dogs were older when we got them...so I lucked out there!
Funny memory......my oldest child was pretty much potty trained by the babysitter since I was working then. She had another boy his age with him all day. EXCEPT my kid hated pooping. He did NOT like the toilet AT ALL. He didn't like the "feeling" of pooping...(rolling my eyes...lol) We actually had to hold him down on the toilet a few times until he got used to it. I never could understand his mindset...pooping in a pullup "felt" ok but on a toilet did not. ???????????hahaha He was FOUR before he chilled out. BOYS! My brother DID THE SAME THING!!!Age 4 and still pooping his pants in the corner saying "Don't look at me!!" hahaha He also used to have tantrums on the floor in the store at age 2. We'd walk away and leave him. Eventually he'd give up, get up, and c'mon. lol He turned out ok...he is a lawyer. My son now has an17 month old son...wonder if he will be like his daddy and uncle? I HOPE not! LOL!
Kid #2 was a BREEZE compared to him. She was in pullups and had a few "lazy days" with accidents peeing but would poop on the potty. I said, "If you want to go to CAMP this summer (week craft camp from 9-11am for a week) you have to potty ON the potty EVERY time." She said, "ok mommy" and that was that. I sent her in pullups JUST IN CASE. But she was fine. Aah, memories! LOL
Wow, funny stories Robin!
DeleteHey Cindy...that puppy...no no poopy is looking so cute. She is looking so lovely sitting in that bowl.
ReplyDeleteThanks Stephanie, she is definitely a cutie!
ReplyDelete