Easy Sign with Chalk Couture Products
Quick And Easy Signs With Chalk Couture Paste and Transfers
Affiliate links may be included for your convenience; my full disclosure policy can be found here. If you click through and make a purchase I'll receive a small commission at no extra cost to you!
I recently tried this product for the first time and was pleased with how quick and easy it is to use!
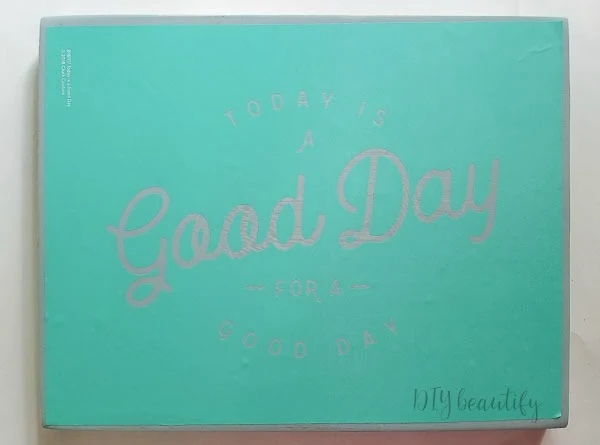
I wanted to make a cute sign for my summer mantle (which I'll be sharing in a few weeks) and the saying, "Today is a good day for a good day" seemed perfect.
I received some samples in the mail (thanks Heather!) and set to work.
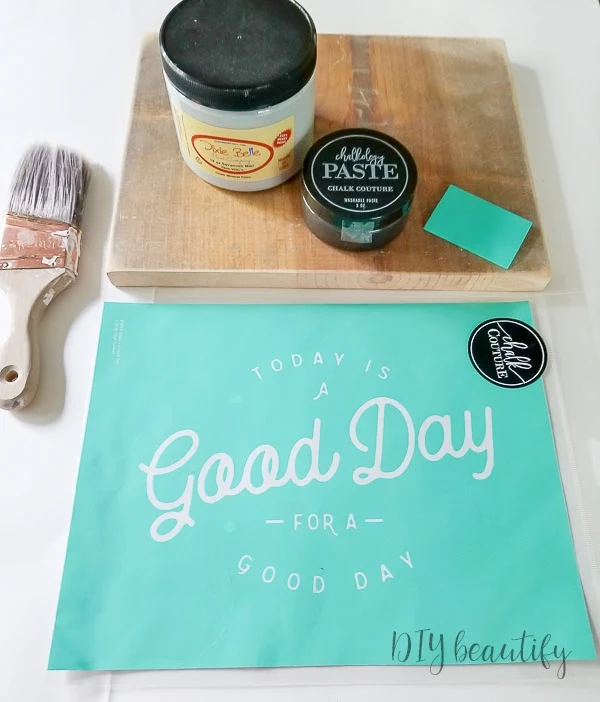
SUPPLIES
- Chalk Couture transfer
- Chalkology black velvet paste
- Chalk Couture small squeegee
- wood board
- chalk paint (I used this one)
- paint brush (this is my favorite go-to brush)
HOW TO
Whenever I make signs, I like to spend some time sanding the board down really well. Sides, edges, front and back. No one likes splinters! It only takes a few minutes using a palm sander. I use this one; it's lightweight, available in a cordless version, and has replaceable sandpaper pads.I painted my board with two coats of Dixie Belle Mineral Paint in Savannah Mist...the same color I used for this flower pot makeover. Oddly enough, it looks gray in this project!
The Chalk Couture stencils are very thin and sticky but are washable and reusable, which I love! I had a little trouble getting the stencil centered on my painted board...they suggest pouncing a lint free cloth on the sticky part of the stencil to remove some of the stickiness. This definitely helped!
Next, I used the flexible rubber squeegee to scoop out a little Chalkology Paste (it's like thick chalk paint) directly onto my project.
Using the squeegee, I spread a thin and even coat across the stencil. The excess paste went right back into the pot for another project. Here's a little video to show you how easy it is. Sorry that I don't show the removal of the stencil...it took two hands to peel it up!
It's really that easy! Center the stencil, spread the paste, peel up the stencil!
The results are a great looking sign with absolutely no bleed-through!
I found this product quick and easy to use! I'm looking forward to trying the Couture Ink with the same stencil...I'll probably make a tee. The paste and inks are available in a wide variety of colors, and there are oodles of stencils to choose from!
You can view the entire line of Chalk Couture paint and ink colors and stencil options here!
Be watching for my summer mantle soon!
bringing beauty to the ordinary,
Disclosure: I received the products featured in this post from Chalk Couture; as always, my opinions are my own.
Become a DIY insider!
You'll never miss a post, and you'll get all my FREE tutorials
and more...delivered straight to your inbox!
and more...delivered straight to your inbox!
Let's be Social! Follow along on Pinterest, FB, G+, Twitter, Instagram
Popular Posts You Might Have Missed
This blog's content is for entertainment purposes only and is not professional advice. By reading this blog and attempting to recreate any content shared on it, you assume all responsibility for any injuries or damages incurred. Read my full disclaimer here.


Transfers not stencils... I'm sorry it just bugs me when people call them stencils.
ReplyDelete