Farmhouse Floors and Shiplap!
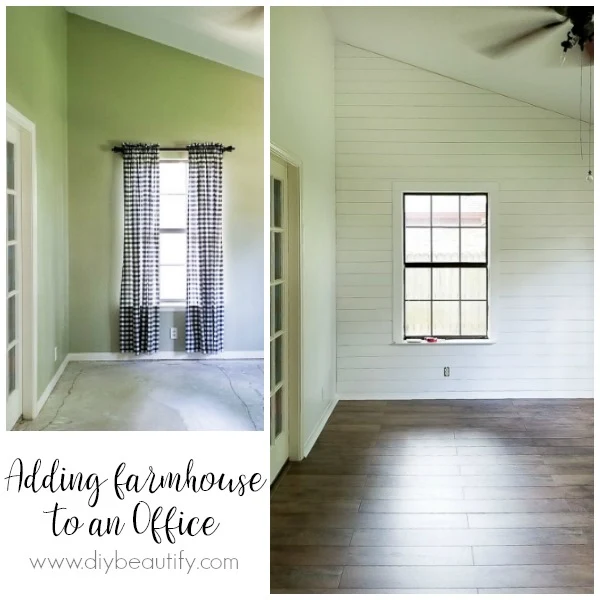
Updating an office with new farmhouse floors and shiplap
Affiliate links may be included for your convenience; my full disclosure policy can be found here. If you click through and make a purchase I'll receive a small commission at no extra cost to you!
You guys! You haven't heard from me in awhile, but I promise I've had a very good reason!
I know I've hinted at an office makeover for months now...and I thrilled to finally be getting around to posting the start of my office makeover! And I'm so excited because it looks even better than I was expecting! It's got that modern farmhouse character and charm that so many of us have fallen in love with!
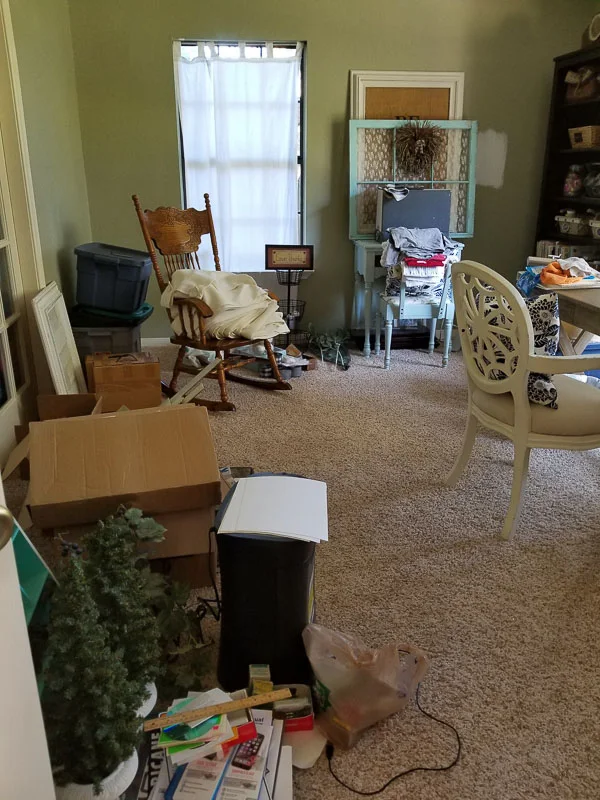
This was formerly the "overflow" room...you know that space, we all have one! I was trying to blog in the middle of absolute chaos...all my crafting and DIY supplies plus office stuff and extra decor and a bunch of other crap that had no business even being in our home! You know how that goes.
Y'all don't believe me? Take a look at this...
And this...
It was time to tackle this room and make it a beautiful and functional space for me to work!
We recently finished the sunroom makeover and we are absolutely loving our new farmhouse floors that we added to the sunroom and living room. In fact, we loved them so much that it was natural to install the same floors in my office as those two spaces connect.
To give you an idea of where the office is located in our home, it's part of the add-on at the back of our home, and looks into our big backyard. It shares a wall with the sunroom, and is behind the master bedroom. In fact, those french doors in the above picture open from our master into this space. And yes, those are beach towels hanging on the doors...we like it dark when we sleep! And we have big plans for those doors in the near future. It took awhile to figure out what this "flex room" (realtor's words) should be. We thought it would make a great sitting room or workout room but in the end...with that awesome view of the backyard and all the light...I claimed it as my office! It's definitely been nice to keep the doors closed and the mess out of view! But the mess is no more!
Today I want to share the big projects that were the foundation of my new farmhouse office. Obviously, clearing it out was the first order of biz...not my favorite part...because that also involves thinking...do I keep? toss? donate? hoard?!
So while the detritus from this room hung out in the sunroom for several days, we got to work. And y'all, I have to give a HUGE SHOUTOUT to Mr DIY because he did the bulk of the work in this room!!! He's my hero and I love him forever!!! And I'm going to let him take a weekend off very soon! 😉💕💕💕
I knew that I wanted to paint those green walls...not that they're horrible, but I love a fresh coat of paint in a room makeover, and I wanted to go lighter!
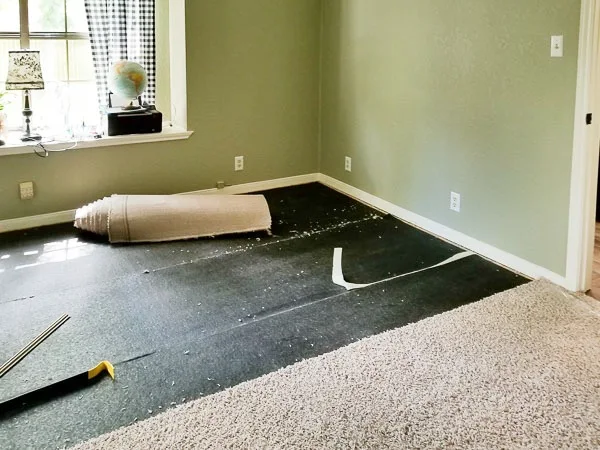
But first things first...Mr DIY ripped out the carpet, pad and the millions of staples. I think I went shopping with my daughter while he was working!! Come on now, she needed supplies for camp!!! 😏
Proof that I was there for part of the time!
Normally I don't mind painting, but this room was a beast! See the window area? And the 15-foot walls and the angles? It was not fun!! I had to call in my son to reach that last 6 inches.
I had some leftover Valspar paint in Bistro White and while it took 2 coats to cover that green, the end result was fresh and bright!
Mr DIY was able to start on the floors and got the whole room done in just a day! Thanks to our son Kyle for helping out! Oh look...there's all the junk from the office...much of which will NOT be coming back into my pretty space!
The guys did a great job transitioning the floors from the sunroom to my office. It honestly looks like they were installed the same day! These floors look like they're from a 100 year old farmhouse! I love the aged color and matte finish! Best of all, they're very affordable! You can read all about them and where they're from here.
Here are the finished floors! I know what y'all are thinking...why didn't you paint that wall?
Because we installed shiplap on it!!! A dream come true for me! Ever since I was first introduced to shiplap by Joanna Gaines. I knew I needed shiplap in my life!
But before we get to the shiplap, I forgot to mention that I gave the trim a fresh coat of paint (before the floors went in) and painted enough quarter round to cover the gap around the perimeter...and installed it myself using our (very loud) nail gun!
Okay, let's get to the shiplap (rubs hands in glee)!!
Initially, I brought up the idea of DIY shiplap from plywood...you know, to save money. But then Mr DIY and I found pre-made shiplap at Home Depot and the decision was made! In the end, we had to go back for more so the total cost was just under $200...but it saved us so much time and I think was much easier to do. No nickels...no painting...and minimal cuts.
Okay, take a look at our wall. We had 3 challenges to contend with. The window...the outlets...and the angle. I'm going to tell you how we dealt with each one below.
Challenge No. 1: Window
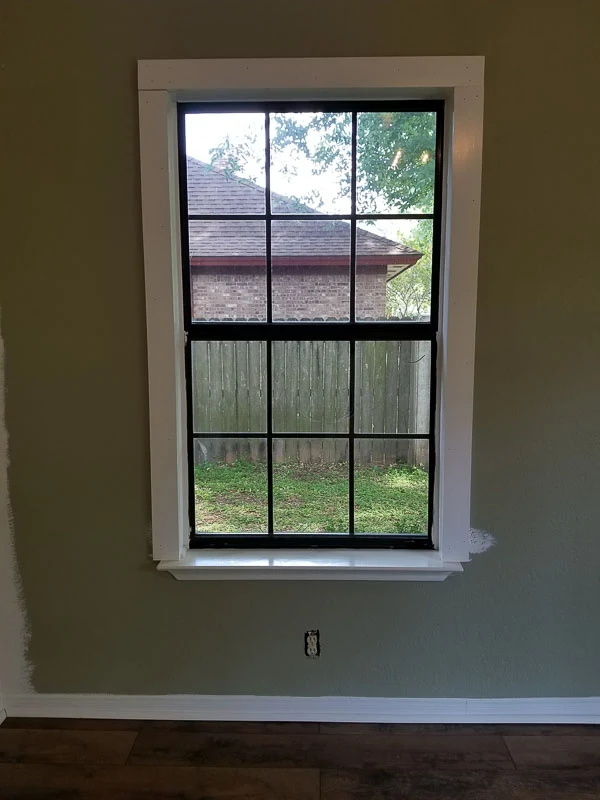
I wanted a very simple, farmhouse look around the window, so we cut three pieces and nail-gunned them around the window before we even started with the shiplap. The boards had warped a little as they dried, which left a gap on one side...but no biggie. We were ready to start installing the shiplap!
But as we started, we realized there was another challenge with this window...do you see it? Yep, that piece of trim at the bottom. There was going to be no easy way to cut the shiplap to fit around it, so our solution was to remove it completely and take the shiplap right up under the window.
Challenge No. 2: Outlets
You can see an outlet in the picture above. There are actually 2 outlets on this wall. Mr DIY had cut the board and we were ready to nail it in when we realized the outlets had to be brought forward for us to be able to attach the switch plates. It wasn't a big deal, but involved purchasing some longer screws.
Challenge No.3: Steep Angle
I think anything is easier to do when there are no surprises...like angles. When we installed our Timberchic walls in the sunroom, Mr DIY did all the measuring and it turned out perfectly!So I wasn't really worried. We had recently purchased a new miter saw, and Mr DIY used a miter box to figure out the angle. We were able to pre-cut the angle on all the boards outside before figuring out how much we need to cut off the ends. We purchase 12-foot shiplap, which was awesome because our wall is just under 12 feet wide. So we used full boards across. It took 2 of us to carry the boards into the house and set them in place, but it wasn't that difficult.
Once we started to get higher, we had 2 ladders in place. We each held an end of the shiplap while we climbed our respective ladder, held it in place and then passed the nail gun back and forth.
This pre-made shiplap has an edge that creates the grooves between boards. It was really easy to do. Every few boards we would make sure it was level. I darkened this photo up quite a bit so you can see the edge that I'm talking about. Each piece fit right onto the one below it.
Once we got passed the challenges near the bottom of the wall, it really was smooth sailing! We got to this stage (below) and realized we need to buy another 6 boards. We ended up with some smaller cuts that I'm hoping to use in another spot in the room.
My honey was looking a little worn out by the time we got the the top...
The new floors and shiplap wall add so much character and warmth to my office!
Now the fun part begins! Stayed tuned because all the pretty stuff comes next!
Update: my modern farmhouse office is complete! Check it out here!
bringing beauty to the ordinary,
Become a DIY insider!
You'll never miss a post, and you'll get all my FREE tutorials
and more...delivered straight to your inbox!
and more...delivered straight to your inbox!
Let's be Social! Follow along on Pinterest, FB, G+, Twitter, Instagram
Popular Posts You Might Have Missed
This blog's content is for entertainment purposes only and is not professional advice. By reading this blog and attempting to recreate any content shared on it, you assume all responsibility for any injuries or damages incurred. Read my full disclaimer here.


Your office looks great! What a wonderful makeover.
ReplyDeleteThanks so much Debra!
DeleteYour husband is definitely a hero! Kudos to him for such great work.
ReplyDeleteThanks Allyson, he definitely is!!
Delete