The Easiest Way to Install DIY Shiplap
Disclosure: this post was sponsored and product provided by Lowe's Home Improvement . All opinions are my own.
If you want to save time, follow this tutorial for the easiest shiplap to install!
Affiliate links may be included for your convenience; my full disclosure policy can be found here. If you click through and make a purchase I'll receive a small commission at no extra cost to you!
Have you done a search for 'DIY shiplap'? There are oodles of tutorials for cutting down your own plywood and creating a shiplap wall with that method. It's the cheapest way to go, definitely! But it's also much more labor-intensive! You'll need to sand all your pieces after they're cut. Your wall will need to be painted prior to installing the boards. You will also need some way to create the gap between boards. And, you will need to prime before you paint! If you're after the least expensive way and don't mind all the extra steps, then go for it!
However, the tutorial I'm sharing today is, in my opinion, the absolute easiest way to add shiplap to a wall! Mr DIY and I used pre-made shiplap from Lowe's. It's available in 8', 12' and 16' lengths. I believe it must be ordered online, although some stores may carry it in stock. Check your store and plan ahead if you need to order it! This is the way to go if you want to add shiplap to a wall quickly and easily.
Watch this short video as I explain why we love using the shiplap from Lowes!
The beauty of using this shiplap is that we were able to install it right over our silly-putty-colored and textured walls! No prep needed other than removing the baseboards and crown molding. The only prep I did was to paint along the top of the wall and the ceiling to avoid any dark shadows later on.
Here's a little peek at the room before we started. It wasn't pretty!
We were able to have our tile installed before shiplap day arrived, so you'll see pictures of our beautiful new tile as I share the tutorial. The stone tile we used is currently 50% off at Lowe's!!! This tile is so much more beautiful in person than it looks on my computer screen! It's natural stone so the color varies with each tile. It looks very luxe...well, you'll soon see!
Supplies needed for easy DIY shiplap
- PrimeLinx Shadow Gap shiplap (measure your room and add 10%...that's how much product you'll need)
- stud finder
- level
- measuring tape and marker
- spacers
- nail gun and air compressor
- noise blocking ear protection
- chop saw
- paint (I used HGTV HOME by Sherwin-Williams in the color Alabaster)
- molding (quarter round)
How to Install Shiplap
Let me caution you. The very first step, before you install even one board, is to do some measuring! Now I'll be honest, I hate measuring...I'm more an 'eyeball it' kinda girl. But while that may work for a piece of artwork, when it comes to adding shiplap to a wall, you want your boards to be straight and level! Thankfully Mr DIY is a measuring genius, so I watched him while he worked 😉
We needed to do some math too 😟 Here's my "shiplap for dummies" explanation: We had to figure out the height of the wall, the height of the boards and how many boards would fit on our wall. Our walls in this small guest bath are low, only 7'. We realized that we would have to rip one board down, and decided to do it at the top rather than the bottom. You'll need to decide what's best for your space.
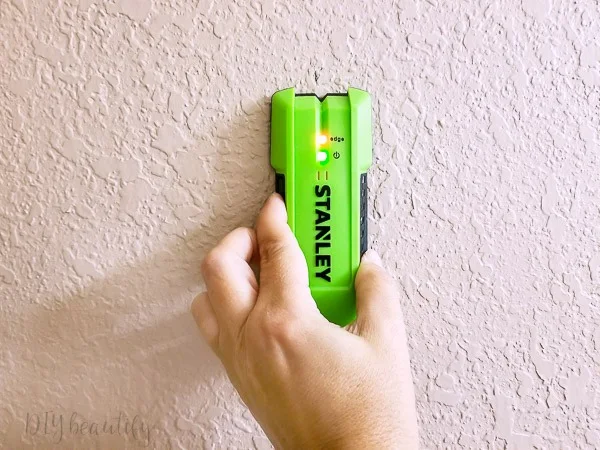
Before that first board was nailed down, Mr DIY put me to work finding the studs in the wall and marking them. This is very important because you want to nail your shiplap to a stud, otherwise it won't be secure.
After I marked each stud, I used a straightedge and a Sharpie to draw lines on the wall. This makes it much easier when nailing in the shiplap later on.
Any gaps were completely concealed after we added quarter round molding!
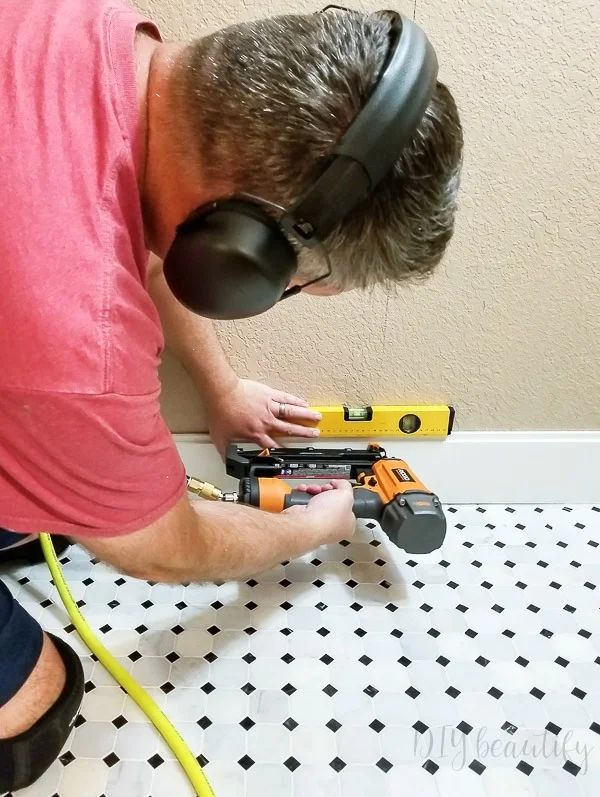
We made absolutely sure that the first piece of shiplap was level before it was nailed into the studs.
If you're using a nail gun with an air compressor, those things are LOUD! Especially in a small space. Please use appropriate ear protection! And notice Mr DIY is wearing knee pads, those were a big help too and saved his knees!
Once that first board went up, the rest of the wall went fairly quickly. Mr DIY measured and pre-cut several pieces of shiplap at a time. We set up the chop saw in our front yard, so he just had to come in the front door and straight down the hallway.
We made sure to check that the boards were level every 3 boards or so as we worked our way up the wall.
Progress! I absolutely loved watching this little room take shape! The shiplap made such an instant difference, it was really very gratifying!
Remember when I said that we needed to rip boards down for the very top? Here's what I was talking about. Once the shiplap was installed, there was a 2-ish inch gap left. We took just those boards to a friend who has a tablesaw and he ripped them down to the exact measurements we needed. You could always take them to Lowe's and have them cut them for you.
We decided to install very narrow quarter round molding to the corners just to hide the cut ends. If this was a larger space, I don't think we would have bothered, but in a tiny space like this you notice every little detail! I could have filled in all the nail holes, but I like the rustic look so I just left them alone. Then I painted a coat of Alabaster white over the primed shiplap and we were done!
If you have any questions about installing the PrimeLinx Shadow Gap shiplap, please don't hesitate to ask. We loved the ease of using the pre-made shiplap and all the time it saved us!
Please free free to PIN this image for future reference and share it with a friend who's looking for the easiest way to install shiplap!
bringing beauty to the ordinary,
Become a DIY insider!
You'll never miss a post, and you'll get all my FREE tutorials
and more...delivered straight to your inbox!
and more...delivered straight to your inbox!
Let's be Social! Follow along on Pinterest, FB, G+, Twitter, Instagram
Popular Posts You Might Have Missed
This blog's content is for entertainment purposes only and is not professional advice. By reading this blog and attempting to recreate any content shared on it, you assume all responsibility for any injuries or damages incurred. Read my full disclaimer here.


Cindy, we did shiplap in our last house the way that everybody else mentions - including having Lowe's cut the wood for us. It turned out nice but I like what you are doing here so much better! Our Lowe's people were nice but the boards weren't all the same size and that was a pain. Also, we had terrible knots in the wood that are normal but pretty hard to work with. This product looks so much nicer! Is it actually wood?
ReplyDeleteOh I just read the description at the Lowe's website and it is wood. Nice! Love it!
DeleteThanks so much Stacey! Yep, real wood ;) It was a dream to work with!
Delete