Master Bedroom Progress
Today I'm sharing some of the progress we made this week on our master bedroom makeover, including building barn doors from scratch.
Affiliate links may be included for your convenience; my full disclosure policy can be found here. If you click through and make a purchase I'll receive a small commission at no extra cost to you!
Welcome friends! We are SO close to the finish line with our Master Bedroom makeover for the One Room Challenge...only two weeks until the big reveal!
Wanna get caught up on the rest of our progress? Just click on the links below:
Week 1 // Week 2 // Week 3 // Week 4 (you are here!) // Week 5 // Week 6
So far on this makeover journey, my favorite project by far was our faux brick wall that we German schmeared to give it a European farmhouse vibe! Every single time I walk into our bedroom, I take a moment to appreciate it! It was so easy but makes such a big impact!
Progress on our Master Bedroom
This week was a bit crazy because of Easter and all, but having Mr DIY home for 2 extra days meant that we had time to build our barn doors!
DIY Barn Doors
I don't have a tutorial for you today, because I just couldn't get it together (or as my dad used to say, "I've got it together, I just can't remember where I put it!") 😁😂
I promise that I will write up the tutorial for you in the next few weeks, and include a complete source list. Total disclosure...we are not builders...so these doors probably took us a little longer because of that. BUT, we did it! And they do look amazing.
Here's a peek and a very abbreviated version of how it went down. We bought wood...
...did some stuff...and VOILA, barn doors! 😃
We took some time to get away too! It was a perfect weekend to hit the beach, and Kyle taught Abby how to throw and catch a football while I worked on my tan. 🏉
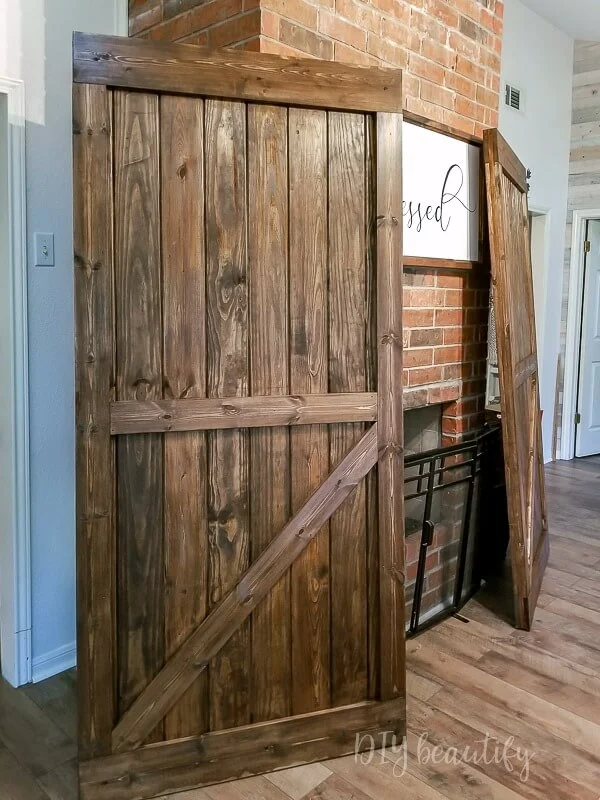
But back to the project...I spent a couple days staining the barn doors and here's how they look. Notice they're not in place yet...that's coming this week!
I also painted the header that the barn door hardware will hang on. This 1x6 is about 20 feet long!!!
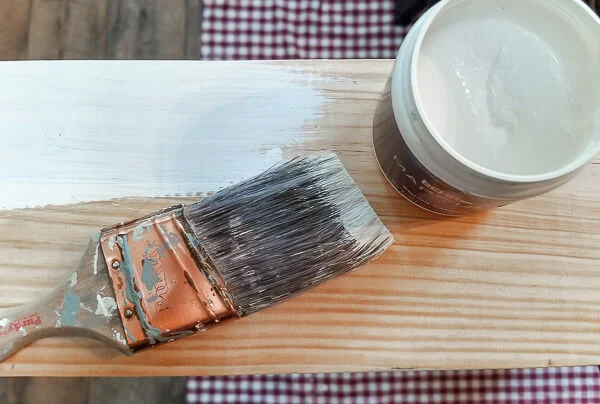
The plan was to paint it the same color as the walls in the Master (Valspar Bistro White). However, as I looked at this piece of pine, with all it's grooves and notches and imperfections, I decided to whip up some DIY chalk paint using my wall color. Let me tell you why.
Advantages to Chalk Paint
- quick and easy to apply
- no drips
- dries quickly
- covers imperfections in the wood
- 2 quick coats
DIY Chalk Paint
I had an empty sample size paint pot, so I filled it halfway with my wall paint. Then I added half of the amount of POP and CC that I normally do. And just like that I had DIY chalk paint in the color of my choice!
If you don't understand a word that I just said, I'd like to direct you to this post where I explain step by step how to make your own chalk paint in sample paint pots.
And here's why I love it...it goes on so easily, no worrying about drippy thin paint.
By the time I was finished painting the first coat, I started right over with the second as the paint had already dried. Once both coats were dry, I very lightly sanded with a sanding sponge to smooth the finish, and then gave it a light coat of clear wax to bring a little sheen back to it. I was finished in under 30 minutes!
Hopefully we can install the barn doors tonight! I am so excited to see how they look! And even more excited to get rid of the beach towels that have been hanging on our french doors for almost 3 years!
Other progress we made this week...
- Mr DIY changed out the switches that were old, yellowish 80's switches for nice bright white ones.
- I DIYed a pretty pillow and found bedding
Here's what we hope to achieve this next week
We have some pretty cool lights that I am anxious to hang, but I'm still waiting on something to arrive in the mail!
Fingers crossed there are no issues in hanging the barn doors, and I can share those with you next week.
I'm hoping for a pretty easy week as it's my birthday week...I turn the big 50 today 😮🙊 and think I deserve some time off from projects!
Be sure to check out the other guest participants and their One Room Challenge projects (HERE). You don't want to miss the 20 featured bloggers and their room makeovers!
Be sure to check out the other guest participants and their One Room Challenge projects (HERE). You don't want to miss the 20 featured bloggers and their room makeovers!
Thanks so much for following along! Until next time,
bringing beauty to the ordinary,


what a cliff-hanger! happy birthday! i look forward to seeing the finished doors hanging soon!
ReplyDeleteHaha, sorry Gwen! Awesome pics coming up, I promise! And thank you SO MUCH for the birthday wishes! ❤
DeleteThe door looks AWESOME! Great job! Cant wait for the whole kit and kaboodle! And let me just sayyyyy, you do not look anywhere near 50!!! That being said, HAPPY BIRTHDAY!!! I turned 50 last July and it strangly didnt bother me :/. I just wanted to do something special to remember the day, so I did and I'm all good now, lol! Have some fun!
ReplyDeleteThanks so much Sandra! Hoping to hang the doors today... they are soo heavy! Yeah, 50 isn't so bad 😊
Delete