How to Build Barn Doors
A tutorial to build a pair of barn doors from scratch. Save money with this easy DIY tutorial!
Affiliate links may be included for your convenience;
my full disclosure policy can be found here. If you click through and make a purchase I'll receive a small commission at no extra cost to you!
Hi there friend!
Today is the June edition of Thrifty Style Team, and today we are teaming up with the men in our lives to share their DIY projects! For most of us, our hubbies do a LOT of behind the scenes work on our projects, and we don't give them nearly enough credit!! 😉💗
So today we are declaring our appreciation for our talented men!
And we're dishing on their manly DIY projects! Some cost next to nothing, some were much more, but we consider each of these to be a thrifty project because when you Do- It- Yourself, you can save so much money!
When Mr DIY and I started planning our Master bedroom, we knew that we wanted something to replace the french doors in our bedroom. There was too much light coming in when we were trying to sleep, and no privacy! In fact, shortly after moving into our home in October of 2016, we hung up beach towels and there they stayed!!
You can click here to see our bedroom before it's makeover...and click here to see the completed bedroom full reveal.
Between the two of us, Mr DIY was blessed with the math skills, so he measured and marked and wrote everything down. I was blessed with the creative gene, and needed to share my 'barn door wishes' with Mr DIY in a language that he understood...you know what I'm talking about, right ladies?
Sometimes it feels like we truly are from different planets when we try to communicate! 😵
I got a little assistance in my efforts because a friend of mine (and her hubby) had just built barn doors and I loved the look. So Mr DIY and I went to their house to take a closer look and plan our own doors. These are the barn doors that inspired the ones we built...
Inspiration Barn Doors
Our doors were custom built to the measurements we needed. We wanted them to hide the frame around the door opening when they were closed. The finished size of each barn door we built is almost 7' tall and 3.3' wide. The total cost for our project was $100 per door plus $115 hanging hardware plus stain =
$350.
Supplies for DIY barn doors
- 8' pine tongue and groove wall planks (we used 8 for each door)
- 1x4 pine boards
- 1x6 pine boards
- rubber mallet
- wood clamps
- small circular saw
- nail gun
- wood glue
- Minwax pre-stain wood conditioner
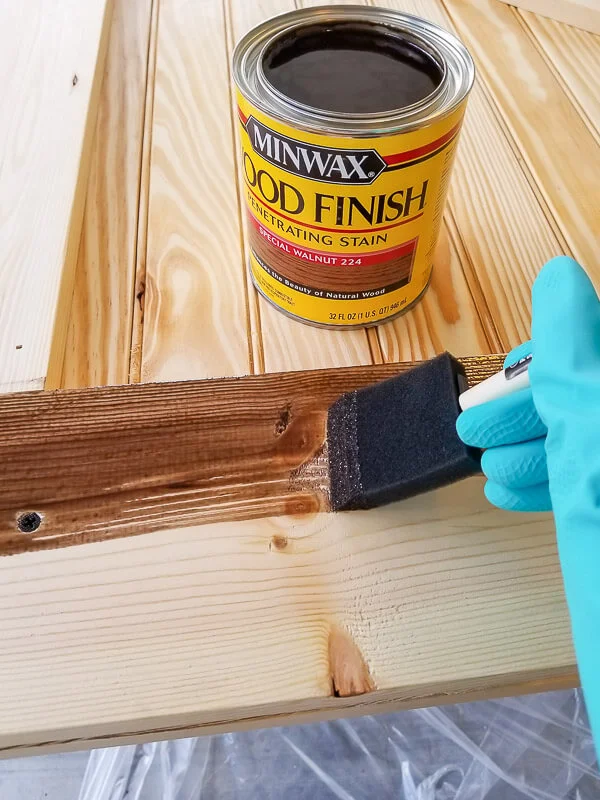
- Minwax stain (I used this one and this one)
- foam brushes
- header for attaching hardware
- barn door hanging hardware (we used this set)
- barn door floor guides (one for each door)
How to build DIY barn doors
One of Mr DIY's friends has a shop with every tool imaginable! So we headed over there with our wood to build our barn doors.
Step One
Snap together the tongue and groove boards on a large, flat surface. A rubber mallet is helpful for stubborn boards.
Step Two
Clamp boards together at the top, middle and bottom. This will hold them snugly in place while the excess length is removed.
Step Three
Mark a line and carefully cut off the excess wood with a compact circular saw.
Step Four
To better envision how the doors will be built, picture the completed door as a pb&j sandwich! 🍞
- The tongue and groove boards are the pb&j filling
- The 1x6 and 1x4 boards are the bread. They will be attached to both front and back of the 'filling'
- The 1x6s will be the crust on the top and bottom of each side of the door, and the 1x4s will be the crust on the side edges (as well as the cross piece in the middle).
Does that help? Or just confuse you? Hopefully it helped! 👍
Cut the 1x6 and 1x4 boards to size for top, bottom and sides of door. Starting with a piece of 1x6, add wood glue and clamp board in place, lined up with the top of the door. Use a nail gun to secure. We ended up using wood screws as well along the top and bottom boards, just to ensure stability.
Once the top is secure, do the same to the bottom. The clamps help to hold the wood in place while the glue dries and keeps the board from shifting while securing it with screws.
Step Five
Now it's time to work on the sides. Use wood glue and a nail gun to nail 1x4 boards along the side edges. Then one across the middle.
Step Six
Finally, cut a piece of wood at the appropriate angle and attach it with glue and nails as a crossbar. You can do these on the top of the door as well, but we chose to just do the bottom. You will need math to make these cuts! (truthfully, this is where I gracefully 'bowed out' of the door making process and headed home to bake a cheesecake!!) 😃 Much less stressful!
Step Seven
Repeat the same exact steps on the reverse side of the door! Mr DIY finished this step, and built the second door, without me. I'm so thankful for a handy hubby!! 😍
How to stain barn doors
The finished doors came home and Mr DIY turned them over to me to beautify them! Well, he did have to carry them for me because these suckers are heavy! He set them up on saw horses on our back patio and left me to it!The pre-stain conditioner is optional, but I highly recommend it for the best results! It helps to create a more even finish, especially when you're working with blotchy woods, like pine. It just sets you up for the best results!
Step One
Wipe off doors with a damp lint-free rag to remove any sawdust particles. Stir pre-stain conditioner and apply with the grain using a foam brush. Let dry the recommended amount of time.
Step Two
Stir stain well and apply a light coat with foam brush. Brush with the grain. Let stain soak in for recommended amount of time (5-15 minutes usually) and then wipe off excess with a rag. Let dry and repeat for a dark, richer color.
After two coats of stain, I still wasn't happy with the color and so I did an additional light coat using the darker Espresso stain. This gave me the rich color I was wanting. Don't be afraid to experiment with stain (usually I would recommend doing this on a piece of scrap wood first! Obviously I didn't do that and it worked out fine!)
The doors will need time to dry, then you will flip over and stain the other side. And let dry again. All in all, the staining process took several days before the finished doors were ready to come into the house!
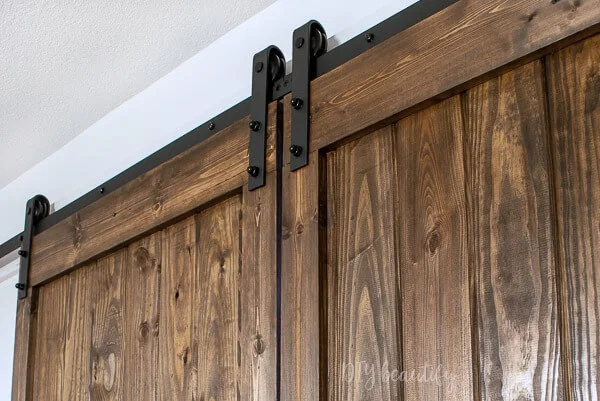
Hanging the doors was a bit of a challenge because the wall in our Master that we hung them on is an add-on, and one side bows a little bit.
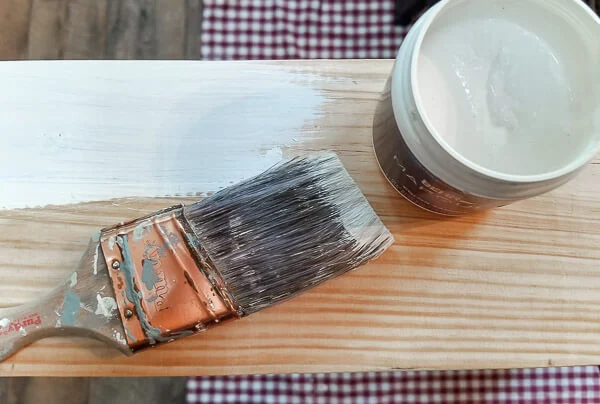
We chose to add a header to our wall, from which we hung the doors. I painted the header (just a really long 1x6 that I painted white to match the walls). I actually mixed up a little container of my DIY chalk paint recipe using the leftover wall paint because I wanted to do fewer coats over the raw wood.
This little trick worked really well, and 2 coats completely covered the pine in just minutes. The header was attached to the wall studs, and then the hardware was hung on that. I chose not to apply any kind of top coat to our barn doors. I like the matte look with just the stain.
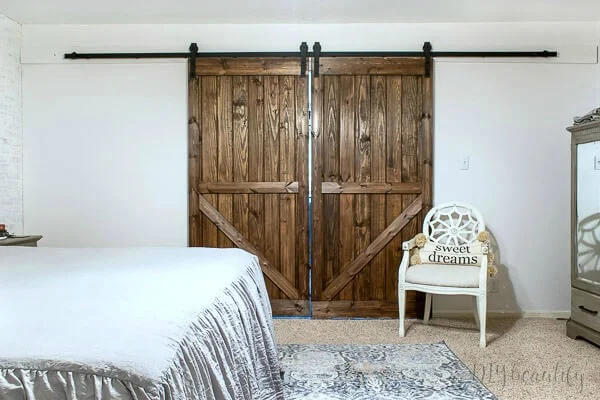
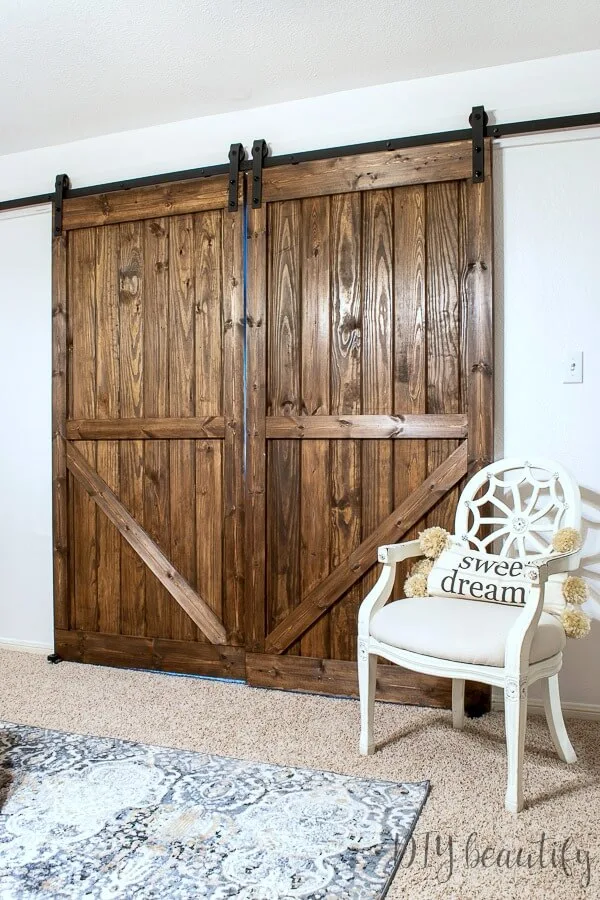
And after a couple hard days of work...we had our own custom barn doors! We made these doors for about $350 (including hanging hardware). This was much cheaper than if we had paid someone to build them for us! There's a small gap between the doors when they're closed, because of the weird wall! But didn't they turn out gorgeous? SO MUCH BETTER than the beach towels!
This is the master bedroom side...
...and here's how our DIY barn doors look from my office on the other side. Don't they look yummy with our farmhouse floors?
I did purchase handles for the doors, but we ended up not using them. They slide so easily and the handles aren't really necessary.
We are loving our DIY barn doors, they add such a gorgeous farmhouse feel to our home! The doors would not have happened without the skills of my Mr DIY!! He is so talented! But if you're not into building your own, you can purchase beautiful custom barn doors!
Go ahead and pin this for later!
Let's see what the other Thrifty Style Team men built this month. Click on the links below for each tutorial.
Do you live with a handy guy? Or do you do all your DIY's yourself?
bringing beauty to the ordinary,








Wow Cindy! You are so fortunate to have Mr. DIY in your life! He is so very talented - your barn doors are gorgeous!!
ReplyDeleteThank you, yes I am!
DeleteWow! Mr. DIY did an amazing job! Those barn doors are absolutely stunning! I love every inch of them! <3 Wishing you a happy Father's Day!
ReplyDeleteAww, thank you so much Kristi! He did a great job!
DeleteOh my gosh! These barn doors are so beautiful! I'm sure you two look at them with pride whenever you see them!
ReplyDeleteThanks Jane, we are really loving them!
DeleteWhat difference! Thanks for the tutorial. Very detailed and perfect for ANYONE that is interested in making their own barn doors. Perfection!
ReplyDeleteAww thanks Meegan!
DeleteYour hubby did a fantastic job with your beautiful barn doors! Love them!
ReplyDeleteThank you Kristi!
DeleteSuper awesome Mr. DIY! My husband found a set in the dumpster at a job site. Of course he took them home, and they were cut down and became a tv cover in our bedroom. We still wonder why someone would throw them away, maybe the size wasn't right and they had to start over, who knows but it was our gain and like your doors they add so much character to our bedroom.
ReplyDeleteThank you so much! I never understand why people throw good stuff away... our gain though right?
DeleteOh wow! I think I think these even more than the ones in the inspiration photo! And you really did make it look a lot less intimidating. You two make a great team!
ReplyDeleteThank you Courtenay!
Deletelet's hear it for the men! your doors look great and hubby makes it look so easy for others wanted to do this in their own homes.
ReplyDeleteThanks so much Laura!
Delete