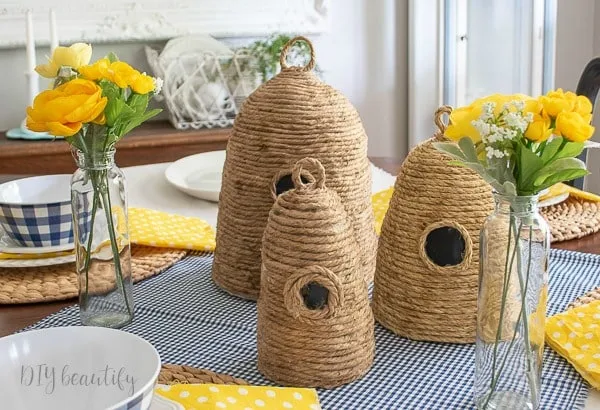
Easy DIY Bee Skep for under $10!
Turn common household items into inexpensive DIY bee skeps or bee hives for under $10! Don't miss my tips and tricks below for the best outcome!
Updated 7/2022
Affiliate links may be included for your convenience;
my full disclosure policy can be found here. If you click through and make a purchase I'll receive a small
commission at no extra cost to you!
Hi there friend! Is it feeling like summer yet where you are? You can't have
summer without bees right?...and while
bee decor
is super cute, bee skeps are even cuter! The texture and neutral color make
them the perfect summer home decor accent!
What is a bee skep?
A skep is a traditional round hive made of straw or dried grass. Multiple strands of straw are bundled together to form a thick rope and the rope is then coiled and bound together to make the skep. The skep is generally empty so it provides protection for the bees but little else. Find out more from Honey Bee Suite.Make it for less!
I love the cute design of a bee skep, and wanted to add some to my home decor
but the ones I've seen are usually very pricey. And this is where I come in because I love to find ways to make budget-friendly decor for my home!
If you like saving money with thrifty decor, make sure you're signed up for my newsletter to get updated whenever I post a new project, craft or room makeover! The form is just below.
My sweet friend Shamara from
Shamara's Pretty Things has a fabulous IGTV that walks you through the entire process!
Watch the video tutorial HERE
and then come back for additional tips and tricks that I learned while making
my own DIY bee skeps!
How to make a DIY bee skep for under $10
Did you watch Shamara's video? She shows just how simple it really is to make
these bee skeps using some surprising items that I'll bet you have in your
home! I set out to make my own DIY bee skeps one Saturday afternoon, using
items I already had! I'm sharing some additional tips that will help you to
achieve success. First things first...here are the supplies you will need.
Supplies
- vessel or containers in varying sizes (like SOLO cups, plastic plant pots, etc)
- hot glue
- rope (I used this exact jute rope and this sisal rope)
- newsprint or packing paper
- packing tape
- posterboard
- heat tool (optional)
- sharp scissors
- small pieces black vinyl or cardstock
- lighter (optional)
Select your vessels
You probably already have a lot of items around your home that you can turn
into a bee skep! Here are some items that I grabbed from around my house. A
SOLO cup, a plastic plant pot and a basket
(I ended up not using the basket because I really love it as is, but I
found a great alternative at the
Dollar Tree...keep scrolling to see it).
I'd love to know what you ended up using to create your bee skep! Leave me
a comment below.
Adjust the Shape
When you flip your vessel over, you need to do a little work to make it
rounded at the top and possibly even the sides. This is actually very easy to
do. All you need is
packing paper or newsprint and packaging tape!
Scrunch the packing paper up and tape it to the vessel until you're happy
with the shape; try to create a rounded
(dome) shape at the top. This is really easy to
do if your vessel is rounded to begin with!
If your vessel has more of a square-ish shape, you need to round it. You do
this by wrapping it with more packing paper. Just scrunch it until it
resembles the shape you need and tape it on. Here is what my SOLO cup looked
like after taping paper to create more of a beehive shape. Remember, it
doesn't have to be perfect! The bee skep really comes together when the rope
is glued on, and the rope disguises all the little imperfections.
Stuff Inside and Make a Bottom
Next, stuff the INSIDE of the vessel with paper! This adds some weight so it
will sit nicely on your shelf. I also traced the bottom opening onto poster
board, cut it out and hot glued that to the bottom of the cup. That finishes
it off nicely, keeps the paper inside, and gives it more support. You could
also add a few small rocks to the inside to give it extra weight.
Wrap with Rope
Now the fun part begins when we bring our DIY bee skeps to life! Starting at
the bottom, add a bead of hot glue in a 2-4" section and hold the rope in
place. Wrap and glue the rope around the skep, working your way up.
Insider Tip: Cut all rope ends at an angle to help disguise the beginning
and ending of the rope
Make a Loop
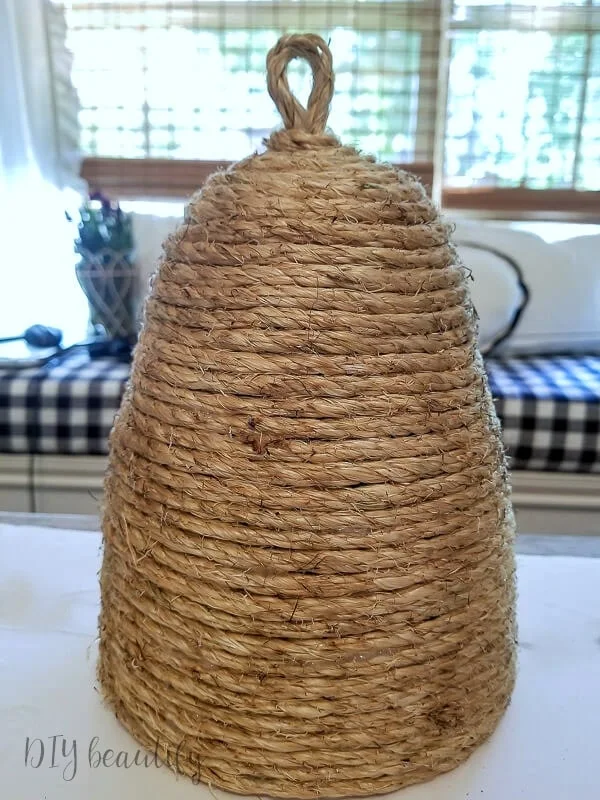
When you have about 1/3 of the beehive wrapped in rope, take another piece
about 8 inches long, form the middle into a loop as seen in the pictures below
and hot glue to the very top of the bee skep. Hold in place to secure. Glue
the ends down as well. These will be completely hidden as you continue
wrapping and gluing rope around the skep and will ensure that it's held in
place securely so the loop is functional if you want to hang your completed bee skep up.
Insider Tip: You may have some gaps or holes in your paper (see pic below
with the arrow). In that instance, rather than gluing the rope to the
vessel, add glue to the
row of rope below until you get past that
trouble spot. This will give your finished skep a nice and uniform shape.
Keep wrapping and gluing all the way to the top! When you are gluing over the
ends of the hanging loop, just pull the rope a little tighter so your skep
doesn't end up with bumps!
Make the Hole
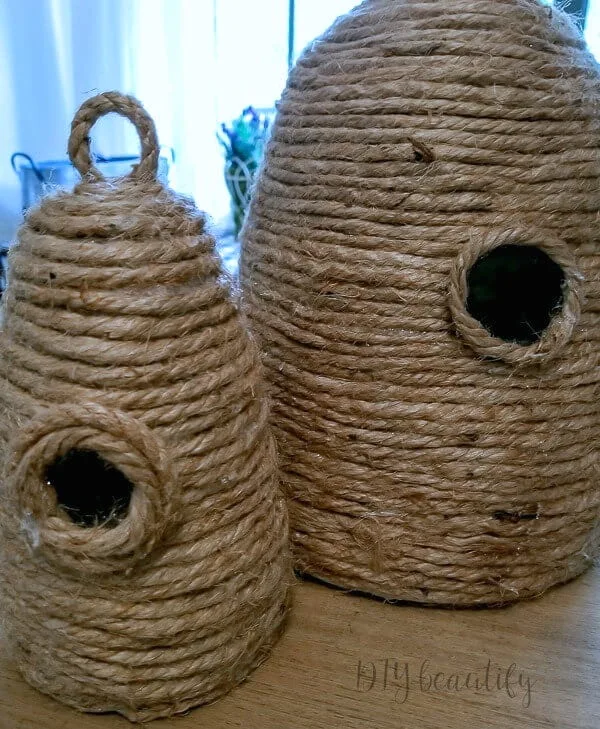
It's super easy to make a faux hole for the bees! Cut out a circle from
black card stock or vinyl
(use a
circle punch
for a perfect shape)
and hot glue in place in the middle of your skep. Glue a small piece of rope around the edges to finish
it off nicely. It tricks your eye so that it really resembles a functional hole that the bees can fly into and out of!
Erase the glue strings
After using all that hot glue, you're bound to have a lot of dried glue strings hanging off your new bee skep! The easiest and fastest way to eliminate these is to use a heat gun (or blow dryer) to melt the glue strands. Just blow your way around the skep, and watch the glue strands disappear!
Burn your Skep
I know just what you're thinking because I thought the same!
This chick is crazy! This step is
totally optional, and obviously you need to be super careful when you're using
a flame, but I promise there is a very good reason to burn your DIY skep! If you want to know why and how to do it, please
watch this short video.
I think it's worth the
extra, easy step, but it's up to you!
Please be cautious when using a flame! Always keep the flame moving.
Less than $4 worth of rope, a plastic pot and hot glue equals one super cute
bee skep! I hope you agree that these bee skeps are so cute and worth the
effort! I think some tiny ones using
these little peat pots
would be so cute!
For those who would prefer to skip the DIY and buy a pre-made bee skep, you
can shop the links in the carousel below.
SHOP BEE SKEPS
I used my DIY bee skeps to emphasize a summer theme in my dining room.You can
read all about how I decorated this dining room for less than $20
here.
Pin it to remember
Looking for more inexpensive DIY projects for your home?
- Antique a Dollar Store Tray with Chalk Paint
- Beaded Wood Riser Tray With Crackle Finish for $20
- 13 DIY Pumpkins to Make for Fall
- Get that Restoration Hardware Finish Using Paint
- Upcycle a Thrifted Berry Wreath with Paint
If you're a new follower, make sure to say Hello in the Comments below! I'd love to know where you're from and what kinds of home decor projects you love to do (or are looking for easy tutorials for!)


Such a cute idea Cindy and one I feel I can do this weekend. I love the texture of the rope.
ReplyDeleteThanks Di, they are very satisfying to make!
DeleteThese are perfect !!! Thanks!
ReplyDeleteWhat size & type of rope did you use? (3/8" or 1/2", sisal, jute, manila)?
ReplyDeleteAll the details are in the supplies list
DeleteWOW! Always wanted one and now I think perhaps I may! Thank you, Cindy! You did a great job! Found you from visiting Marty. : - )
ReplyDeleteThanks so much Michelle, they're a lot of fun!
Delete