Dollar Store Valentines Day DIY Sign
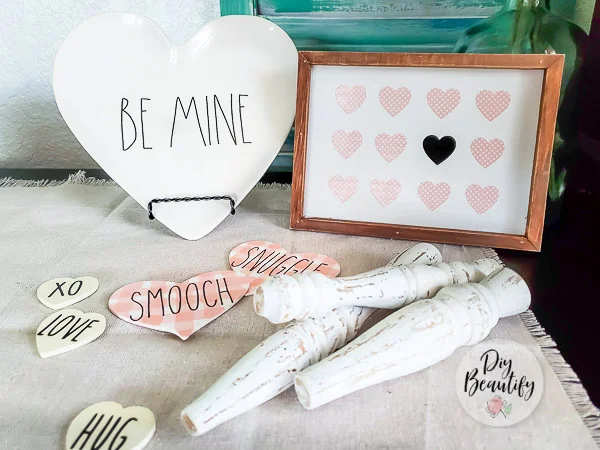
This sweet heart sign is made from dollar store items, and will add farmhouse charm to your Valentines decor!
Affiliate links may be included for your convenience. As an Amazon Associate, I earn from qualifying purchases at no extra cost to you. My full disclosure policy can be found here.
Welcome Wednesday, and welcome back for another Valentine's day craft! I've been having fun over here making tons of new items for V-day that suit my style and my home decor! You can see all my Valentines DIYS here. I truly hope you find something that inspires you 💗 Maybe it'll be this easy, inexpensive DIY sign made from Dollar Tree items!
Dollar Tree DIY Sign
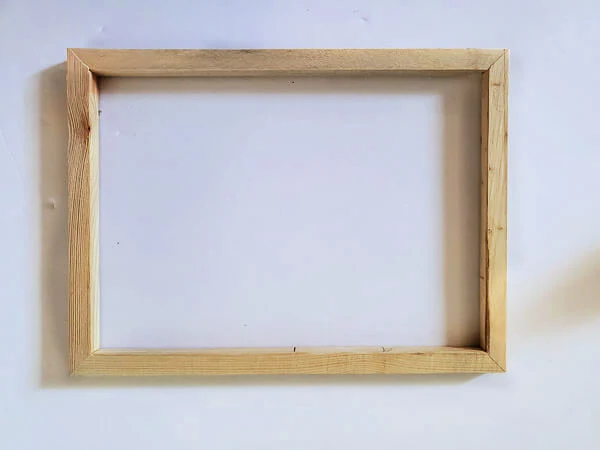
I recently went shopping at my local Dollar Tree and found a bunch of cute items to craft with! They now carry stretched canvases several different sizes. One thing you may not realize is that they are stretched over a wood frame! That frame will be the base of our cute farmhouse Valentines sign.
Here's how I made it.
Supplies
- canvas from the dollar store (I used the 6 x 8 for this sign but they had lots of larger sizes)
- burnt umber acrylic paint
- foam brushes
- damp paper towel
- paper plate
- piece of cardboard (I used the side of a box)
- white chalk paint
- pink and black craft vinyl (I found the polka dot vinyl at Hobby Lobby for $1/sheet)
- hot glue or staple gun
- die cut machine optional*
*if you don't own a die cut machine like a Silhouette or Cricut, you could cut hearts from the vinyl with scissors, or a craft punch
Start by tearing the canvas off the frame. It's held on by staples, and you can remove the staples, but it's not easy! I just tore around the staples until all the canvas was removed and I was left just the frame.
Blond Moment!
Now I have to be honest...I started removing all the staples, which was very difficult before realizing I could simply flip the frame over!! 😃😵 The back of the frame was all nice and pretty!
Faux Stain using Paint
I wanted my sign frame to have a darker look, but didn't want to go through the hassle of using stain, which smells bad, is messy and can take awhile to dry!
Instead, I used burnt umber acrylic paint which is a nice dark brown. I painted a small section at a time and before it dried, wiped off the excess with a damp paper towel. This reveals the wood grain underneath, which gives the frame a stained effect! So easy and fast!
I would definitely not do this to a piece of furniture, but for a quick craft, this is perfect!
I set the frame aside to dry while I worked on the inside decor piece.
Prepare Cardboard Backing for Design
As you can see, the frame is open. I needed something that I could adhere my heart design to. I cut a 6 x 8 piece of a cardboard box and that worked perfectly! If you have an old 5 x 7 picture frame, you could always use the backing from that!
I painted the cardboard with two coats of white chalk paint. I've never painted cardboard before, but it was easy and fast and once dry it doesn't even look like cardboard anymore!
Make Design for Sign
I used my Silhouette machine to create and cut out a design of hearts, four across and three down. I cut it out of pink polka dot vinyl that I bought by the sheet at Hobby Lobby for $1. You could also use a heart punch to create your hearts.
Bring it all Together
Here are all the elements that we've created so far...the faux stained frame, the painted backing, and the heart design. You can see that I cut out a single black heart as well.
I first adhered the heart vinyl design to the white painted cardboard using transfer paper. This allows you to place your design perfectly, all pieces at once. Then I applied the black heart to the top of one of the pink ones just for a little pop of black! Here's a close up of the painted cardboard...love the texture created with the chalk paint!
Next, I stapled the design to the back of the frame, but you could always hot glue it too!
The Finished Sign
I love how it turned out! It's got farmhouse style, and it matches the rest of my Valentine's decor...which this year is pink, black and white!
Click here to watch a video tutorial for the large plaid conversation hearts. I'll be sharing how I made the small Rae Dunn inspired conversation hearts soon!
PIN FOR LATER
I'll be back on Friday with another Valentines Day craft, hope to see you then! 💟


Comments
Post a Comment
Your comments are like sunshine and chocolate! Thanks for taking the time to leave a nice one ;) I read all comments and love to respond if you leave your name and email! Otherwise, please look for my response under the post where you left it!