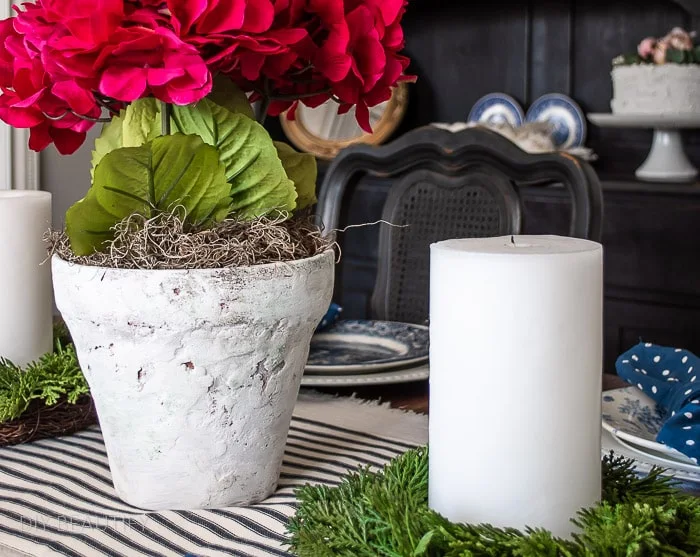
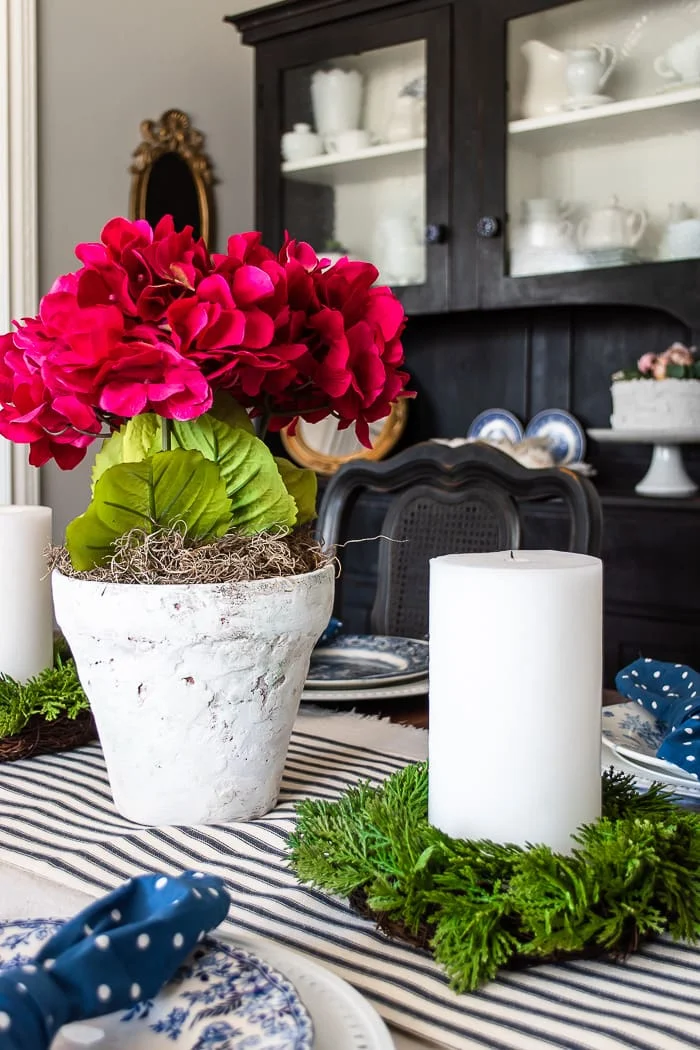
How to Make an Aged Stone Flowerpot Centerpiece
I'm showing you how easy it is to turn a plain Jane flowerpot into an aged stone pot and then plant it with a faux hydrangea! I'm sharing all the steps below!
This post may contain Amazon or other affiliate links. As an Amazon affiliate I earn from qualifying purchases. My full disclosure policy can be found here.
Have you been to Round Top? I am hoping and crossing all my fingers and toes
that Mr DIY and I will get there this weekend!
I know it's
Easter.
But Round Top antiques fair only comes around twice a year,
and usually by the Fall, it's too blazing hot to really enjoy it!
Easy Aged Stone Flowerpot Centerpiece
I've been teasing you with this aged flowerpot centerpiece for a couple weeks now as I've been sharing my blue and white dining room and the other projects I've completed in this space.I hung a vintage plate wreath on the wall, and decoupaged chargers with blue and white floral napkins.
I really like when a space comes together for next to no money...that means I have more to spend at Round Top 😃😊
This crusty old flowerpot started life as a brand new terracotta pot that I picked up at Lowes.
I wanted to give the new pot some texture, and hide that sharp edge along the top of the rim. My plan was to use joint compound on it. I know we have a leftover bucket from when I German schmeared the faux brick wall in our bedroom.
But I couldn't find the joint compound in the garage so I grabbed this bucket of lightweight spackling instead.
My plan was to record a video as I applied the spackle over the flowerpot, but I quickly realized I needed both hands just to keep the spackle on the pot! I think the spackle is dryer than the joint compound, so keep that in mind if you plan to make this project at home!
The spackle wouldn't spread so I ended up smearing it on with my hands, thicker and chunkier at the top.
It took a few days to dry completely because I'd applied it so thick, but once it was dry, I took it outside and used my palm sander to smooth it out.
I actually think my difficulty applying the spackle ended up working in my favor because the results are a combination of textures and thicknesses. Doesn't it look like something that may have been unearthed in France?
Okay, maybe not yet. But it will after I age it!
Aging a flowerpot with paint
To add age to the faux stone pot, I applied a variety of paints. I used white, brown and green acrylic paints and a cheap chip brush.I started by painting the pot with white acrylic paint to cover up most of the terracotta color. And then it got fun.
I squirted out some brown and green paint into a paper bowl and dipped a crumpled paper towel into the paint and dabbed it onto the pot.
I had a small glass of water handy so if the color got too heavy, I wet the paper towel and wiped and smeared the paint.
This softened the color and created an aged appearance. It also added a ton of dimension to this faux stone flowerpot!
I just worked my way around the flowerpot, adding and removing paint until I was happy with how it looked.
And then I gave it a light dry brushing with white paint. This softened the colors even more. The green looks like moss and the brown looks like dirt that has been rubbed into this pot over a hundred years!
Isn't that cool?
If you love old things, I know you are loving how easy it was to transform a new pot into one that looks as though it was unearthed from the grounds of a crumbling farmhouse in Tuscany!
Adding flowers
To turn the aged stone flowerpot into a centerpiece for my table, I planted it with hydrangeas.Faux hydrangeas that is! I bought three large fuchsia pink hydrangea stems from the craft store and simply inserted them into a floral foam brick that I stuck down into the flowerpot.
I covered the top of the foam with Spanish moss to disguise the foam, and my aged stone flowerpot centerpiece was ready to go on my Spring dining table!
This was such a simple DIY for Spring, and I love how it all came together!
The hardest part was waiting for the spackle to dry! After that, it was done in no time! It cost less than $20 for a beautiful centerpiece.
Have you made anything similar? I'd love to hear about it!


I've been wanting to do this for a while but haven't had the time. I've got to make the time! I love this and you make it look easy. Grinning and Pinning! Thanks for sharing. Happy Easter!
ReplyDeleteThanks Cindy, just found our tub of Joint Compound and plan to make a few more!
Delete