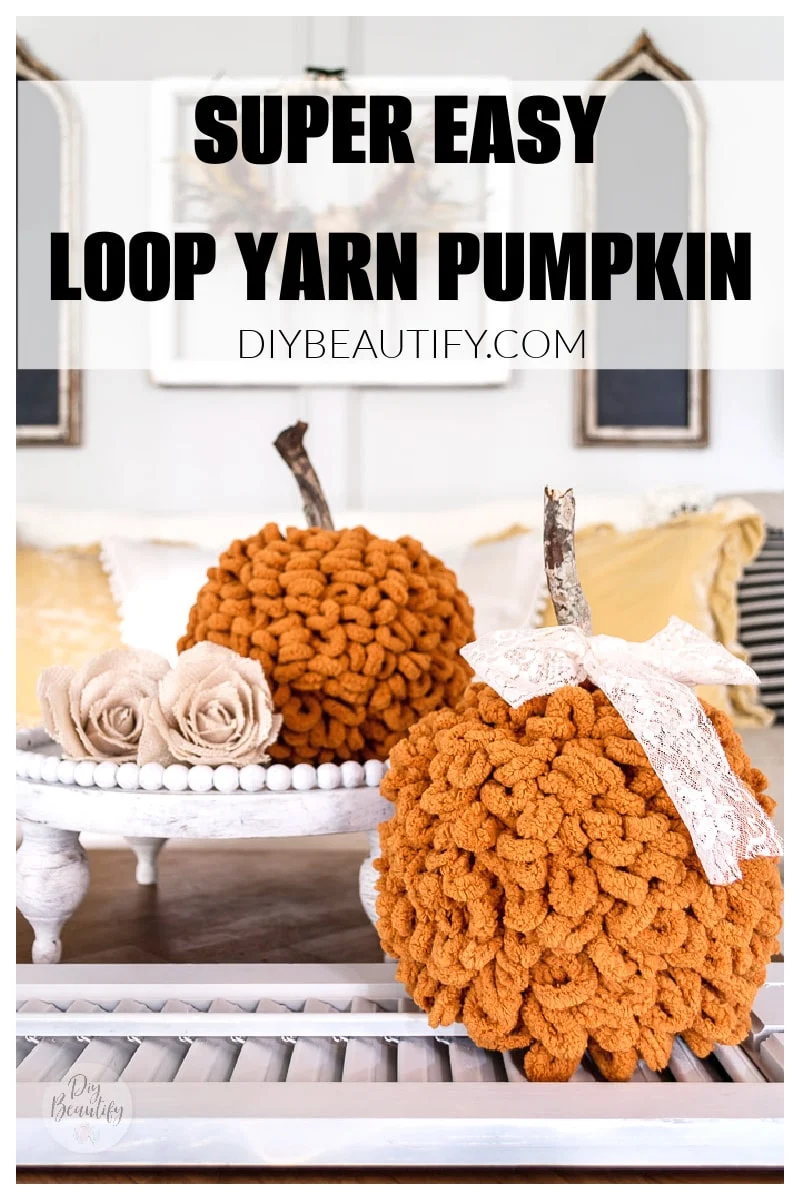
Easy Loop Yarn DIY Pumpkin
How to make a soft and fluffy pumpkin from loop yarn. No glue required! Only three simple steps to this easy DIY pumpkin and it's ready to display in your Fall decorated home!
This post may contain Amazon or other affiliate links. As an Amazon
affiliate I earn from qualifying purchases.
My full disclosure policy can be found here.
Hey friend, I hope you've been enjoying some cool, Fall-like weather! I'm a
day late sharing this pumpkin tutorial. Mr DIY and I drove our daughter Abby
up to Memphis, TN to do some college tours over the long weekend. Our son and
his girlfriend live there, so we had lots of good family time. AND, it was
perfect sweater weather, which was great for all the walking we did!
We're back home in Texas now and getting caught up on all the things. I wasn't
even going to share this pumpkin DIY because it's so easy, but I have to
remind myself that not all crafts are as easy for others as they are for me!
When I spotted
this pumpkin spice colored loop yarn, I knew it would make an adorable pumpkin!
I'm no stranger to cozy DIY pumpkins! My
sweater sleeve pumpkins
are one of the top viewed posts and this year I also made a
crochet chain pumpkin
for those who don't crochet! Check them out and then come back and see how to
make a loopy yarn pumpkin, maybe the cutest DIY pumpkin yet!
The best part is there's no messy glue! And, if you tend to be a little
commitment-phobic with your seasonal decorations like I am, you'll be able to
easily take this pumpkin apart to make something else next year - I'm planning
on making a wreath!
So let's get started and I'll show you just how easy it is to make this DIY
loopy yarn pumpkin!
Easy DIY loop yarn pumpkin
I love that this easy craft only requires 4 simple and inexpensive supplies,
and if you purchase the yarn I linked, you'll be able to make two pumpkins!
Supplies needed
- foam pumpkin (the foam pumpkins from Dollar Tree and Walmart work perfectly)
- straight pins
- stick to replace stem
- loop yarn ( this is the exact color yarn I purchased)
A couple notes on the supplies:
I reused some pumpkins that I purchased a previous year from both Dollar Tree
and Walmart - both pumpkins I used were a medium size. I was able to use one
skein of yarn for each pumpkin without cutting the yarn at all. If you choose
to do this craft with a smaller or larger pumpkin, just keep in mind you may
need less or more yarn. The yarn I purchased came in a set of 2 skeins and
there are lots of color options.
One more thing:
Keep in mind that once the loop yarn is attached to your pumpkin, the finished
pumpkin will be a
lot larger! I found the plastic stem that came with it was way too
small, so went out into my backyard and picked up a couple of taller, thicker
sticks (about 1" in diameter) to replace the stem.
What is loop yarn?
If you've never seen loop yarn before, it's a yarn made with loops so you can easily finger knit blankets, scarves and even sweaters! But I'm using it in a completely different way than it was intended because I just thought a loops yarn pumpkin would be a great idea!How do I make a pumpkin with loop yarn?
Step 1:
Making a loop yarn pumpkin couldn't be simpler! First, remove the plastic stem
and replace it with a stick. We're not going to leave the stick in there while
securing the yarn, but you do want to poke it into the pumpkin to make sure
it's a snug fit.
Step 2:
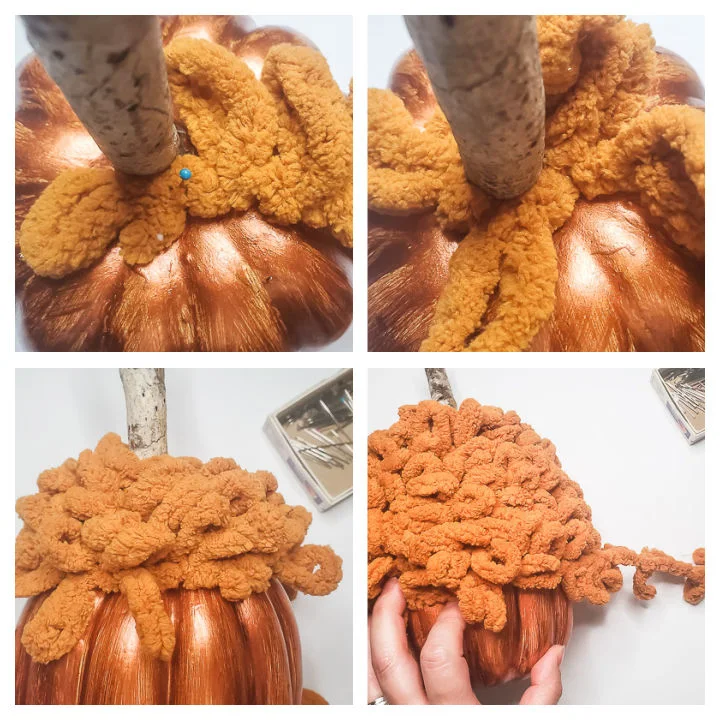
Unravel the loop yarn and find one end. Tuck that end into the hole where the
pumpkin stem was. Use a straight pin to secure the yarn. For the purposes of
this tutorial, I used a pin with a green tip (see picture below). But I like
the plain ones so you don't see the pins.
Start wrapping the yarn around the top of the pumpkin, making sure all loops
are on the outside. Secure with pins where needed.
Once you get going and you're working more on the body of the pumpkin, you
don't need as many pins. Keep the rows of yarn tight to hide the pumpkin and
to make it extra full and fluffy!
I did have a little yarn left once my pumpkin was wrapped, and instead of
cutting it, I just rewrapped a few sections to use all the yarn. Remember, I
plan to make a loop yarn wreath next Fall so I wanted to keep my yarn ball
intact!
Update: See my loop yarn wreath here!
Step 3:
Finally, once you're finished pinning the yarn to the pumpkin, go ahead and
insert your stick stem. Give the pumpkin a little fluff and display it! You
can tie a piece of ribbon or lace around the stem as I did with one of the
pumpkins below.
I was so proud of how this DIY pumpkin turned out and had so much fun taking
pictures of it. Then my son walks by, touches it and says,
"Looks like a brain!". Womp womp...can always count on the guys in my
life to keep me humble, LOL! He's also a Science major, so... 😉
I think my pumpkin spice loopy yarn pumpkin looks fabulous and unique! In
fact, I searched Google and didn't find anything like this so maybe I'm a Fall
pumpkin making trend setter?!
I grabbed some dried leaves, one of my Free Fall printables and styled the DIY pumpkins on this crackle wood beaded tray that I just made for $20.
It's pretty amazing how BIG these pumpkins get with the addition of the loop
yarn! This yarn is super thick and chunky and so soft!
Millie wasn't quite sure what to make of it...the pumpkin is almost as big as
she is!

I hope you love this Autumn pumpkin DIY as much as I do! Have you ever crafted
with loop yarn before? I'd love to hear about it!
Please support my blog by Pinning, Sharing, and Commenting! I truly appreciate
it.


I made this earlier today and couldn't be more pleased with how it turned out! The pumpkin spice color of the yarn is perfect, too!
ReplyDeleteYay, thanks for letting me know! It's such an easy pumpkin to make, and I love the yarn color!
DeleteSo stinkin cute! I'm going to try to make this soon.
ReplyDeleteLove this yarn and this pumpkin. I made a wreath with this last year. I hope I can find some leftover so I can try this!
ReplyDeleteI cannot wait to try this out, Cindy! I’d love for you to join us over at the Creative Crafts Linky Party every Wednesday through Sunday
ReplyDeletehttps://creativelybeth.com/team-creative-crafts-linky-party/
Followed and Pinned! 🙂
Creatively, Beth
FABULOUS tutorial, Cindy! We'll be featuring you over at the Creative Crafts Linky party starting tomorrow!
ReplyDelete