The Easiest DIY Maple Leaf Place Cards for Thanksgiving
These simple Thanksgiving place cards are nearly free to make using dried maple leaves, natural ribbon and alphabet stamps.
This post may contain Amazon or other affiliate links. As an Amazon
affiliate I earn from qualifying purchases.
My full disclosure policy can be found here.
Hello hello and happy November to you! It's turkey month!!!! 🦃
I'm always excited to celebrate Thanksgiving because it means family, great
food and lots of together time (Mr DIY would add football!) This year
we'll be flying to North Carolina to celebrate Thanksgiving with Mr DIY's
family and it will be so nice to see everyone again (it's been a whole year!).
However you choose to celebrate Thanksgiving, I'm sure a large and delicious
meal is included in the festivities!
You know how when you were a kid and you felt SO cool when someone bought you
a gift that had your name on it?! Today I want to show you how to make the
simplest and most inexpensive place cards for your Thanksgiving table!
Personalized place cards are a way to make everyone feel extra special and
loved - and these ones don't take long to make at all! Are you ready?
How to make the easiest maple leaf place cards
Gather and prep leaves
These place cards are made with real maple leaves! So go outside and grab
however many you need. If they're already dried, like mine were, that is fine.
You do want to choose ones that have dried as flat as possible. Of course, if
you can't find maple leaves, any large leaves will do! If your leaves aren't
completely dried out yet, set a heavy book on them to keep them flat while
they dry out.
Next, add a little warm soapy water to your sink and gently wash the leaves to
remove any dirt, grit and spiderwebs (we don't want to bring those to the table!).
Rinse the leaves gently and set aside to dry.
Personalize maple leaf place cards
You can personalize these dried leaf place cards several ways. I'll mention
more options but first I'll show you what I did.
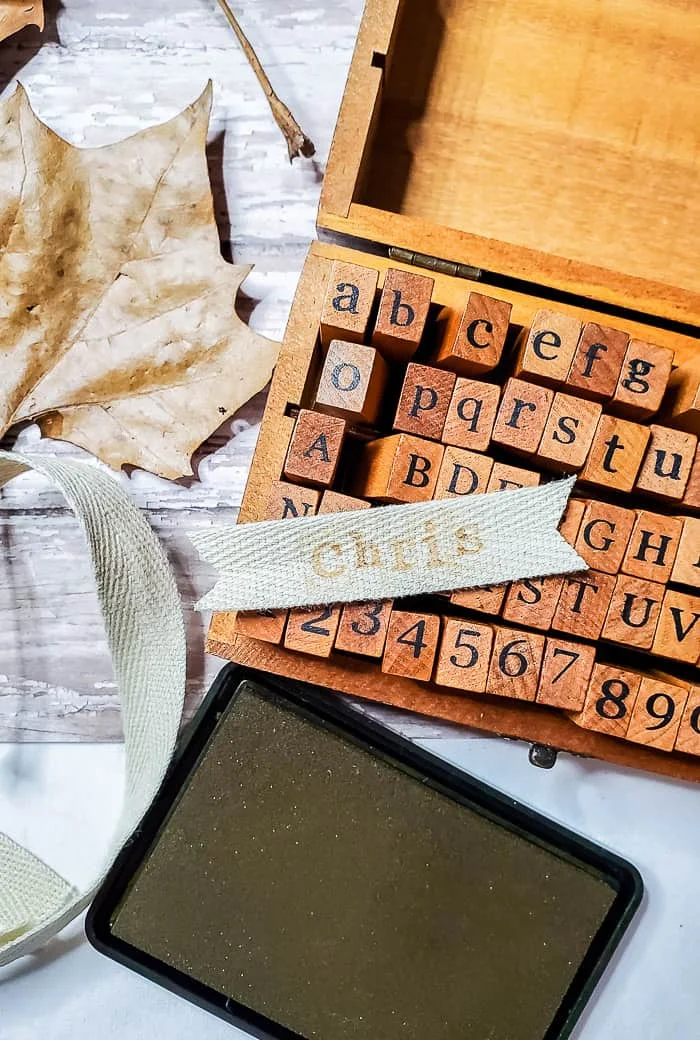
I used a set of stamps that I bought last year when I crafted DIY Christmas tags and ornaments using air dry clay. I love this little set, it comes in its own box and has both upper and
lower case alphabets as well as numbers and punctuation marks! It's a great
buy and I'm sure you (or your kids or grandkids) will be able to use it often.
You can see the stamp set on Amazon here.
I also used some natural cotton twill ribbon. Now, in full disclosure, the
ribbon I used came tied around a blanket I purchased, and I saved it! But if
you need to, I would suggest using
cotton ribbon like this
or
cotton twill tape like this.
The last item you'll need is rubber stamp ink. I used a pad of brown ink, but
in hindsight I wish I would have used black ink because the names would have
stood out more! You can find a
similar ink pad here and this is the
black ink
I would recommend. If you're a long-time crafter, you likely already have
these supplies in your stash!
The stamps definitely give a homemade look to this project! Don't stress if
the letters aren't perfectly even or you get a little smudge here or there.
These place cards aren't meant to be displayed in an art museum 😃 They're
meant to be a quick and easy way to personalize your Thanksgiving table for
your loved ones! They will appreciate it ❤
Designer tip: leave the ribbon intact and stamp one name, then cut the
ribbon.
After you've stamped your loved one's name, notch the ends of the ribbon using
scissors. This is really easy to do and I'm sorry my photo below is so blurry.
To notch the ribbon, fold it in half lengthwise. Start cutting at an angle
from the fold to the edges with sharp scissors. If you need to, practice this
on a piece of paper before cutting the ribbon.
The leftover ribbon will now have a V and you'll have to notch the ribbon end
again before you stamp the next name.
Notching the ribbon just makes it look a little more finished, but you don't
have to do this if you don't want to!
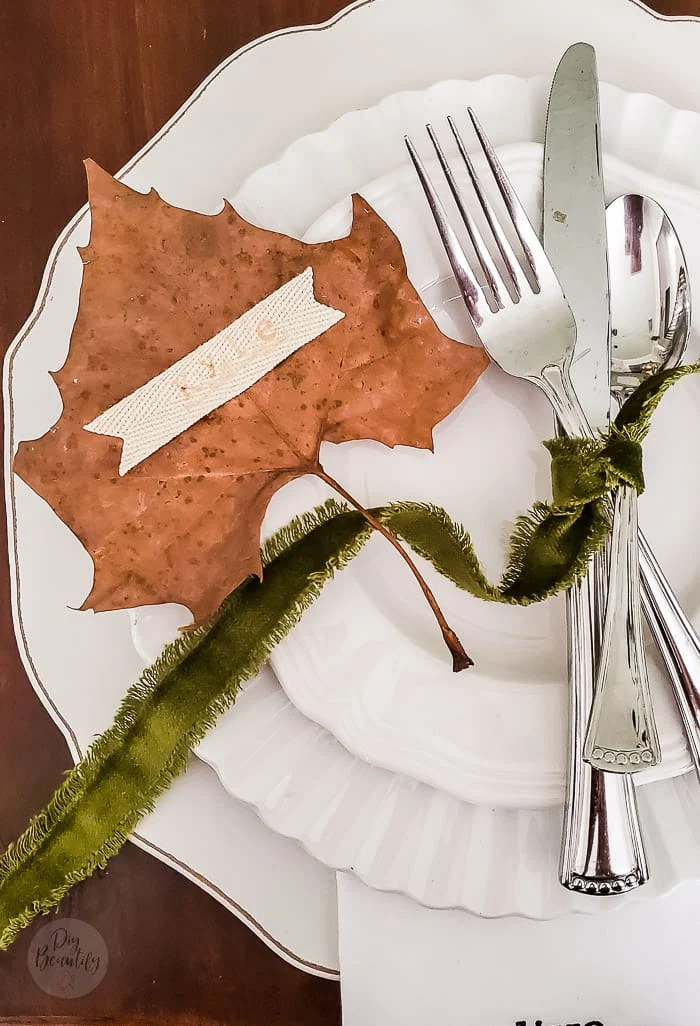
The last step is to adhere the stamped ribbon to the leaves with just a dab of
hot glue.
Now these easy maple leaf place cards are ready to add to your table! Custom
place cards are a great way to let people know where you'd like them to sit,
without any fussing, lol! You can tell them to just look for their name and
without any drama, you've successfully kept Great Aunt Ida across and down the
table from Uncle Ed 😄😁 (this never happens in my family, lol!).
These place cards are so easy but I did promise you a couple variations:
- If you don't have stamps you can use a fabric marker or other non-bleeding marker and write the names onto the ribbon
- Don't want to use the ribbon? Simply handwrite the names directly onto the leaves themselves! You can use a metallic Sharpie or just regular black ink. Don't like your handwriting? Involve the kids (or that cousin with the amazing penmanship!) They will love to contribute to the Thanksgiving table decor!
- Instead of ribbon, you can use regular paper! Just cut to about 1/2" wide and cut lengths as needed. You can still notch the ends (instead of pressing the paper when you fold it, just hold the fold loosely when you cut the notches to avoid creases)
Everyone will enjoying seeing a personalized name card at the table when you
gather to enjoy your Thanksgiving feast!
Click here for more details on how I decorated my Thanksgiving table this
year and tips for decorating a beautiful table that looks fussy but is
really simple to pull together.
What are your Thanksgiving plans this year? Will you be travelling (maybe out
of state) to see family? Or maybe you're hosting this year? I'd love to hear
about it!


Comments
Post a Comment
Your comments are like sunshine and chocolate! Thanks for taking the time to leave a nice one ;) I read all comments and love to respond if you leave your name and email! Otherwise, please look for my response under the post where you left it!