Vintage Inspired Decoupage Wood Heart
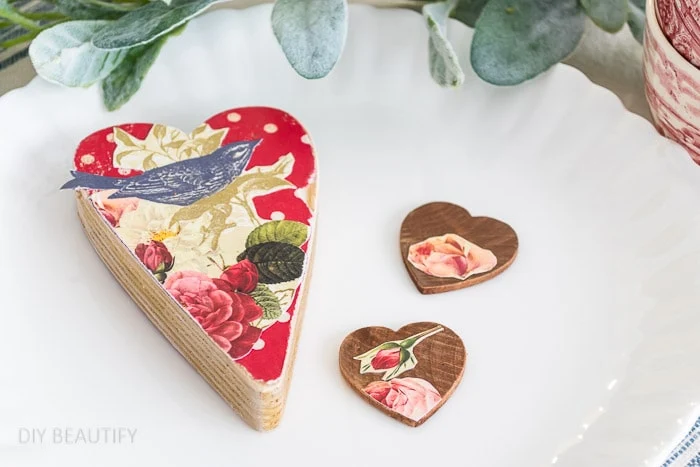
How to give budget-friendly plain wood hearts a vintage feel and customize them for your Valentines decor with pretty craft papers.
This post may contain Amazon or other affiliate links. As an Amazon
affiliate I earn from qualifying purchases.
My full disclosure policy can be found here.
Are you ready for another Valentine's Day craft? 💗💕
Oh good, me too! It is February after all, and winter crafting is always a great way to make those long winter days go by faster!
In case you've missed any of my recent posts (or you're new here), I've
already shared my charming
vintage Valentines card wreath, some ideas for
styling a hutch for Valentines
with vintage pieces and a
super simple heart garland
that you can make in about 10 minutes.
It's funny, but some years I've been all about neutral decor, and other years
I'm craving color. This year, after putting away the riot of Christmas decor,
our home looked so bare. With just a few simple and inexpensive crafts, I've
added a little color and we're all loving it!
See all my Valentines ideas here
I've had this large wood heart for awhile, I bought it last year from Dollar
Tree. It's about an inch thick. I was inspired to turn the unfinished wood
heart into a vintage inspired piece of Valentines decor, and it turned out so
cute!
Let's jump into this easy craft.
How to make a vintage inspired decoupaged wood heart
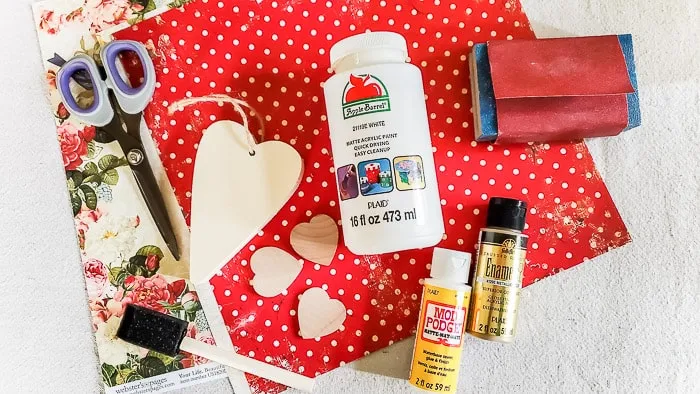
Supplies
- wood hearts (small ones here) and large ones ( this is the one I used) and here
- matte mod podge
- craft brush
- scrapbook paper
- gold acrylic craft paint
- sand paper
- white acrylic paint (optional)
Start by removing the hanging cord and sanding any rough edges of the heart,
including the sides. Don't worry if your wood shapes have holes, we'll be
covering them up!
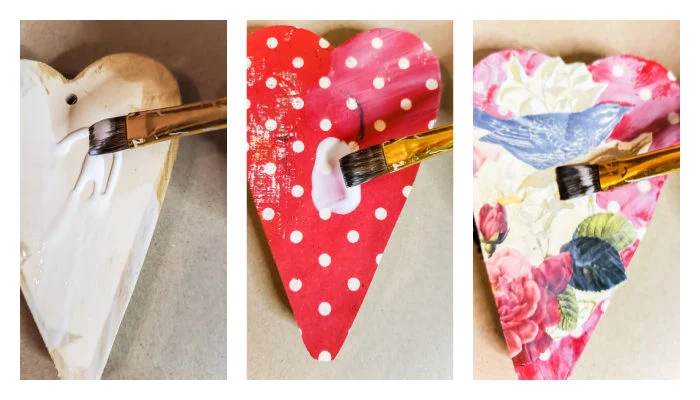
Next, trace the heart onto the back of scrapbook paper. I chose to use a red
polka dot paper as well as a floral one; both papers have a vintage feel and
they are heavier than regular copy paper. You can buy individual sheets of
scrapbook paper at your local craft store. You can see how I layered my papers
below.
Pour a little decoupage medium (Mod Podge) onto the wood heart and brush it
smooth. Place the paper heart cutout (bottom layer) on top and smooth any air
bubbles out with your finger. Brush the top of the paper with another coat of
Mod Podge and place the decorative paper on top, if using, topping with
another thin layer of Mod Podge. Set aside and let it dry.
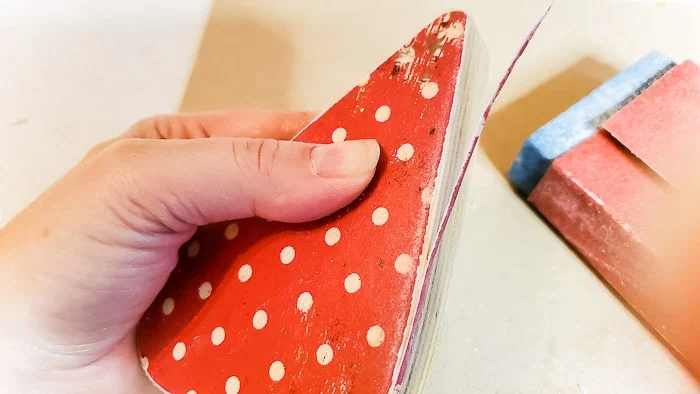
The next step is a tip I learned when I was heavily into paper crafting.
There's a simple way to remove that extra little lip of paper that is
extending past the edges of the wood heart.
Can you guess what it is?
Good old sandpaper! Fold a piece of sandpaper in half (or wrap it around a
block of wood) and gently rub it on the edges of the wood heart. The edges of
the paper will fall right off.
The results are a nice, crisp, professional look. I'll bet you never thought
of an inexpensive wood shape as looking professional, but there you have it 😏
When the Mod Podge is fully dry, it leaves a nice smooth feel to the paper. If
you want to soften the gold paint, you can dry brush it with a little white
paint.
And that's it...a super easy Valentines DIY, and a craft idea that you can use
year round on all kinds of decor!
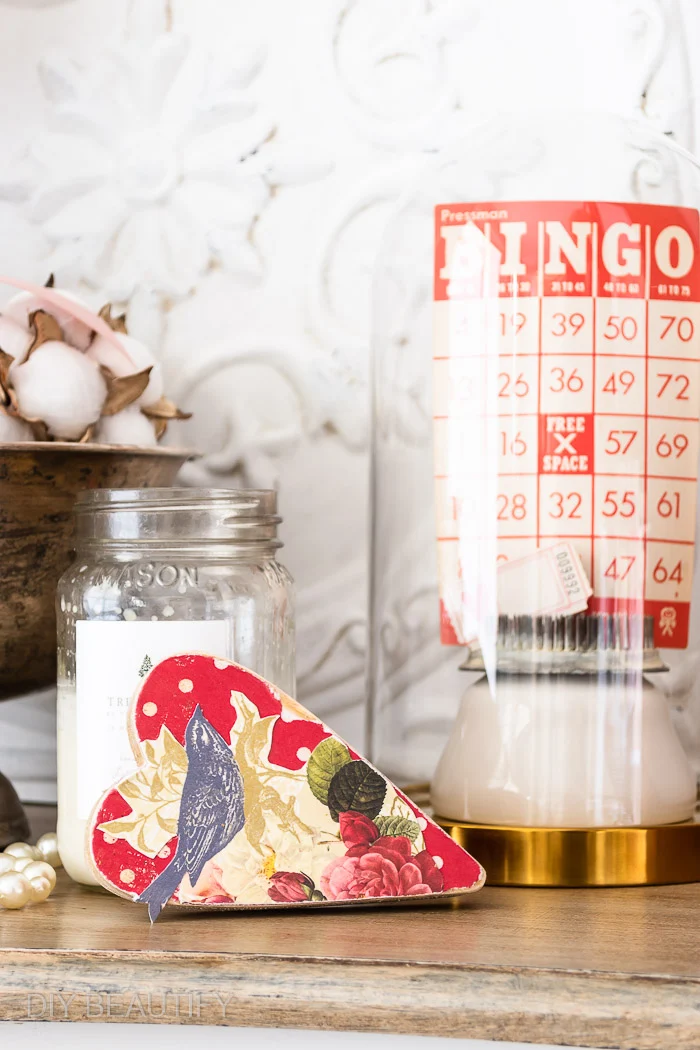
I decorated a small dresser with a few vintage decor pieces and added this
heart. It looks so charming, and those gold edges match the gold of the
vintage Valentines cloch.
Click here to see 9 more Valentines cloche ideas that my blogging friends
and I recently shared.

To see more of my vintage Valentines vignette ideas and my tips for decorating
with cloches,
click here.
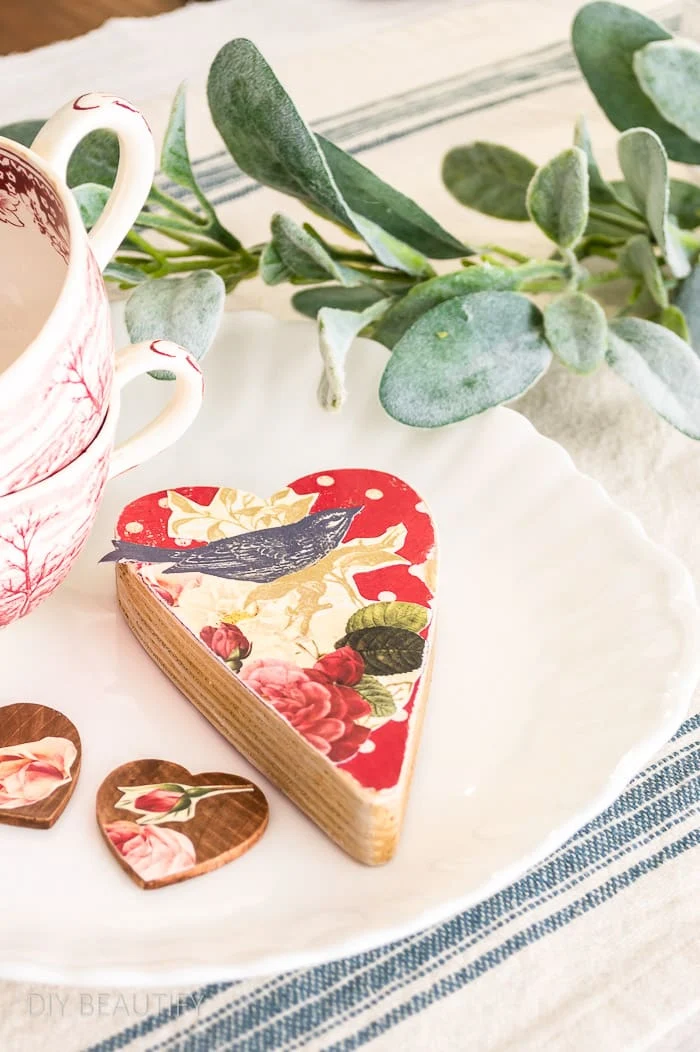
I cut out some small flowers from the floral paper I used and decoupaged them
onto some smaller wood hearts for a coordinating look.
The small clay hearts were a DIY from last year but I love how the white clay
looks with the vintage ironstone and wood and pops of red and pink.
I hope this gives you some ideas for budget Valentines Day decorating,
especially if you love adding inexpensive vintage style to your home!






Love the trees too!! Love what you did with them🌲
ReplyDelete