How to Clean and Antique a Thrifted Oil Painting in 10 Minutes!
Vintage oil paintings are removed from their frames and given an antiqued finish to tone down the bright colors. This easy DIY is a great way to revive any painting!
This post may contain Amazon or other affiliate links. As an Amazon
affiliate I earn from qualifying purchases.
My full disclosure policy can be found here.
Hi friend, welcome to a brand new DIY!
I often see oil paintings at the thrift store, and I usually pass them by.
Recently however, I was so impressed with the way that Natalie from
Vintage Porch on Instagram
antiqued some paintings that she thrifted. Natalie used a mix of black and
brown acrylic paints to deepen the color of her paintings and tone down the
bright colors.
Thrifted paintings
Of course, that very week I spotted 2 paintings at our local Goodwill and
grabbed them because I wanted to try this makeover myself. One of the
paintings was actually falling out of its frame, and I asked if I could buy
just the canvas, but was told that I had to buy the whole thing. No problem, I
figured I could always paint the dated wood frame!
I already had another painting at home that I had thrifted and I couldn't wait
to get started on these makeovers.
My process differed from the inspiration in that
I didn't want to darken the overall feel of the paintings,
I wanted to soften it.
The colors in my paintings were pretty, just too bright for my taste. And by
the way, my paintings are not by any well known artist! I would caution you to
double check before you alter a painting that may have value.
Shop vintage paintings
But I'm getting ahead of myself. Let me show you the 3 oil paintings that I
found. Here they are in their frames, and once I removed the canvases from the
frames.
How to remove a canvas from its frame
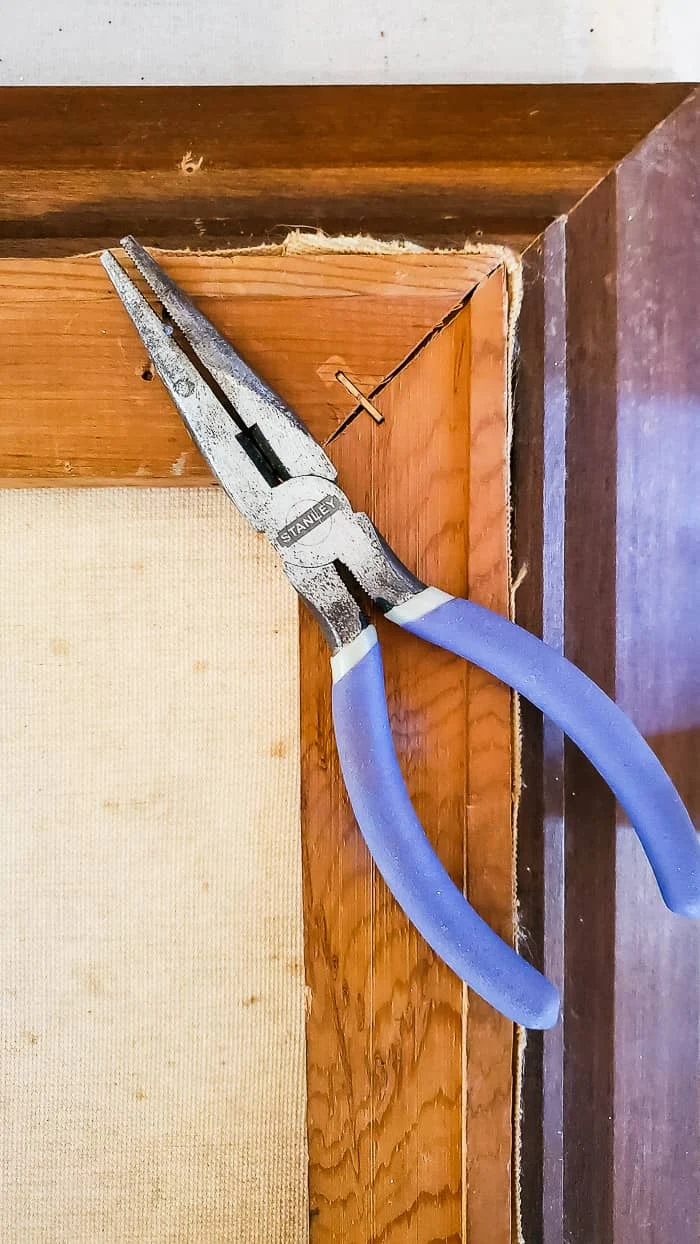
If you flip a painting over, you'll see that the canvas is held in place by a
couple of nails (usually no more than 1 per side).
You'll need a pair of pliers and a
flat head screwdriver. Use the flat end of the screwdriver to lift the nail head away from the
frame (try to straighten it as best as you can), grasp it with the pliers and
pull it straight out.
I also opted to remove the dusty wire hanging from the frames.
How to clean an oil painting
It is difficult to see in pictures, but the paintings were quite dirty and
dusty, especially the one with bluebonnets. I used warm, soapy water (with a
little
Dawn dish
soap) and used a rag to wipe the paintings and frames. I would caution you
against doing this with a valuable piece of art, as I'm sure there is a better
way. However, this method works great on an old, dusty piece. This image below
shows you just how bright the colors were on this particular painting.
How to tone down the colors of an oil painting
I headed outside with my canvases because it was a beautiful sunny day and I wanted to take advantage of that!
I knew I wanted to give these paintings an antique look, but I didn't want to
go dark like Natalie did, I wanted to soften the overall look.
I was surprised at how quickly this process went...it took just a few minutes
to antique these paintings and tone down the bright colors to a more muted
look that works better with my home's decor.
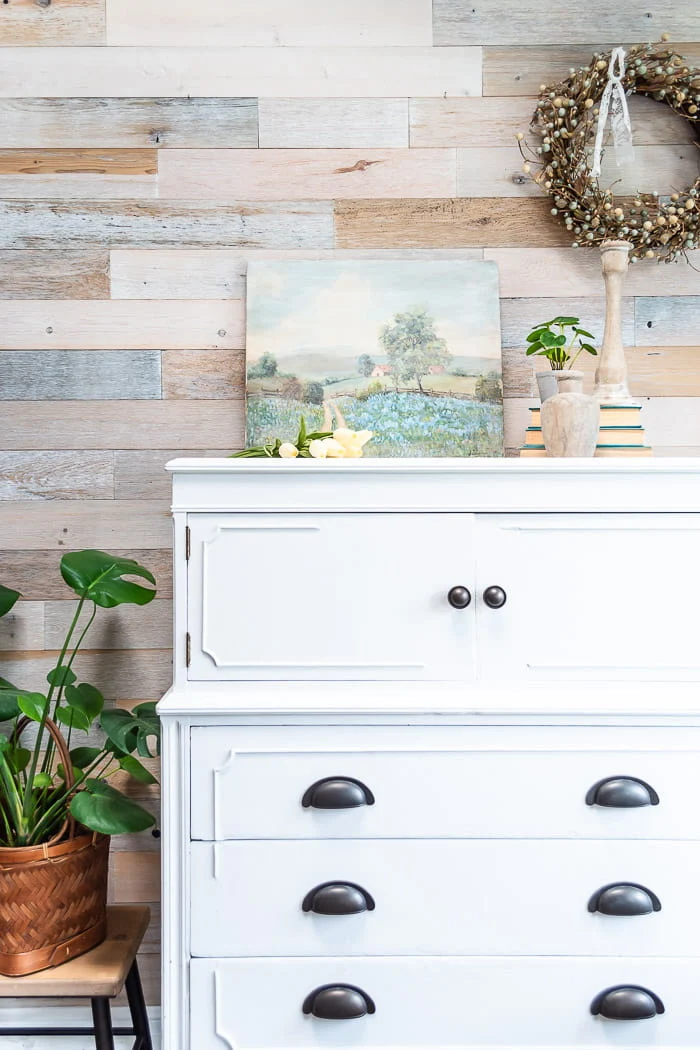
Click here to see how I used two of these paintings on my Spring mantel.
Supplies
- burnt umber acrylic craft paint
- water
- disposable plate or bowl
- damp paper towels or rag
- DecoArt Vintage Effects Wash in white
- paintbrush (optional)
I mixed a little burnt umber acrylic paint with some water on a paper plate to
make a wash. Using a damp paper towel, I dipped it in the wash and then swiped
this mixture across the painting, adding and removing where it needed. Then I
dipped my brush into the vintage effects wash
(which is already like watered down white paint) and brushed over areas
that needed to be a little more muted.
This is a really personal process and depends entirely on both the painting you're working with and what look you prefer! I found that adding the brown mixture helped to give the paintings the antique look I wanted, while the whitewash gave a muted look. If any areas felt too heavy or dark, it was easy to go over them with a damp paper towel and remove some of the paint while it was wet.
I was also trying to soften the colors and I think the vintage wash did the
best job with that. I've used this product before when Mr DIY and I made a
small cottage side table
and I stenciled the top. You can see how the vintage effects wash softened the
colors
here. You can add or remove paint while everything is still damp. Don't forget to
antique the edges of the canvas too!
I'm sorry I don't have any in-process pictures but my hands were full and I
didn't want to stop to take pictures in case the paint dried!
Like I said, I had all three paintings done in under 15 minutes! They
dried super fast and I was ready to decorate with them.
Before and after
The countryside picture of the bluebonnets in the field is probably my
favorite of the three. I would love to live right here! I wanted the
bluebonnets to still be blue so I did wipe off most of the brown paint, but I
liked the color toned down a little with the white wash. Here's the before.
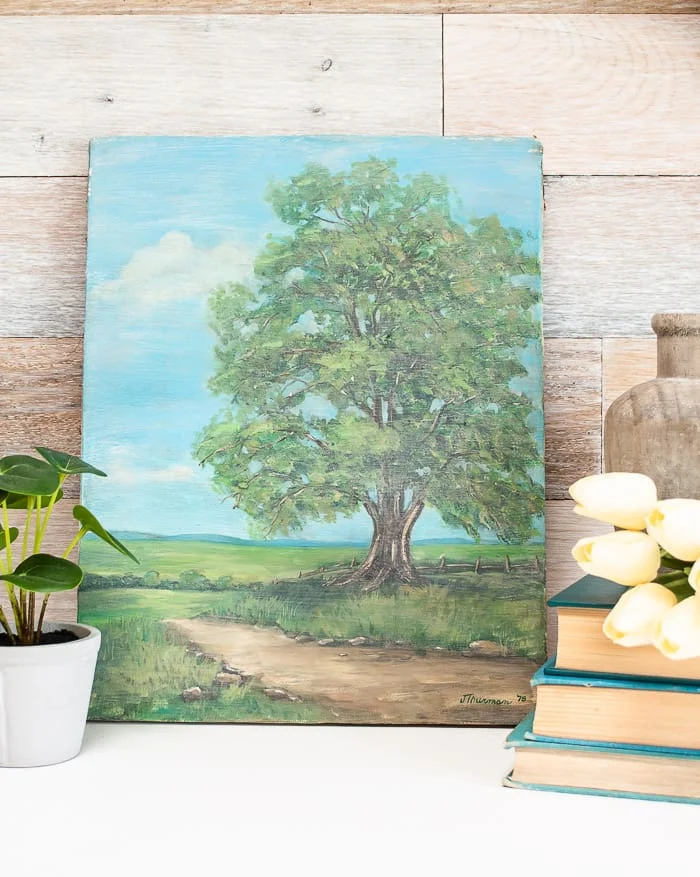
The bright green tree painting turned out so good too! Here's the before (see how dirty it is on the left side)...
And after. This painting looks great with the colors softened.
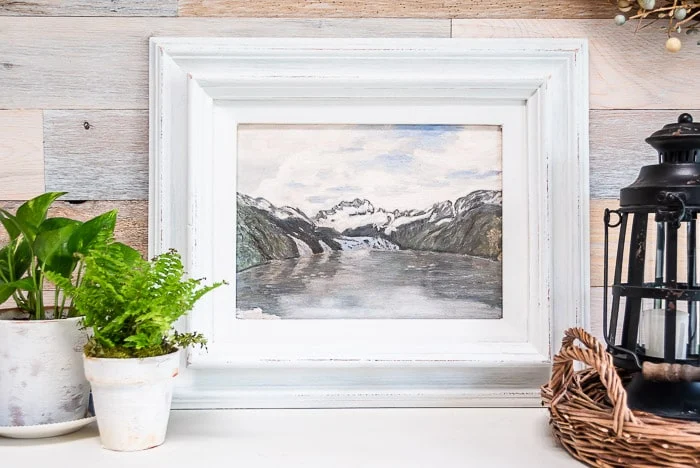
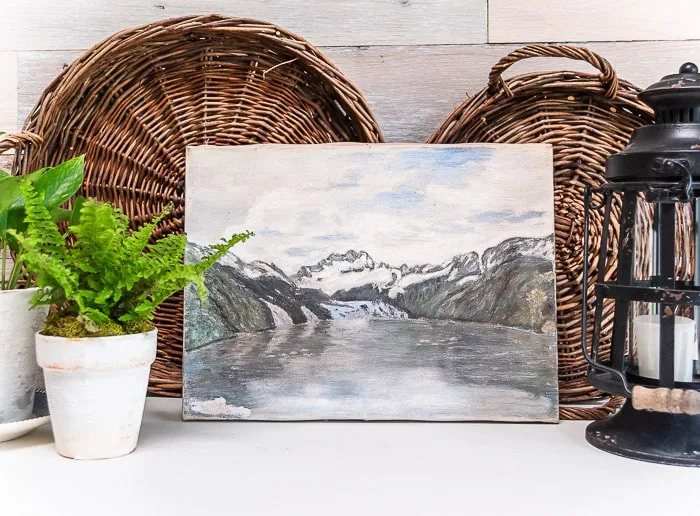
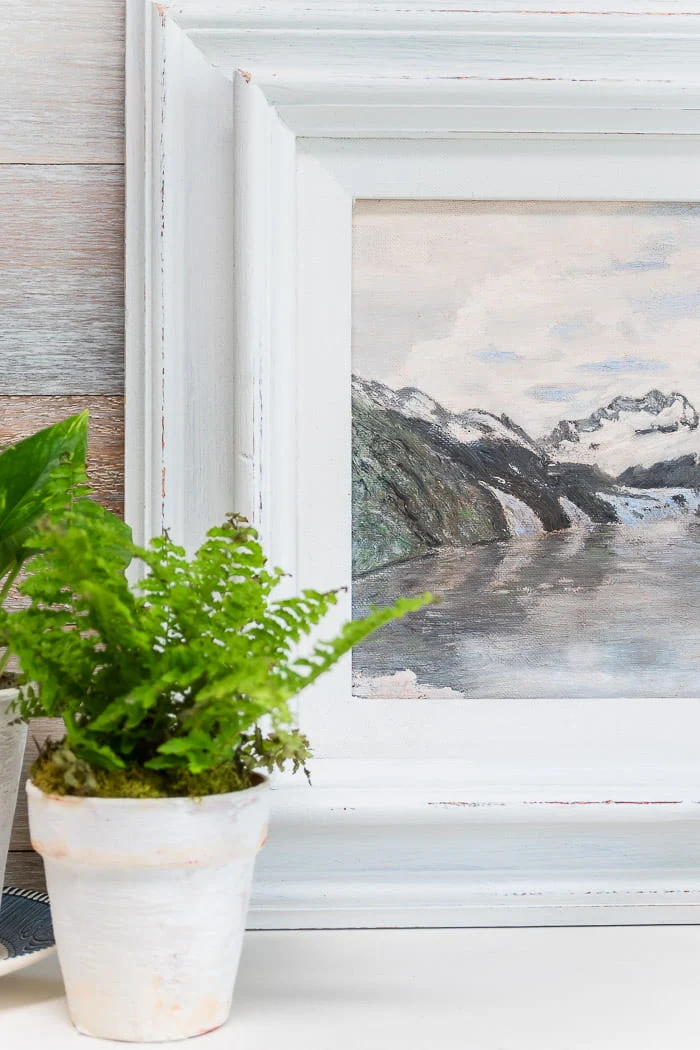
The Glacier Bay painting is the smallest of the bunch and didn't need much.
Just a little brown antiquing gave those white clouds a little more
dimension in my opinion. Here's the before.
And the after.
Antiquing these inexpensive thrifted oil paintings was fun and very easy not
to mention it cost me nothing because I had the paints! I saved the frames
and painted them white. I actually added the Glacier Bay painting back into
a frame because it needed more visual weight.
I'm curious if this is something you would try? Do you like the antiqued
look of the paintings or do you prefer the before?
Pin it to remember
bringing beauty to the ordinary,









Very impressive transformation Cindy. Have you ever thought about a new career as a framer? I love them all!
ReplyDeleteThanks so much Mary!
DeleteI love the Glacier Bay painting as it reminds me of the trip I was blessed to take to Alaska in 2016. All the paintings look fabulous after the process. Do you know if the paintings have to be oil. Would this work on watercolours or acrylics?
ReplyDeleteThank you so much! I'm not sure how it would work with watercolours or acrylics because those are both water based. However, if the painting is old and not valuable, I would definitely try it!
Delete