How to Make an Easter Egg Wreath
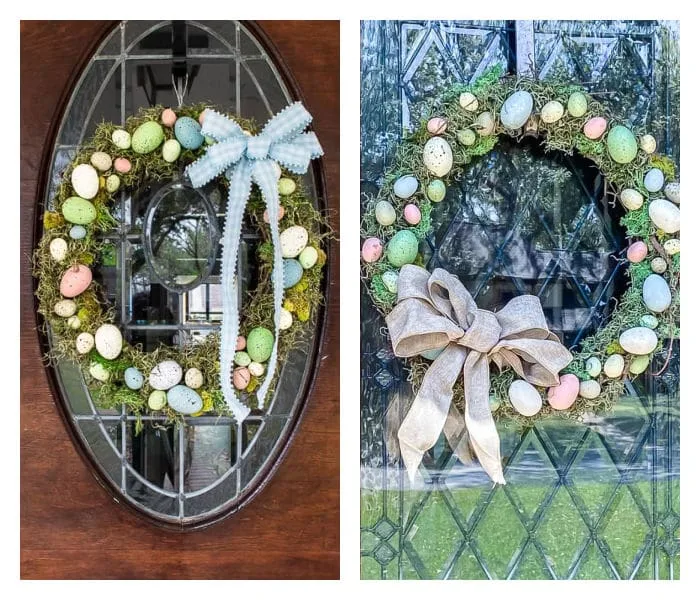
An Easter egg wreath that's simple and affordable to make with speckled eggs and moss. A blue gingham bow will add a pop of color to your front door for Spring!
This post may contain Amazon or other affiliate links. As an Amazon
affiliate I earn from qualifying purchases.
My full disclosure policy can be found here.
Happy almost Easter weekend!
I hope you have some fun plans for hanging out with family but if you don't,
why not grab the kids and make an Easter egg wreath! This wreath is
affordable, quick and easy, and I'll bet all the craft stores have their stuff
on sale too, so it should be even cheaper to make!
Hot tip: Save money and make your own beautiful wreath filled with pastel plastic eggs, moss and a pretty gingham bow!
How to make an Easter egg wreath
This wreath is so simple to make, it hardly warrants a tutorial. However,
there are a few tips and tricks that I'll share along the way to ensure you
successful wreath making!
This is an affordable DIY wreath that cost less than $18 for all the supplies*
Most of the supplies came from Hobby Lobby, but I'm linking to similar
products on Amazon below in case you don't have a HL near you.
*update - I added two packages of
these eggs
this year to make my wreath fuller (they're currently $2.99/pkg at Michaels)
Supplies
- grapevine wreath form (mine is18")
- speckled eggs (Hobby Lobby and Michaels)*
- moss (both reindeer moss and green Spanish moss)**
- hot glue
- wired ribbon to make a bow (I used blue gingham ribbon)
* you can use a wide variety of eggs for this wreath, plastic ones are
lightweight and will hold up well outside in all sorts of weather
** I grabbed a couple bags of
this green moss
from the dollar store but had to dip into my stash of Spanish and reindeer
moss because I ran out. The pastel eggs would also look amazing using
excelsior - perfect if you like a softer, more neutral look!
Making the wreath
First off, this is a messy project! The grapevine and the moss will get
everywhere, so make sure you're working on a covered surface or somewhere that
is easy to clean!
Getting started
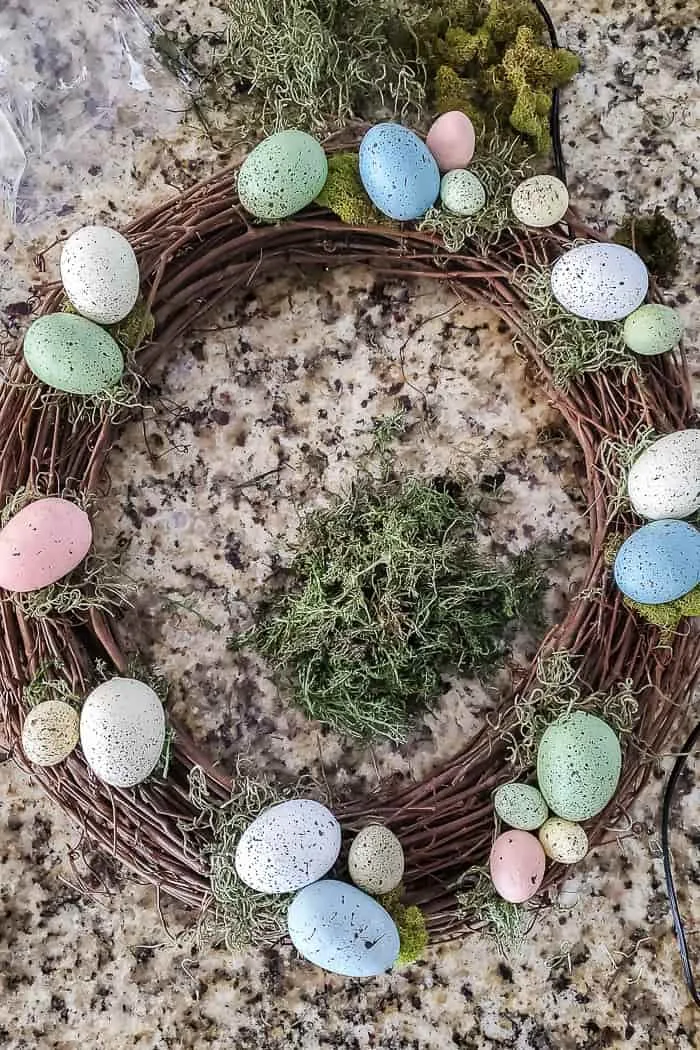
I found it easiest to lay out the eggs on the wreath form to get a rough idea
of how I wanted the finished wreath to look and to make sure I had enough of
each color egg for a balanced look. Also, the eggs I purchased came in a
couple of different sizes, and the smaller eggs were great to fill in empty
spots.
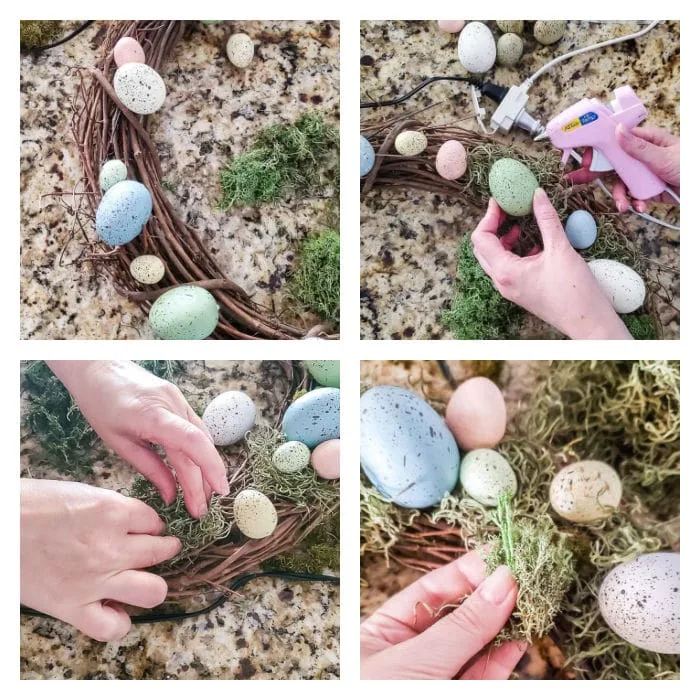
Designer Tip: Hot gluing an egg to a grapevine wreath base is a little
tricky because there isn't a smooth surface. I solved this by gluing an egg
first to a small piece of moss, then hot gluing the moss to the wreath.
Once all the eggs were attached, I went back and filled in the bare parts on
the wreath form with more moss.
This is the kind of DIY wreath that doesn't take a lot of concentration, and
was finished really quickly.
To keep costs down, I didn't fill the wreath up with eggs. Once I had all the
Easter eggs and moss on the DIY egg wreath, I made a quick bow from pretty
blue gingham ribbon, and attached the bow to the wreath with
craft wire.

Update: after finding
these pastel eggs
on sale at Michaels for only $2.99 each, I decided to fill in the empty
spaces on the wreath and I really love the fuller look!
SHOP THE POST
A new wreath adds such a fresh and pretty look to the front door and makes it feel more welcoming! Or hang your handmade from from a mirror, antique window or chippy door for a fun nod to Easter inside your home!
Whether you fill your handmade wreath with eggs, or leave it more sparse, you
will have a beautiful Easter wreath that you'll love to hang each year!
Pin to Save
More DIY wreath ideas


Very sweet. To Spring and new life!
ReplyDeleteThank you!
DeleteOh my gosh... this Easter egg wreath is so DARLING! Those speckled eggs do it for me. NEED one!
ReplyDeleteThanks Donna, I love the speckled eggs too!
Delete