Adding Function and Style to a Small Laundry Room
A small builder grade laundry room gets a huge dose of added function and style with built in shelves, a brush stroke wall and hanging hooks for brooms and mop, all for under $50!
This post may contain Amazon or other affiliate links. As an Amazon
affiliate I earn from qualifying purchases.
My full disclosure policy can be found here.
I'm no stranger to budget laundry rooms! We turned our
builder-grade laundry room into a farmhouse beauty for under $200
when I was a brand new blogger, complete with
peel and stick tile floor,
DIY shelves and cabinets, and a clever way to
disguise a huge electrical box
in the middle of the wall! In our Texas house we took on a budget laundry room
makeover for under $100 that you can check out
here.
Here in our Mississippi rental, our laundry room is the first DIY project that
we tackled in our new home and it's a great one! We needed function in this
room in a big way! The single cabinet didn't offer much in the way of storage,
and the big wide open space between it and the wall was just begging for open
shelves!
Yes, this is a rental and we're only planning to be in this home short term.
But here's the thing. I want to be comfortable in this home during that time,
and if we can spend under $50 and a little sweat equity to improve the
function in our laundry room by 100%, it's totally worth it to us!
I'm so excited to show you how we completely changed this room for less than
fifty bucks!
Laundry room lacking storage, function and style
The laundry room tucks away under our stairs, so the back wall has an angle
that makes it difficult to add any sort of function on that wall. There's a
short door with a crawl space directly under the stairs that I call my 'pillow
storage'. It's not a room I want to access often because like I said, it's a
crawl space.
So the only storage was the single cabinet on the wall. The blank area to the
right of the built in cabinets was just begging for some kind of open shelving
to improve function. That single cabinet is great, but offers limited storage.
We'd only been in the home a few days, but everything was sitting on the
machines and on the floor. I knew we could improve it!
How we added built in shelves and style to our small laundry room for under $50
We wanted to keep this project as cost effective as possible. Remember, it's a
rental. Thankfully we were starting with a beautiful blank slate - pale
grayish blue walls, white cabinets and gray slate floors. In fact, our old
washer and dryer took the real estate prices down quite a bit in the area when
we moved them in lol!
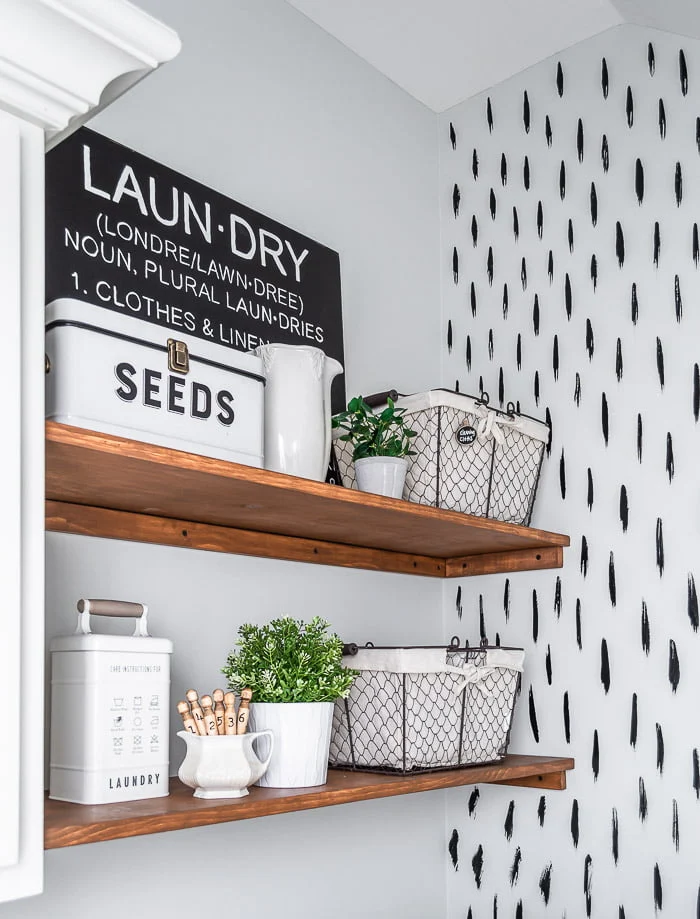
We decided that two shelves would feel just right in that empty space, and
we'd span them from the cabinet all the way to the wall, getting as much
storage as possible! How did we come to that conclusion? Well my biggest beef
with the cabinets was nothing would fit unless I removed a shelf. So we
measured the tallest basket/cleaning tote that I wanted to use on the shelves
(and that Costco sized jug of pods) and went from there. Mr DIY took
some measurements and then headed to Home Depot with his list.
Supplies
- 1"x12"x 8 ft premium kiln-dried square edge whitewood board
- 1"x2"x 8 ft kiln-dried square edge whitewood board
- sandpaper
- 1-1/4" black screws (we used these ones)*
- drywall anchors
- countersink drill bit
- drill (Mr DIY love his cordless drills!)
- Minwax wood finishing cloths (I used Chestnut)
- clear paste wax
- sponge applicator
*
Mr DIY says you don't need to use drywall screws; we used them because
they were black and gave a rustic look to the shelves
Step One: Cut wood to size
Based on the measurements we took, Mr DIY cut the 1x12 8-ft board down to size
(the shelves each ended up being just shy of 4 feet wide). Rather than
floating the shelves, which requires the use of a drill press that we don't
own, we decided to attach the shelves to boards that we pre-mounted to the
wall. This is the same way we
mounted our pantry shelves
in our TX home. It gives a nice finished look, especially when painted or
stained to match the shelves.
Step Two: Pre-drill counter sink holes
Not sure that's worded correctly, but Mr DIY first marked his holes on each
board, including the mounting pieces, and counter sunk holes so the screws
would rest inside rather than outside the boards. You'll need a counter-sink
drill bit for this step. He spaced the holes about 8-10" apart. He said this
will depend on how long your shelves are and how much weight you plan to add
to the shelves.
Err on the side of more rather than less!
Step Three: Sand boards
This is where I stepped in. Luckily we were able to find our sandpaper
(did I mention we had just moved in a couple days before starting this
project?). I sanded all the boards, all sides and edges, smooth, wiping away the
sanding dust with an old t-shirt.
Step Four: Stain boards
To keep this DIY laundry shelf project as fast and easy
(and as mess-free) as possible, I decided to try the all-in-one stain
cloths that I've heard about. I ordered them through Amazon, choosing the
Chestnut color and hoping it would be a good match to the rest of the woods in
our home.
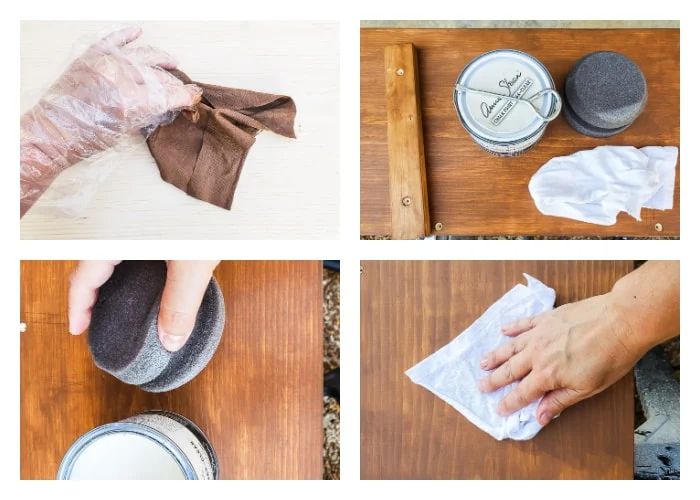
When I was ready to stain the shelves, I wasted several minutes looking for
plastic gloves before realizing that the package of stain cloths includes a
pair of gloves! They're folded up really tiny and attached to the back of the
package. Once I figured this out, I was off and running.
The package comes with 8 cloths, and I think I used about 6 in total. It was
hot outside and the stain dried fairly fast. Fast enough that I didn't bother
'wiping the excess stain off with a clean cloth' like you normally do
when staining! I did a quick second coat and then set the shelves aside to
dry. Please note that if you have drilled countersink holes, you'll want to
add stain to the insides of those as well
(I used Q-tips - and had to go back and do this later because I didn't
realize it was necessary!).
I let the stain dry overnight and then applied two coats of clear wax the next
day. You could also use a
water-based poly topcoat
but I knew where the wax was! I used Annie Sloan clear wax and a sponge
applicator to apply the wax, let it sit a few minutes and then buffed it with
a clean rag.
A top coat not only protects your stained shelves, it enhances the stain and gives it a richer and deeper color. It also adds a smooth feel to the surface, making it much easier to keep the shelves clean. Definitely a step you don't want to skip! Curious about top coat protection options for your painted pieces? You'll want to read this article where I explain all the differences and when it may not be necessary!
Step Five: Install Shelves
We gave the stain and wax a couple days to dry and cure inside the house
before installing them.
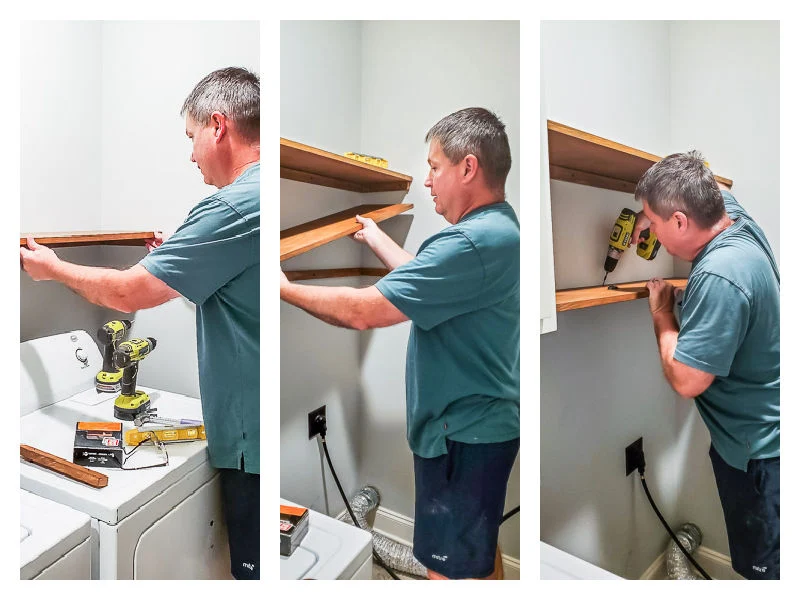
The first step to getting these shelves looking pretty on your walls is to
attach the mounting boards to the walls and side of cabinet
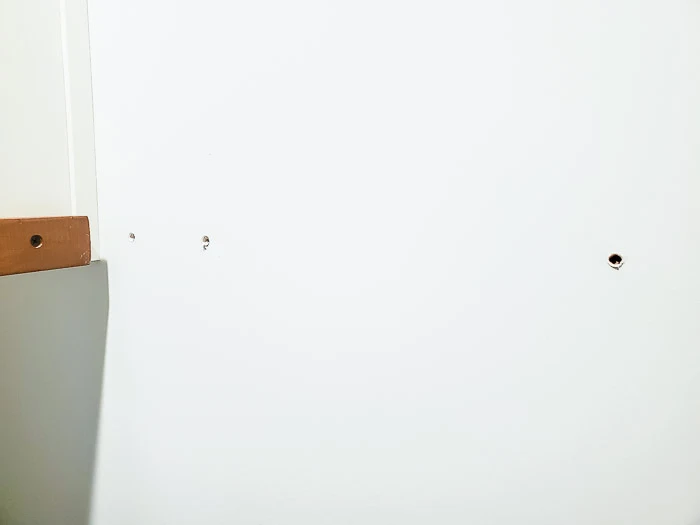
(each shelf will have two short sides and a back to support its weight). You can see how we attached these to fit flush with the cabinet.
To make installing the long board easier
(because you'll need to drill holes into the wall and add anchors), Mr
DIY recommends drilling the screws into the long mounting board just until the
tips of the screws are poking through the other side. Position a level on the
top, hold the board in place and push into the wall slightly so the screw tips
mark the wall. Then you'll be able to easily drill your holes, add the anchors
and screw the board into place.
Once you have all three mounting boards in place, you can lay the shelf on top
and drill it in place to the mounting boards. I hope that makes sense! If not,
please send a question in the comments and I'll have Mr DIY explain it better
lol!
There's a reason he does the measuring and installing and I do the
beautifying haha!
Let's add some Style to a small laundry room!
My favorite part of any room makeover is always making it pretty! It honestly
is what keeps me up at night! I'm pretty sure from that very first picture you
saw that this room wasn't just going to be functional, it was going to be
stylish! Black and white always looks good and is always a classic to fall
back on if you cannot decide on a style or color for a room!
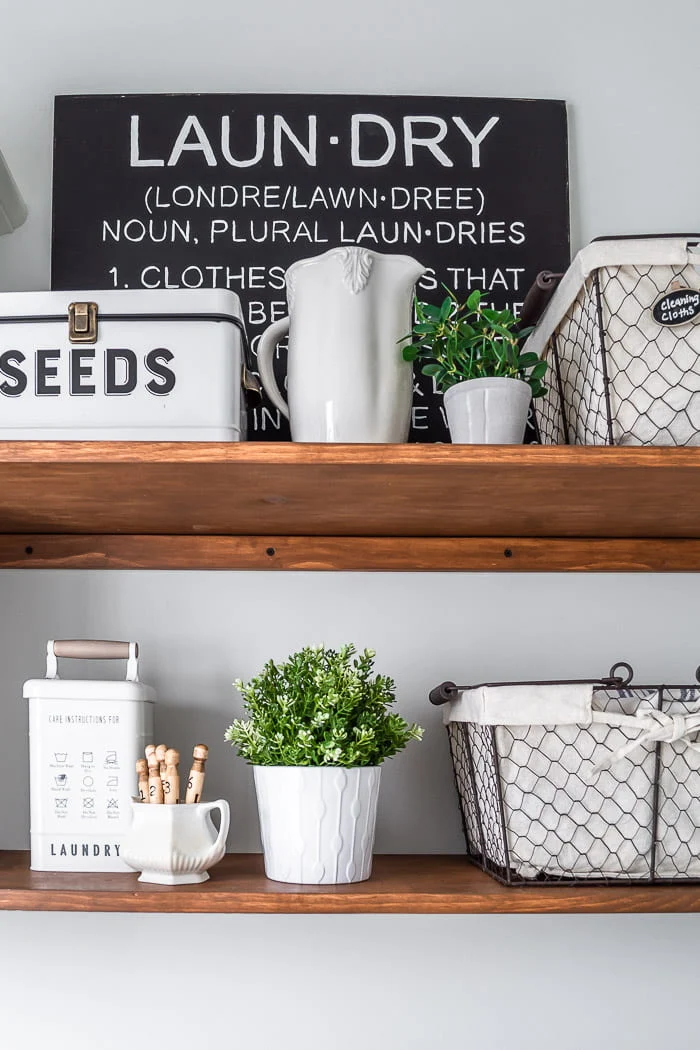
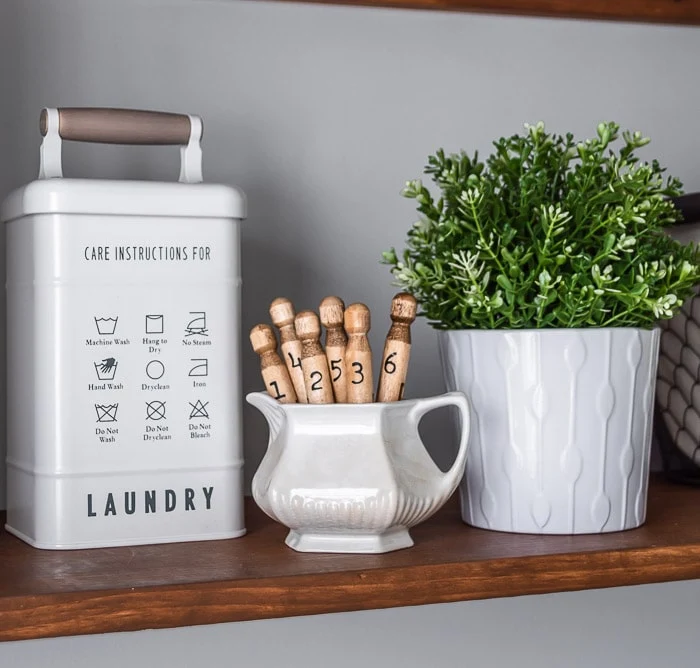
I love when form and function work hand in hand! Those pretty chicken wire fabric lined baskets hide all my cleaning rags, the metal caddy from the Better Homes and Gardens line at Walmart holds soap pods. I even had room to add some pretties, like the faux greenery, a couple pieces of ironstone and my DIY hand painted laundry definition sign (see similar here) . Did you notice the black screws? No? They do a great job blending right in to the rustic shelves!
Across the room I had just enough space to hang a wall mounted vintage
schoolhouse coat rack that holds my ironing board, mop and brooms. Everything
is up off the floor, which makes me happy! You can find a similar
wall mounted coat rack on Amazon here for less than $20! Not long enough? Hang two side by side!
Brush stroke feature wall
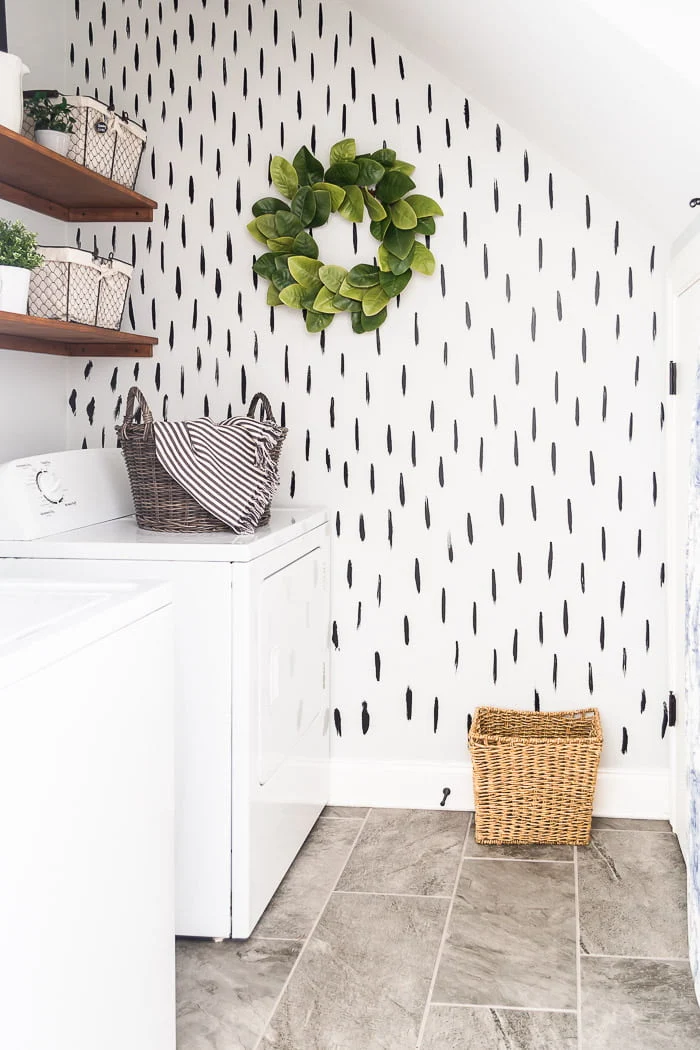
I think the piece-de-resistance in this room is definitely the brush stroke
feature wall! It was a spur of the moment DIY inspired by similar wallpapers
I'd seen online.
How long did it take? Truth?
Only 10 minutes!
Friend, a 10-minute feature wall is such a fun way to add a pop of style and
drama in a room. No commitment, no worry! I do have a couple tips for the best
results that I shared in
this short video
- you can watch me paint this wall!
The crisp black and white brush strokes are not perfect! Each one is different.
I love how they draw your eye away from our old and worn washer and dryer!
Between the new wood shelves and the wall, there's no reason to notice the
machines lol.
I had this post all scheduled to share with you, and I happened to open that
little hobbit door to get the step ladder for a project. What to my wondering
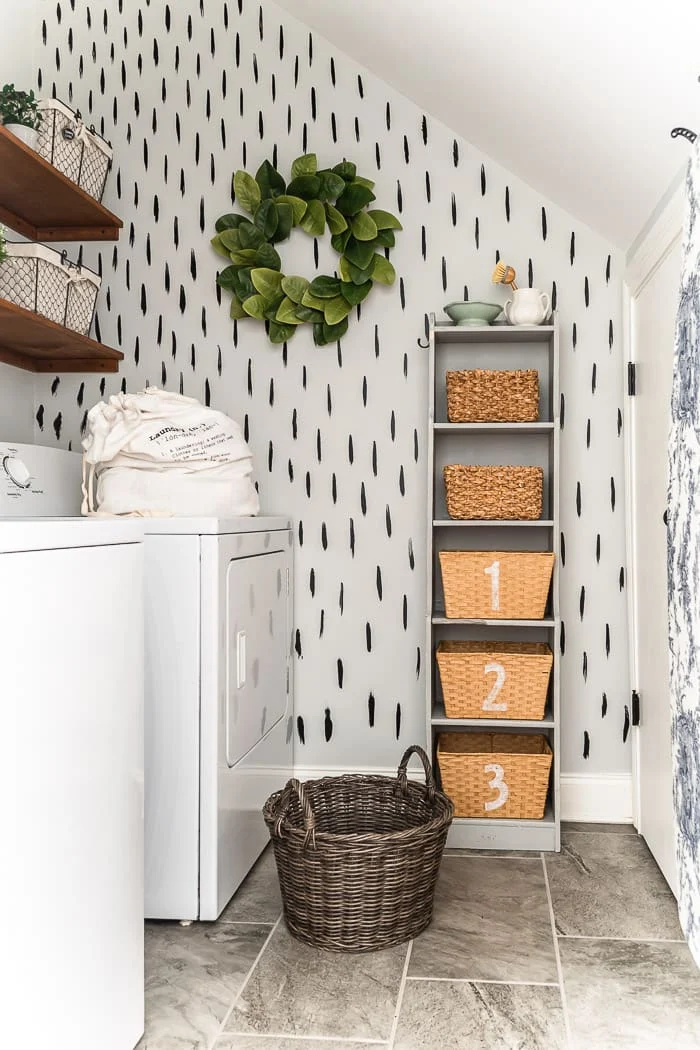
eyes did I notice but the vintage storage tower
(lying on its side because that cubby is height challenged remember!)
from our last laundry room makeover! Someone had tucked it away in there on
moving day. I found myself wondering if it might work, so I hauled it back
out.
I was pleasantly surprised to find how well it fit. We can still open the
dryer door, as well as the little hobbit door (I've decided that's it's new
name - seems to fit) 😃. What I especially appreciate is that you can see this
cute vintage storage tower directly as you enter the laundry room. In our
previous home, you only saw it from the side really. So now I have even more
storage and function in this small space! Woo hoo!
Click here
if you want to read more about this little cabinet and see how I made the
numbered baskets for it. I added a little bowl to the top shelf for loose
change and buttons, and another ironstone sugar bowl with a scrub brush.
I really hope you're inspired to give your laundry room a little upgrade after
seeing how we added so much function, storage and style to our small space!
Please let me know which project is your favorite, the DIY shelves or the
brush stroke wall? As always, sharing with your friends and Pinning images is
encouraged and appreciated.
Pin it to remember!
bringing beauty to the ordinary,









What a great job! Pretty and so functional!
ReplyDelete#Awesome! Love the pics of you and Mr. DIY - and yes, teamwork makes your dreams work = FUN (: Excellent finished project!
ReplyDeleteSo much beauty and function in your small laundry room, Cindy. I’m definitely going to implement a few of these in my even tinier laundry closet! We’d love for you to share your posts at Tuesday Turn About! Hope to see you there!
ReplyDeleteThank you Julie!
DeleteWell you certainly have my attention! My laundry room is small like yours but it's spring loaded with crap. I can do this! Your outcome is so gorgeous and so affordable!
ReplyDeleteIf anyone can do this, You CAN do this Donna! Thanks so much!
Delete