Primitive Farmhouse DIY Sunflowers
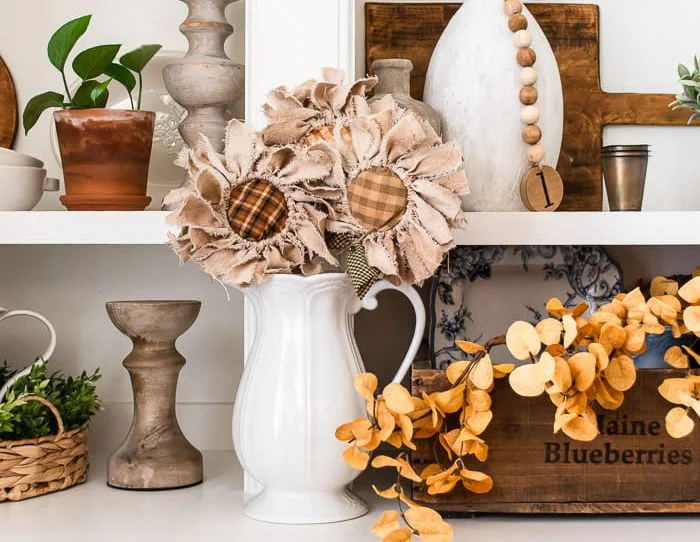
Coffee stained drop cloth and homespun fabrics are use to craft some adorable primitive sunflowers to decorate your home! Step by step video tutorial included.
This post may contain Amazon or other affiliate links. As an Amazon
affiliate I earn from qualifying purchases.
My full disclosure policy can be found here.
Hey friend, it's sunflower season!
Everyone loves these happy flowers, and I wanted to bring the look into my
home with this DIY sunflower craft. There's a touch of a primitive look with
the coffee stained drop cloth and homespun fabric I used, but I think these
crafted sunflowers would really work in any decor. And they are so perfect for
autumn!
I shared a video tutorial on
my YouTube channel if you're interested in watching the video and then come back here for
the supplies list and
bonus tips
for the best results. By the way, if you're not following me on YouTube,
please click the link above and do so right now. Your support is what allows
me to continue bringing you free crafts and DIYs!
DIY SUNFLOWERS VIDEO TUTORIAL
How to make DIY sunflowers with drop cloth and homespun
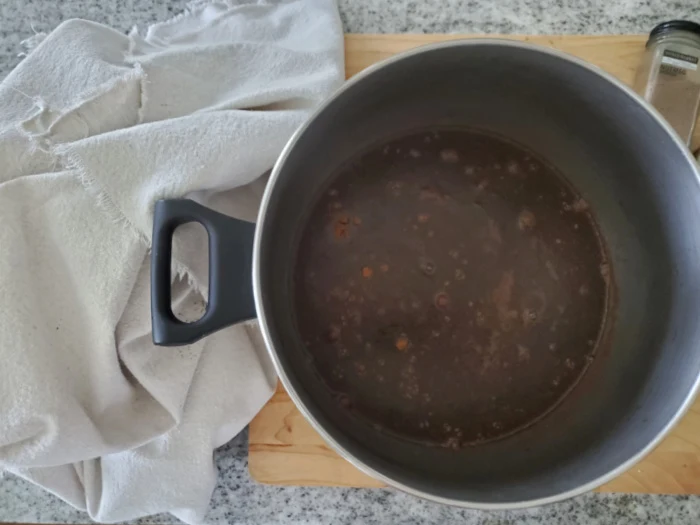
Let's make some sunflowers! I found a few different tutorials on Pinterest, and then put my own spin on it to make these DIY sunflowers my own. One of the tutorials said to stain your fabric with a mixture of coffee, cinnamon, nutmeg and vanilla. You can read more about this process here. I didn't have any instant coffee, so made an extra strong batch of regular coffee.
Insider tip: when I make these flowers again, I will omit the spices. I
just don't think it's necessary, and it did create a lot of cinnamon dust
when I was ripping the fabric!
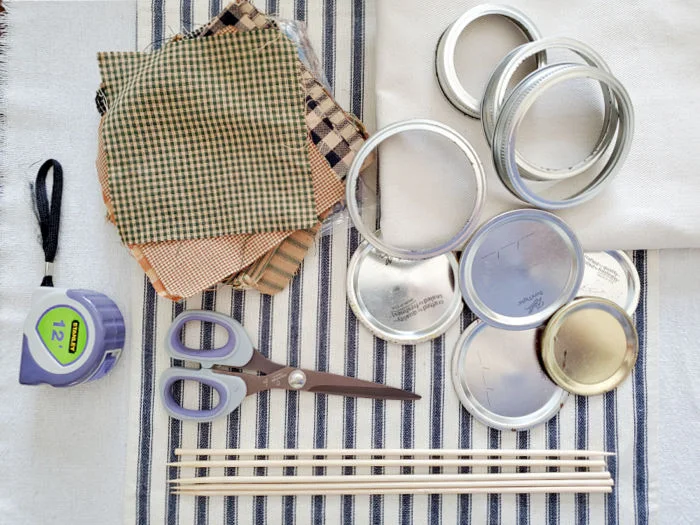
Supplies needed for this project
- canvas drop cloth, prewashed and dried
- strong brewed coffee and a pot or bowl to stain fabric
- measuring tape
- scissors
- mason jar lids and rings (1 set per flower)
- nail and hammer
- homespun fabric (I used this pack from Amazon)
- cotton balls or fiberfill
- hot glue
- 12" hardwood craft dowel rods (about the size of a bamboo skewer but much sturdier)
- brown craft paint or dark furniture paste wax
- jute cord
- paper towels
Step 1: Prepare fabric
I'm sure you could substitute black tea if you're not a coffee drinker! I made
a strong batch of coffee, let it cool, then added it to a soup pot along with
the spices (mentioned above) and about 2 cups of water. If using the spices,
make sure to mix well while the coffee is hot so they dissolve.
Add the fabric to the pot. Squeeze and turn it to really saturate. If you're
after a really strong stain color you can let it soak for awhile. I did not; I
was happy with the color my drop cloth turned just after saturating it. I
removed the fabric once it was completely soaked, being sure to squeeze out as
much excess coffee as possible. Lay the fabric outside in the sun to dry. You will want to turn the fabric
over a couple times to dry the backside as well.
Once the fabric has fully dried, rip it into 1" wide strips. I show exactly
how to do this in the video. Lay a ruler across one edge and snip fabric edge
every inch.
Why rip the fabric? Ripping fabric creates perfect frayed edges along the entire edge, which is very difficult to achieve when you cut it. Plus, it's much faster and lends itself so well to farmhouse, vintage, shabby and primitive crafts!
You'll need to spend a minute removing all the drop cloth strings, and then
cut each strip into 9" long pieces (for a large mason jar ring) and 7.5" long
if you're using a small mason jar ring and lid.
Step 2: Make Hole in Mason Jar Ring
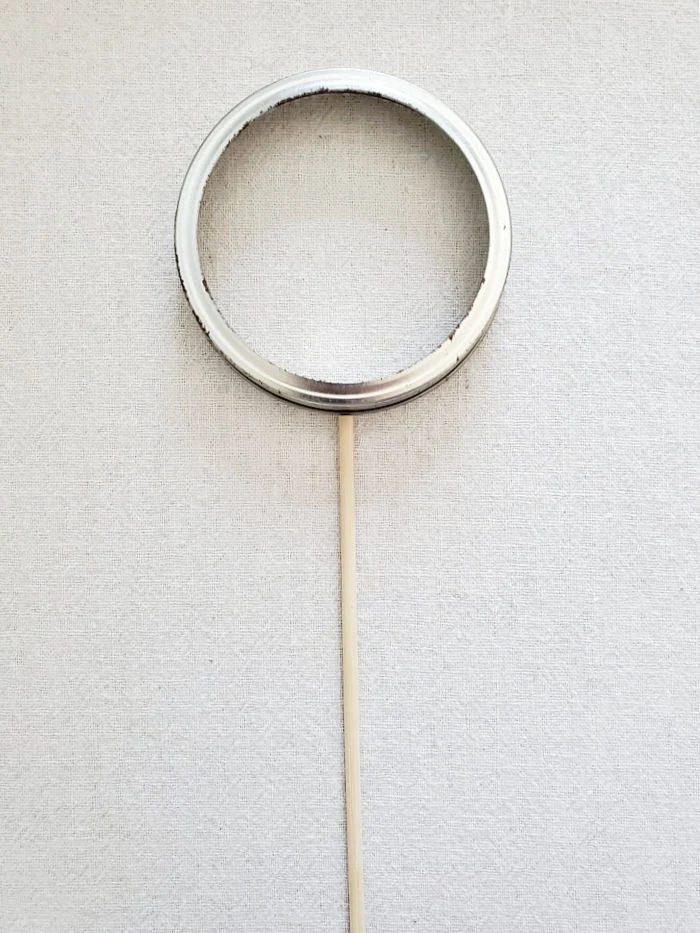
You can use a drill for this step, but we found it easiest to just use a nail.
Before you create your hole, measure the diameter of the dowel you will be
using and find a nail that is just slightly smaller. Use a hammer to lightly
tap until the nail goes through the metal ring.
Insider tip: start with a smaller nail if you're unsure; you want the
dowel to fit snugly or it will just fall out and not work well as a
stem
Step 3: Create Flower
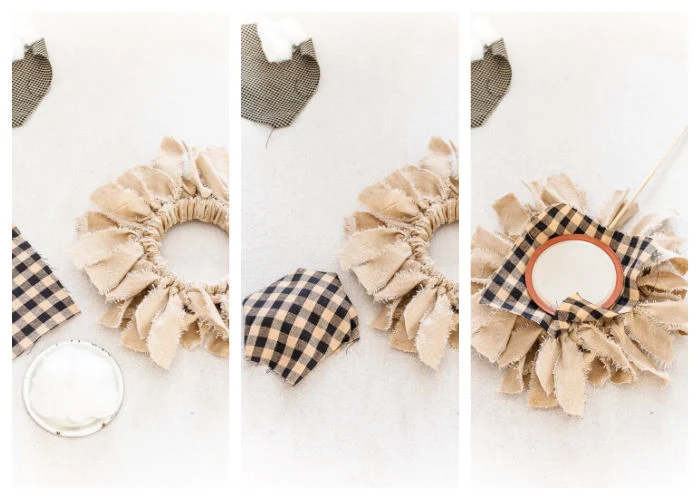
It's finally time to start creating the drop cloth sunflowers. Tie strips of
fabric to the mason lid ring, making a double knot. I suggest inserting the
dowel into the hole while you're tying the fabric strips onto the mason ring
or you may find you lose the spot (ask me how I know!) Tie the strips tightly and work your way around the ring, tying right up to
the hole.
Insider tip: for an extra full sunflower, make sure to slide the fabric
knots closely together to get the fullest possible flower.
Step 4: Add the Center
You might be tempted to skip this step, but I promise this is where the
sunflower really comes to life! We're going to use the mason jar lid to
create a double sided puffy center!
Note: a reader suggested that inserting pictures to the center would make
this a really cute custom gift for grandma, and I agree!
I used the 5" pieces of homespun fabric for the step, and it was the perfect
size and so handy not to have to cut the fabric. Just lay a small piece of
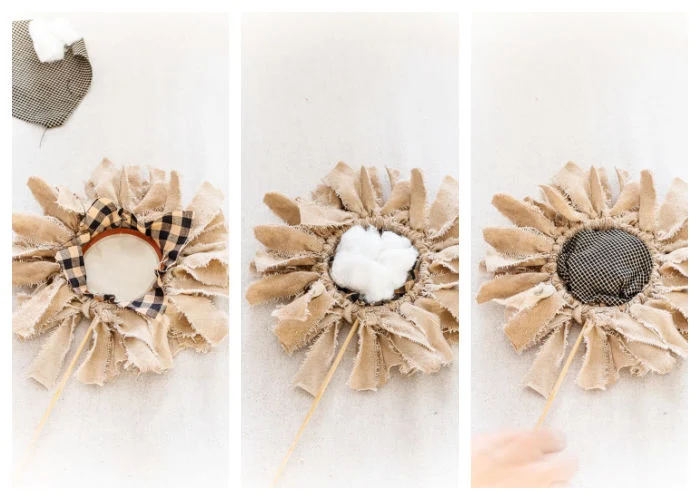
fiberfill or 3 cotton balls on top of the mason jar lid, top with the
fabric, invert and press into the center of the flower. You want to hear a
pop as the lid settles into place firmly.
If you're struggling to get the lid firmly into the center (it's because of
the bulk of the drop cloth), use a small piece of wood. It's very helpful to
help press the metal lid into the center. And you do want to hear a pop! I
didn't take a picture of this but shared it in the video. You'll know the
lid is in there well and good when you flip it over and the fabric looks
tight and nice and poofy!
Step 5: Glue the Backside
Remember I said the center of the flower was reversible? Once you get the lid secured in place with the fabric, flip the flower over. Glue down the excess fabric from the center, add some more fiberfill or cotton balls, and hot glue a contrasting piece of homespun (or other fabric) to the backside.
No matter how you display your DIY sunflowers, they will look great from the
front or the back!
Step 6: Stain Dowel
Use a little dark furniture wax to quickly add a dark stained look to the
dowel rods and insert them into the flower. I don't have a picture of this
step but showed how to in the video. Just use a little dab of the wax on a
paper towel, rub it on and then wipe any excess off.
Step 7: Create a Quick Leaf
This bonus step is in the video! Use one of the 5" squares of green homespun
fabric and a little jute to create a fast and cute leaf. No glue, no sewing,
it's simply tied onto the dowel rod.
I'm working on a mini version of these fall flowers, so be watching for those
soon!
Update: see my Mini Sunflowers here
If you love this project, please pin and share with a friend using the social
links below. And as always, if you make these, please do let me know! I just
may share your project!
Pin it to remember 🌻
CAN I USE OTHER FABRIC?
You can use other fabric for the flowers but make sure it has some weight! I
like the drop cloth because it is a sturdy fabric and it helps the sunflower
'petals' to hold their shape better; a floppy fabric will not be a good
choice for the flower but could be used for the centers.
HOW LONG DO I STAIN THE FABRIC?
That really depends on how deep and dark you want the stain to be. I only
soaked mine until the fabric was completely saturated. If you are wanting a
darker stain then leave it a little longer.
WHY USE SPICES IN THE STAIN?
Warm spices like cinnamon and nutmeg are often used in primitive handcrafts
because of the pleasant aroma they leave, as well as the texture and the
grungy color. You can omit the spices.
WHAT ARE PRIMITIVE CRAFTS?
Primitive crafts are what early Americans made using items they had on hand. They were often toys and decorative items for the home. Primitive crafts usually have a rough and simple look to them that suggests a lack of formal artistic training.Today, we love the worn and tattered appeal of primitive crafts, maybe because it recalls an earlier time when life was simpler!

.jpg)





The sunflowers are so cute! I love how they turned out. I will have to try this, thanks for sharing!
ReplyDeleteThank you!
DeleteI am so glad you shared this on FB today! Love the project! I have so much fabric and mason jar rings to get out of my craft room and this is a great project. Pinned. I would also like to invite you to share it this weekend at the Home Matters Linky Party on my site. I may also use your post as the inspiration for my next Pinterest challenge as well. Love it!
ReplyDeleteThanks Donna! So glad you're inspired ;)
DeleteSuper cute!
ReplyDeleteI'm smitten! I was drawn in by this gorgeous texture but even the toning you did to age it is phenomenal. These sunflowers are so adorable!
ReplyDeleteThank you so much Donna! The secret is coffee stain!
DeleteI love everything about this! Finally a project I can use for all my mason jar rings & lids. Thank you for sharing!!
ReplyDeleteYES, put all those rings and lids to good use and make a batch of cute sunflowers! Thanks so much!
DeleteSeen other directions, your's was the easiest to follow, loved the directions!!!! I am 77yrs old, made at least 50. My husband asked me if I was starting a floral shop, ha-ha. Kay s.
ReplyDeleteOh gosh, that's a lot of flowers LOL! So happy to inspire you 😉
DeleteThe drop cloth fabric I find is only the HUGE drop cloths for painting. Can you buy this fabric by the yard? I don't need a ton of it to make a bouquet of flowers. TIA
ReplyDeleteLove love love!
ReplyDeleteAdorable!
ReplyDelete