The Cutest DIY Fabric and Wood Bead Sunflowers
Create simple fabric sunflowers using faux stained wood beads. You will love all the ways you can use these flowers in your home decor! Full pictorial and video available.
This post may contain Amazon or other affiliate links. As an Amazon
affiliate I earn from qualifying purchases.
My full disclosure policy can be found here.
September is in full swing and that means it's time to get serious about Fall
crafting and decorating! I love keeping things simple and affordable, and
these wood bead sunflowers are both!
I recently shared my
primitive sunflowers made from drop cloth, and got some great feedback. However, I wanted to come up with a similar
project that was faster and easier, and still gave great results! That's where
these little, palm-sized sunflowers come into the picture. If you follow me on
Instagram,
YouTube
or
Pinterest, you may have already seen these. I often share my projects on those
channels before they make it to my blog, so if you're not already following
along, please consider it!
Fall sunflowers made from fabric and wood beads
My fall crafting this year has focused around simple and affordable decor that
has a vintage primitive look to it. What do I mean by that? There's a
time-honored feeling of warmth and coziness but I'm not going full on
primitive with huge amounts of grunge!
What are primitive crafts?
Generally primitive crafts are simple pieces made from worn items
(think old wood, shabby comforters and fabric) that maintain that
distressed look. Items are usually crafted with natural, even darker, colors
and stress a rough and simple look. Handcrafted items are often darkened with
coffee or tea to give a 'dirty', well-loved appearance.
If you still don't have a clue what I'm talking about
(no worries, this is a no judgement zone!), think of the pieces
displayed in old general stores or Cracker Barrel, that give the feeling of
time, age and have a simple beauty.
My vintage-primitive crafting style is creating some of these timeworn pieces,
but making them suitable to fit into any decorating style. Like these fabric
sunflowers with wood bead centers! The full step by step pictorial is below,
but if you'd like to watch me make these flowers,
click HERE to watch the VIDEO.
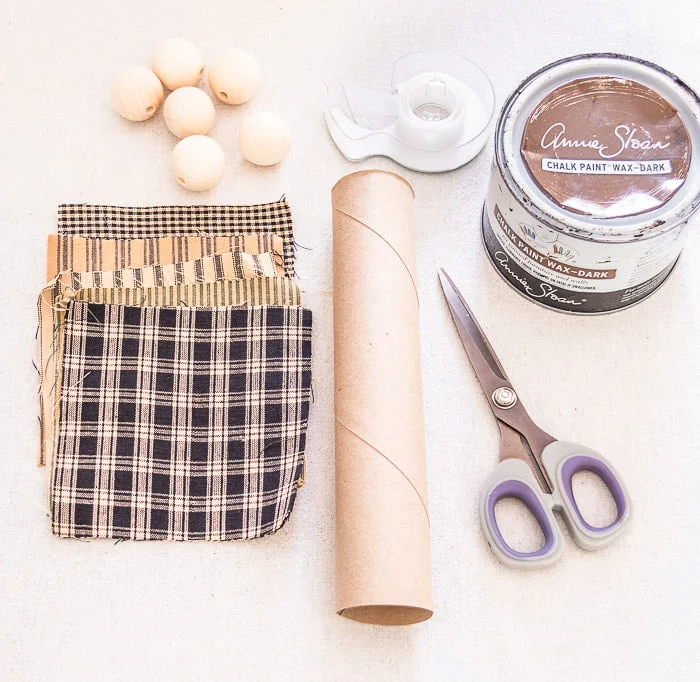
Supplies needed:
- 1-1/2" wood balls without holes
- dark brown furniture wax (you could also use a dark brown acrylic paint)
- homespun fabric squares (I used this pack) or any other thin cotton fabric
- paper towel tube
- scissors
- tape
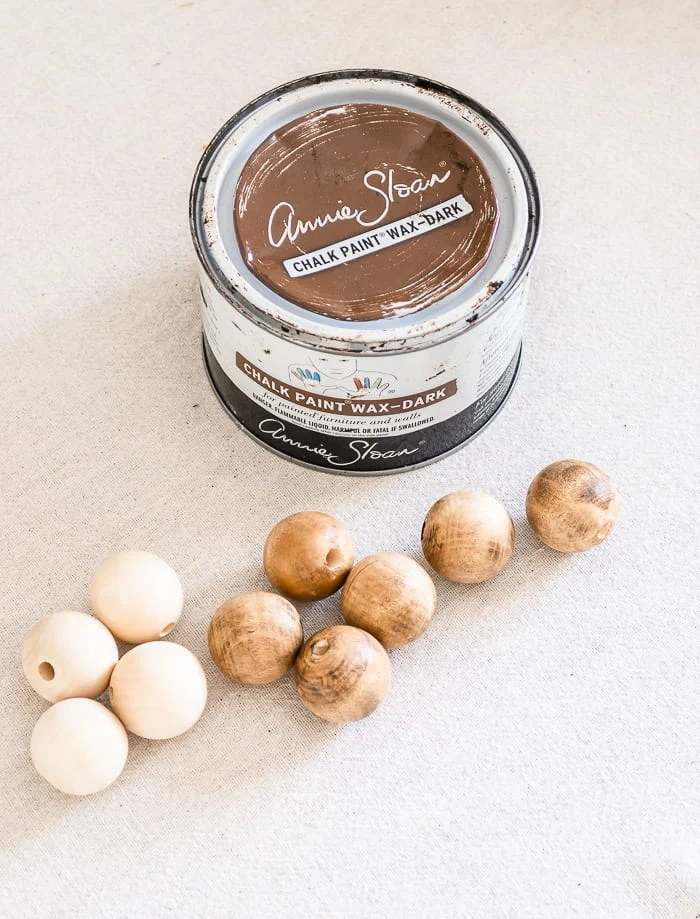
Step 1: Faux stain wood beads
Rub dark wax on beads, work it in with a cloth or paper towel and rub it off.
You could also use brown acrylic paint
(paint, then wipe off excess) and follow up with clear wax. I like the
simple one step ease of the dark wax though! I've used this faux stain hack
for so many home projects, like the frame on this
inexpensive ornament nativity DIY, the
DIY herringbone table
that Mr DIY and I made, and these
faux bleached wood chargers that began life as cheap Dollar Tree chargers.
Step 2: Prep paper towel ring
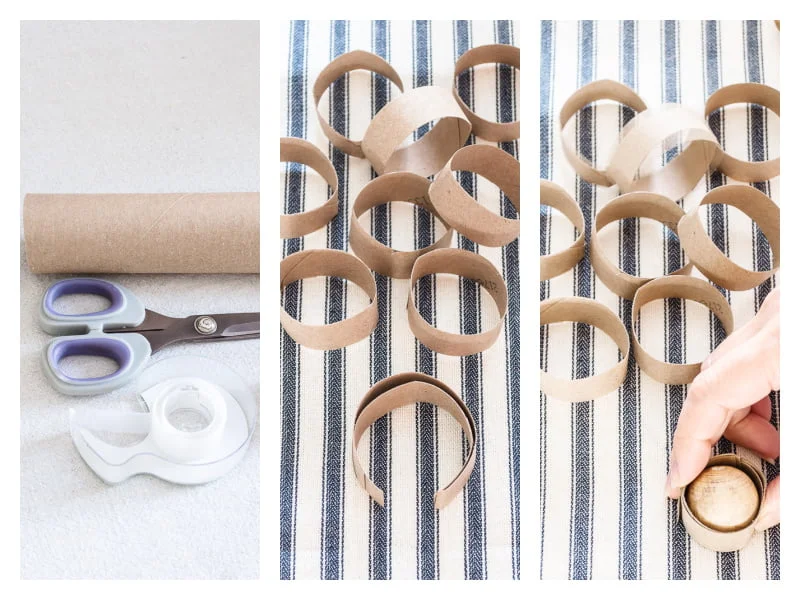
Set the wood beads aside to fully dry and let's start on the next step. Cut a
paper towel tube into 1/2" sections and snip each one with scissors to open it
up.
Stack two together and wrap around a wood bead to get the correct size. You
want a snug fit. Tape ends to hold it in place.
I am going to experiment with making paper towel tube napkin rings for my Fall
table, so be on the lookout for that project! You gotta love cheap crafting!
Step 3: Rip fabric into strips
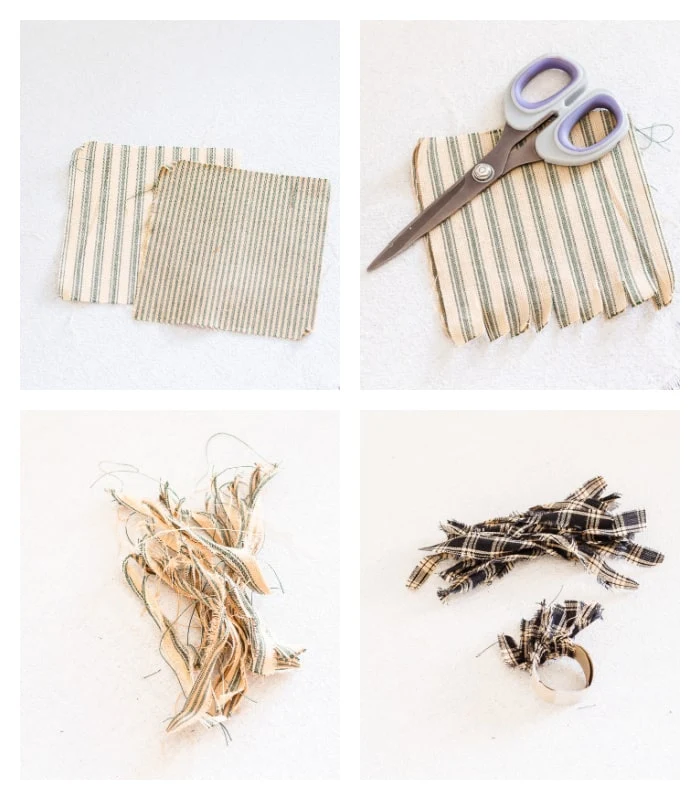
You'll need two 5" squares of fabric for each flower. I like the homespun pack
I linked to in the supplies list because the fabric is already cut and all the
colors coordinate and are just perfect for Fall! I have a couple other crafts
to share where I'm using this same package of fabric, so it's definitely a
great buy! You might prefer
this Spice Charm pack
if you're wanting some more orange fabric choices.
Measure across the edge every 1/2" and make a snip with your scissors. You
should end up with 9-10 strips per fabric square. Then rip the fabric into
strips, and clean up all the strings.
Why rip fabric?
You might be wondering why I choose to rip my fabric when I craft. The reason
is really two-fold.
- it's much easier to rip fabric than to cut it and you're sure to get straight edges
- you'll end up with nice, frayed edges which are just right for any craft where you want a little of that distressed, farmhouse charm
Step 4: Tie fabric to create flower
Tie the fabric strips, one at a time, around the paper towel tube ring that
you made. Knot twice and keep the knots nice and close together for the
fullest flower. Keep tying until you finish the ring or you run out of fabric
strips. Each flower should use 18-20 strips of fabric.
Finally, just pop the wood bead into the center. The fabric knots will ensure
that the bead fits nice and snugly and doesn't fall out! Aren't these DIY sunflowers the cutest?!
Remember, if you want to watch me make these flowers
How do I decorate with primitive sunflowers?
Here are a few ideas for decorating with these fabric and wood bead
sunflowers.
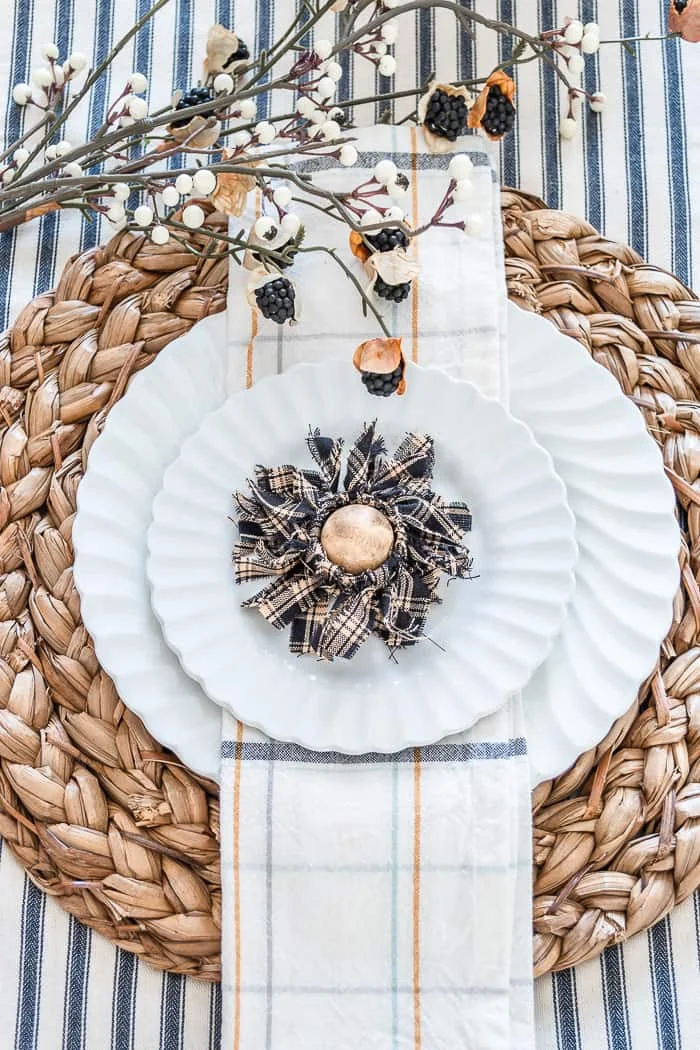
- Add one to each place setting for a sweet touch on your Fall decorated table
- You could remove the wood bead and use the flower as a napkin ring
- Try adding several flowers to a garland or a wreath (tie them on rather than using glue so that they are removable!)
- Simply tuck them anywhere you want a little sunflower surprise!
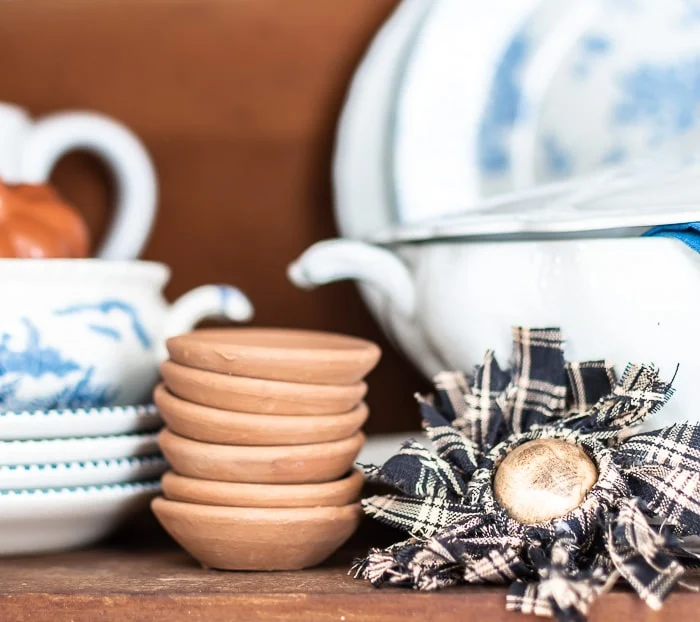
I added several of these handcrafted flowers to my primitive pine cabinet.
Along with the blue and white vintage dishes, and these sweet terracotta
butter pats, they add a little touch of Fall decor without feeling commercial!
Looking for MORE fall decorating ideas? Click HERE!
I hope you have fun making these simple sunflowers! Send me a pic if you do
make them and I would love to feature you!




-min.jpg)


I love both of your sunflower crafts---so clever! I also have a question about where you found your terra cotta butter pats.
ReplyDeleteHow adorable! And I completely agree, tattered and worn spell cozy warmth to me... and these gorgeous fabric sunflowers certainly do that!
ReplyDelete