Upcycle Dollar Store Foam Pumpkins
Upcycle those ugly foam dollar store pumpkins into beautiful terracotta looking pumpkins with realistic stems! An easy and low cost Fall DIY that will fool everyone!
This post may contain Amazon or other affiliate links. As an Amazon
affiliate I earn from qualifying purchases.
My full disclosure policy can be found here.
This Fall DIY might be one of my favorites to date! These white foam pumpkins
from Dollar Tree now look like terracotta candy dishes, with the help of a
little air dry clay and some acrylic paints!
This is a simple upcycle that anyone can do. I love that it delivers high end
results on a low end budget! If you follow me over on
Instagram, you have already seen me share this project, but if you're looking for the
step by step pictorial, that's what I'm sharing here today. Let's get right to
it!
How to Turn Dollar Store Foam Pumpkins into Faux Terracotta Beauties
I'm sharing all the details for transforming foam dollar store pumpkins into
truly stunning pumpkins that look just like terracotta! Keep reading for the
step by step instructions!
Supplies Needed:
- foam pumpkins from Dollar Tree (color doesn't matter because we'll be painting them, but I used white ones)
- air dry clay
- acrylic craft paints (I mixed these colors by DecoArt - Burnt Orange, Spiced Pumpkin, Light Buttermilk, Burnt Sienna to create a terracotta color)
- baking powder
- soft craft brush
- disposable bowl
- foam brush
- DecoArt matte spray sealer
Step 1: Make clay stem
The first step is to create a more realistic stem for the foam pumpkin. Rather
than removing the stumpy little stem, we're going to form a new stem around
it.
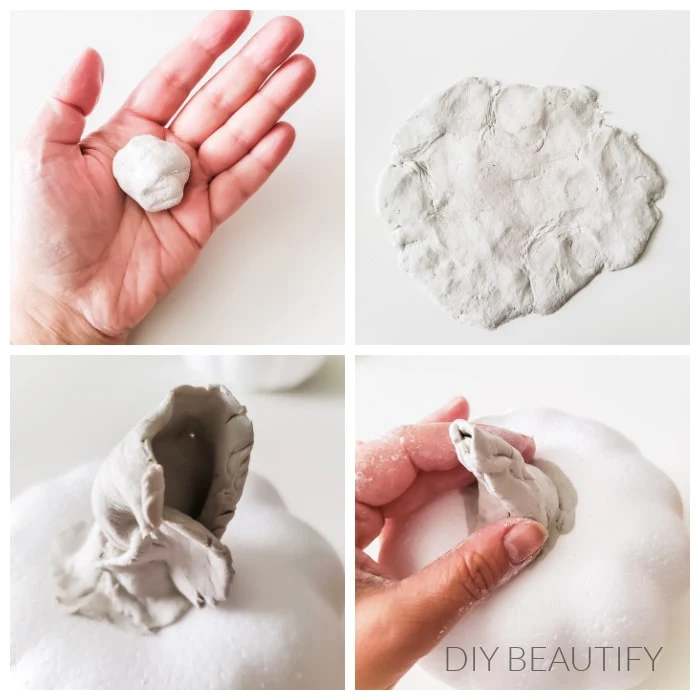
Take a small piece of clay and form it into a ball. Work it with your hands
until it is very pliable. Mine was not a brand new package and I had to add a
little water to soften it. Just work it in your hands, molding it into a ball
until it softens up. Then press it onto a flat surface and create a bit of an
oval. I just used my hands.
You'll gently peel it up and place the long edge against the base of the
pumpkin so about 1/2" is on the pumpkin below the stumpy stem. Wrap it around
the stem, pressing it onto the pumpkin.
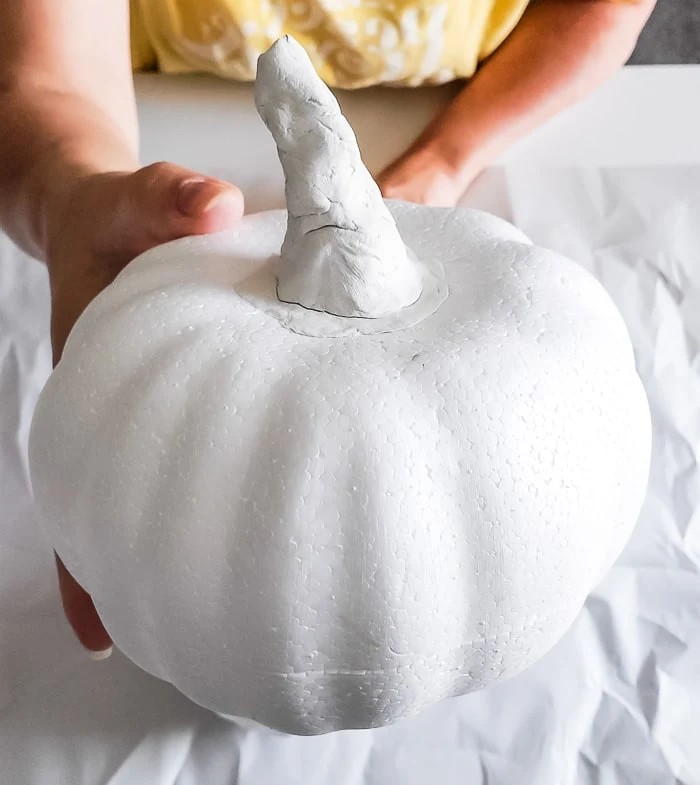
Give it a little bit of a twist as you form it into a more realistic looking stem, squeezing the edges together. Be sure to press the ends onto the pumpkin giving the stem a bit of a foot. This is what's securing it to the pumpkin, so press it well. Set aside to dry. It will take about 24 hours to completely dry; you'll see the color will change from gray to white once it's completely dry. If you need more details check out the video for these farmhouse pumpkins with realistic clay stems that I made last year!
Step 2: Make textured paint
Once the clay stems have dried, it's time to paint them! Let's mix up some
textured paint, which is as simple as mixing acrylic craft paints with baking
powder!
I mixed together the colors you see in the supplies list to create a custom
terracotta color and then added about 2 tsp of baking powder. Don't worry
about the paint color being too dark because it's going to lighten with the
last step!
As you mix the baking powder and paint together, you will notice it starts to
get very airy and puffy! Paint the pumpkins with this textured paint. I love a
foam brush for this step because it's easy to pounce it to get all the nooks
and crannies of the foam pumpkin and the clay stem!
Simply paint your pumpkins and new clay stems with two coats of this fun
textured paint, letting the first coat dry slightly before painting the second
coat. This is the same textured paint that I used to transform the
ugliest thrift store vase
into a true beauty!
Step 3: Add the terracotta look
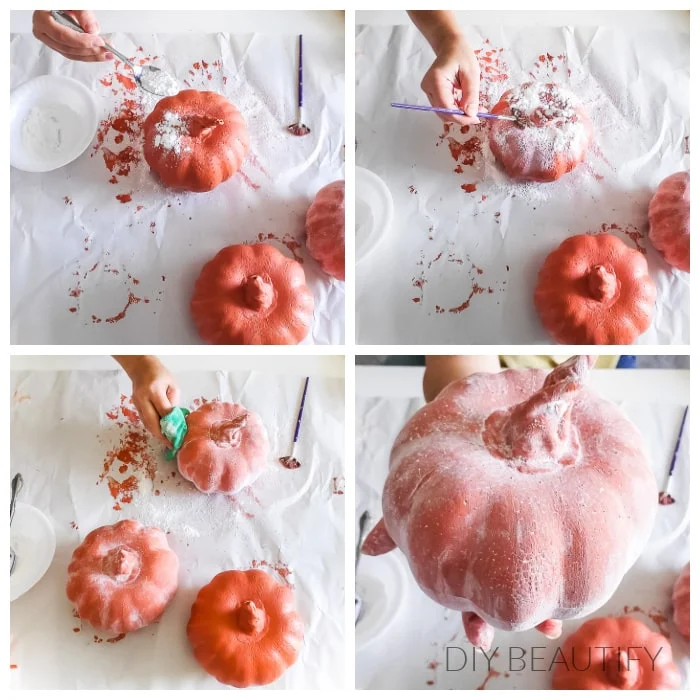
Meanwhile, sift about 1/2 cup of baking powder to remove any lumps and make it
very fine. Let the painted pumpkins dry until it they're tacky.
This is the step where the MAGIC happens and the pumpkins really start to look
like terracotta! Spoon a couple teaspoons of fine baking powder over the tacky
pumpkins and use a soft brush to coat the baking powder all over the pumpkin,
letting the excess fall off. Really make sure the baking powder gets into the
grooves, cracks and crevices.
See how much this step lightens the pumpkins and adds that terracotta finish?
Step 4: Seal the pumpkins
Finally, to keep the finish on your pumpkins, take them outside and lightly
spray them with a coat of matte sealer. This will ensure that the baking
powder coating stays in place and doesn't come off when they're handled. I
really love the DecoArt matte sealer because it doesn't alter the color or
make the pumpkins turn yellow. They dry almost instantly and are ready to
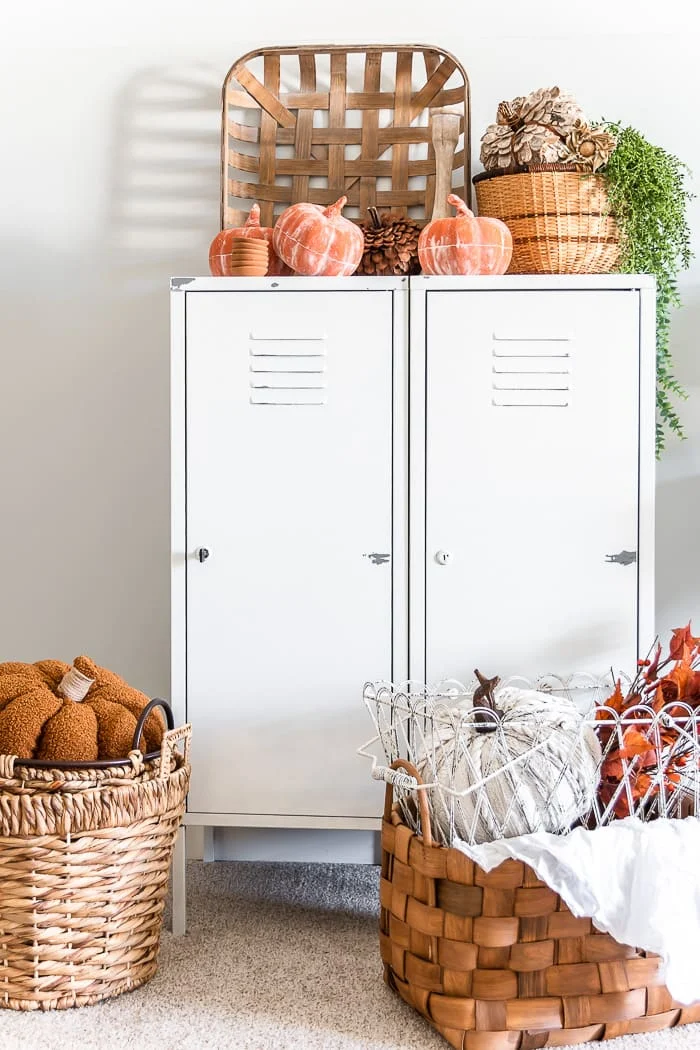
style in your home! Can you spot my
DIY pinecone pumpkin
in these styled images?
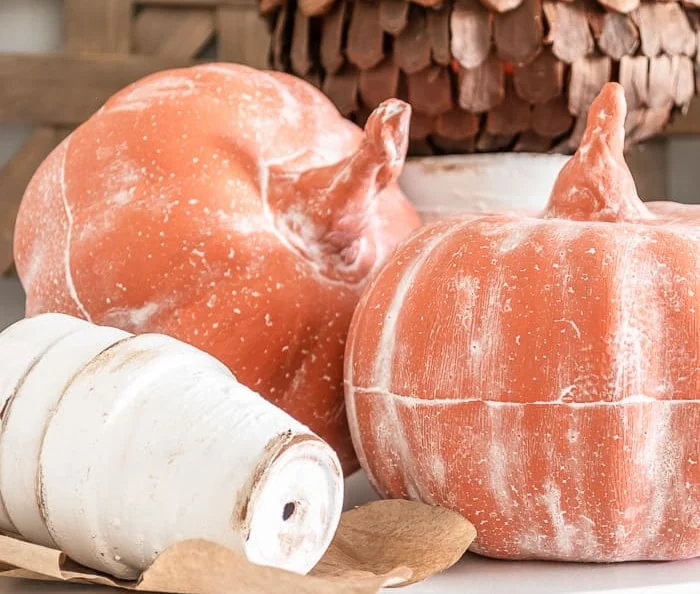
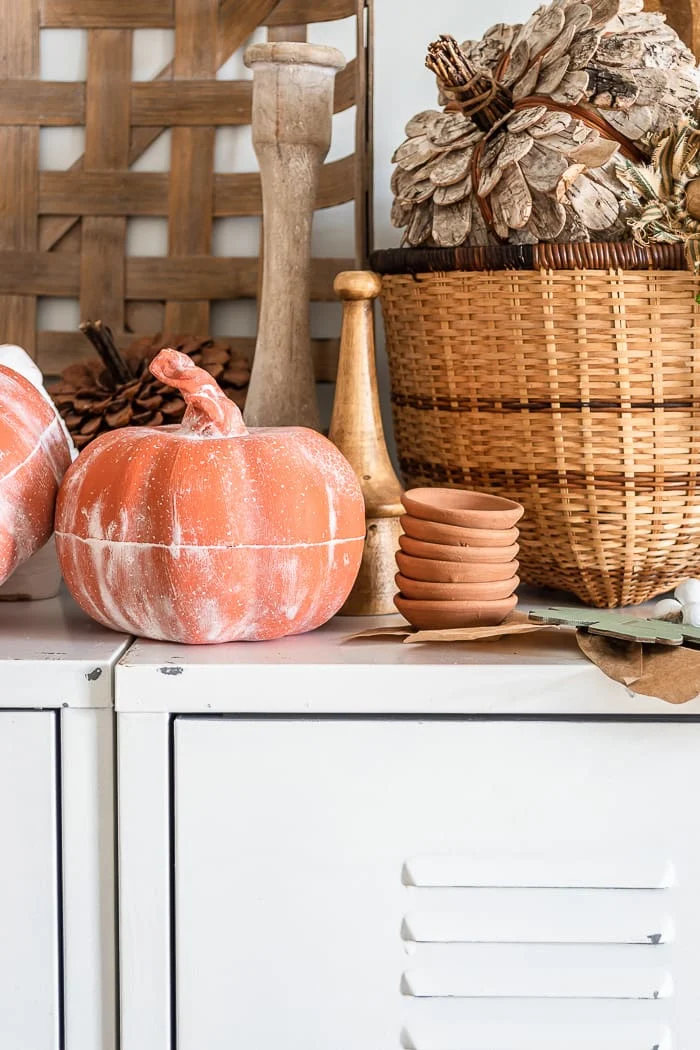
I think the line around the middle really makes these DIY terracotta pumpkins
look like candy dishes with a lid and a bottom!
DO I NEED TO USE FOAM PUMPKINS?
You can use any pumpkins with this textured paint and baking powder technique!
Look for inexpensive pumpkins or even jack o lanterns at the thrift store,
yard sales, Walmart, dollar stores, etc!
CAN I USE BAKING SODA INSTEAD OF POWDER?
I haven't personally used baking soda for the textured paint but I have seen
others do it with success! So I say go for it! If you don't get a look you are
satisfied with, baking powder is cheap to buy, and you can always paint over
the pumpkins!
WHAT IS THE RATIO OF PAINT TO GET THE TERRACOTTA COLOR?
This is personal preference. I just mixed my paints until I got a look that I
liked! You can always look online for a color guide or purchase a
terracotta paint color
so you don't have to mix paint!
Styling Terracotta Pumpkins in Your Home
I styled the terracotta pumpkins on my IKEA lockers in my upstairs
office/craft room/workshop that I have yet to share with you. I promise I will
get to that soon! It's been a bit of a mess as I've just recently unpacked it
and then immediately started creating all the fall decorations!
What do you think of these Dollar Tree foam pumpkins that I upcycled into
terracotta beauties? Are you surprised by how real they look? Are you inspired
to make some?
I hope you're still able to find some foam pumpkins at your Dollar Tree, they
tend to sell out so quickly! You might still be able to buy some
online here. Please let me know if you make any of these faux terracotta pumpkins, and
send me pictures! I would love to feature them in my newsletter!
As always, I am honored when you choose to Share my ideas with your DIY loving
friends or Pin them! You can hover over any image to Pin it!
Love it? PIN it!
See you later this week for another fun DIY!As a participant in the DecoArt Blogger Outreach Program,
I received product to use to create this fall project. My opinions,
as always, are 100% my own.









Can these be used outside?
ReplyDeleteI don't think so. Maybe a covered porch, but you don't want the clay to get wet!
Delete