How to Make Primitive Pumpkin Place Cards
Follow these easy step to turn plastic pumpkins into rustic and primitive ones with paint and cinnamon, and make a cute fabric name tag! These primitive pumpkins make the perfect Thanksgiving or Fall place cards for your dining table!
This post may contain Amazon or other affiliate links. As an Amazon
affiliate I earn from qualifying purchases.
My full disclosure policy can be found here.
Welcome friend! Are you looking for some easy ways to personalize your
Thanksgiving table for friends and family?
These primitive pumpkin place cards are so fun and simple to make, with just a
few basic supplies.
Why primitive?
Lately I have found myself really drawn to the folk art style of crafting.
Primitive items look homespun and evoke that feeling of an earlier time when
life was simpler. These handcrafted items also speak from the heart.
This Fall I made
primitive farmhouse sunflowers, small
DIY fabric and wood bead sunflowers
as well as
chunky, drippy candles
(with a primitive version). I have some primitive Christmas ideas rolling
around in my head too, so be on the lookout for those!
Of course, you make it yours! If you prefer to make your pumpkin placecards
look more modern, do that! It's easy to personalize this project to suit your
personal decorating style!
Are there other ways to decorate with primitive pumpkins?
Of course! You're really only limited by your imagination! You can leave off
the place card fabric tags and pile these prim pumpkins in a dough bowl or
basket. Instead of names on the tags, you can stamp other words that have
meaning to you, or why not "grateful" "thankful" "blessed" to stay with the
Thanksgiving theme.
How to make primitive pumpkin place cards
What supplies will I need?
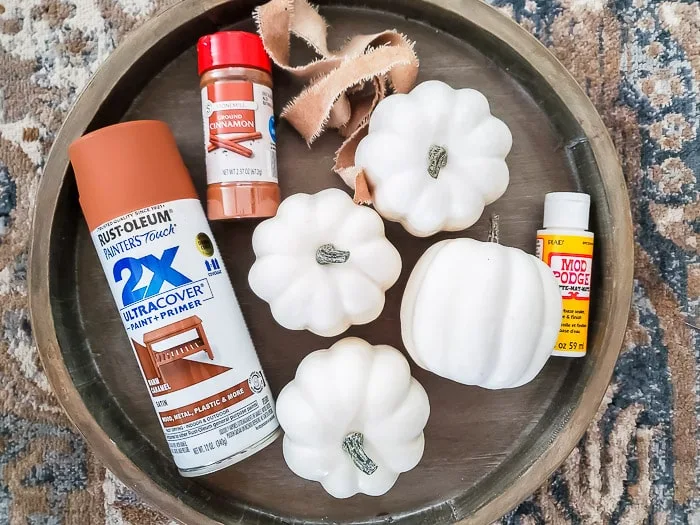
- pumpkins ( plastic or real)
- Rustoleum Warm Caramel spray paint
- matte mod podge
- foam craft brush
- cinnamon
- spray sealer matte finish
- coffee stained fabric (see THIS POST for instructions)
- alphabet stamps
- ink pad
- homespun fabric
- natural raffia
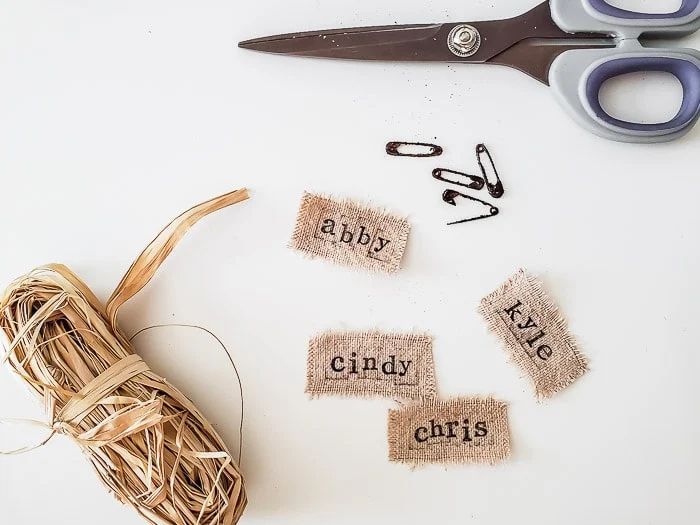
- small rusted safety pins (tutorial below)
Step 1: spray paint pumpkins
Take your pumpkins outside and spray them with the caramel spray paint. Two
light coats should ensure they're fully covered. Let them dry before moving on
to the next step.
Step 2: add cinnamon to pumpkins
Before we get into this step, I'm sure you're wondering WHY CINNAMON? Ground
cinnamon is commonly used in primitive crafts for these main reasons:
- it smells amazing
- it adds a primitive color to crafts
- it has a rustic, gritty texture that primitive crafts are known for
I purchase cinnamon from the dollar store and keep it in my craft room. That
way, I can carefully add the excess cinnamon back to the jar for another
use.
Use a fairly heavy coat of mod podge to make sure the cinnamon sticks to the
entire pumpkin. The foam brush is easiest to get the glue in every nook and
cranny of the pumpkins. Once the pumpkin is thoroughly covered in glue,
sprinkle cinnamon generously over the pumpkin. I keep a paper towel in a tray
below to catch the excess cinnamon (which I then pour back into the
container).
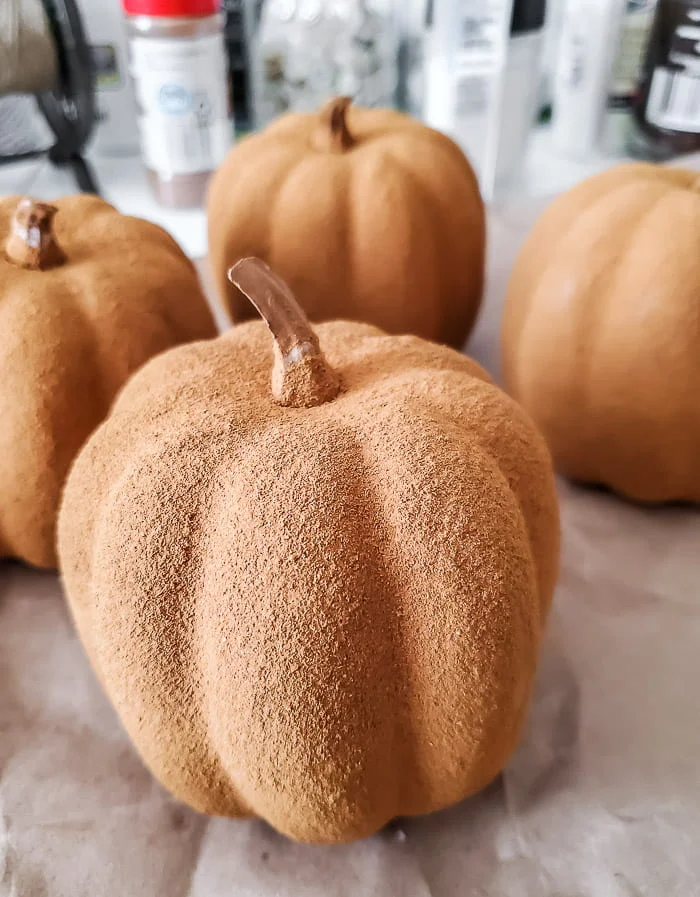
The pumpkin should be completely coated in cinnamon. Isn't that a lovely
primitive color? Now we need to ensure the cinnamon stays put!
Step 3: seal the pumpkins
Carefully spray the coated pumpkins with a coat of a matte sealer to set the
cinnamon in place so that it doesn't come off when the pumpkins are handled.
The color will darken significantly as you can see below. If you find that
your pumpkin isn't as thoroughly coated in cinnamon as you thought, you can
reapply. Just make sure to finish up with the spray sealer to set the cinnamon
in place.
Step 4: make the name tags
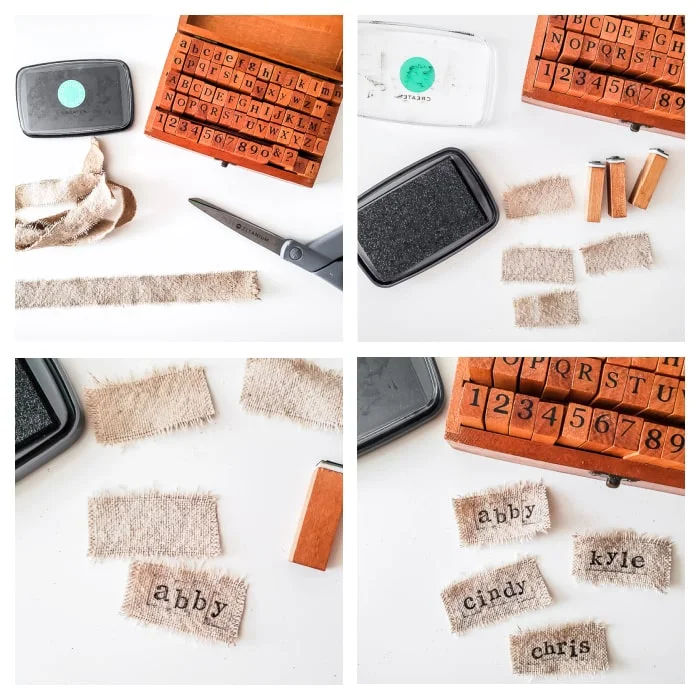
Stain some fabric (either muslin or canvas drop cloth) in coffee following the
directions linked in the supplies list. Rip fabric into 1" strips.
Using alphabet stamps and ink, stamp each name onto the fabric strips.
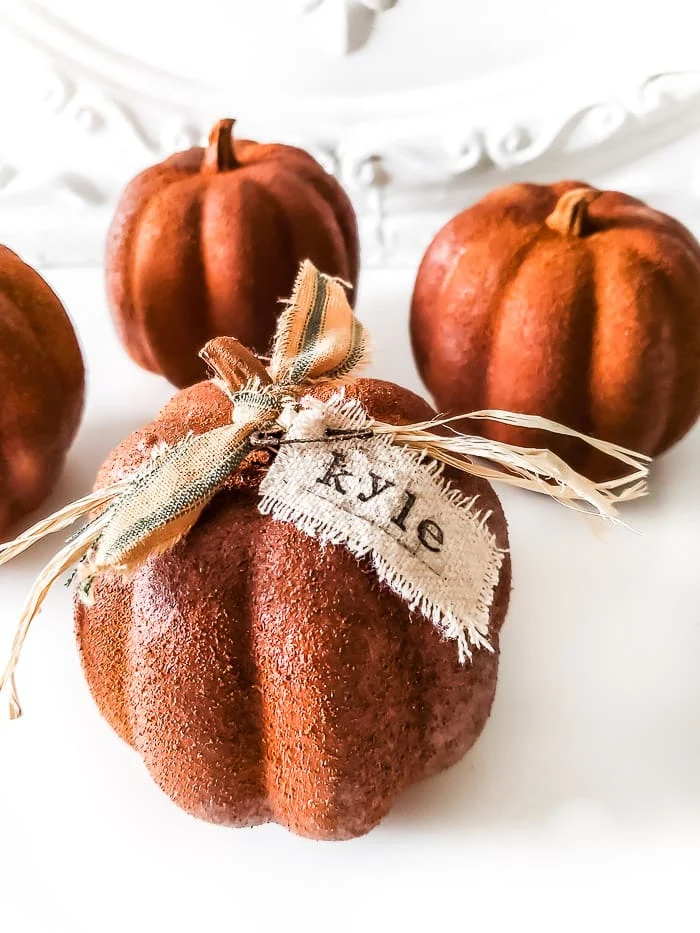
Step 5: finish pumpkin
Tie a piece of raffia around the pumpkin stem and knot. Add a strip of torn
green homespun fabric (this is a simple way to mimic the leaves of the
pumpkin) and then use a rusty safety pin to attach the name tag to the fabric.
How do I make rusty safety pins?
- spray paint safety pins with a dark brown color like THIS ONE
- while paint is wet, sprinkle cinnamon onto the pins and let dry
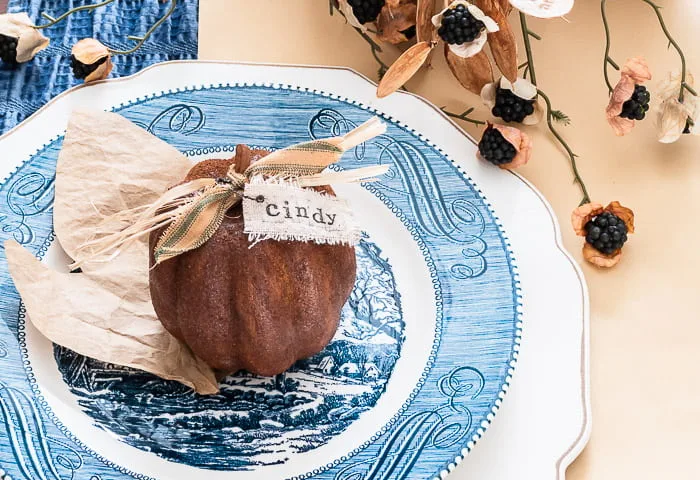
I really love how these primitive pumpkins turned out! They're so perfectly primitive, they smell good, and they are a wonderful addition to any Thanksgiving table!
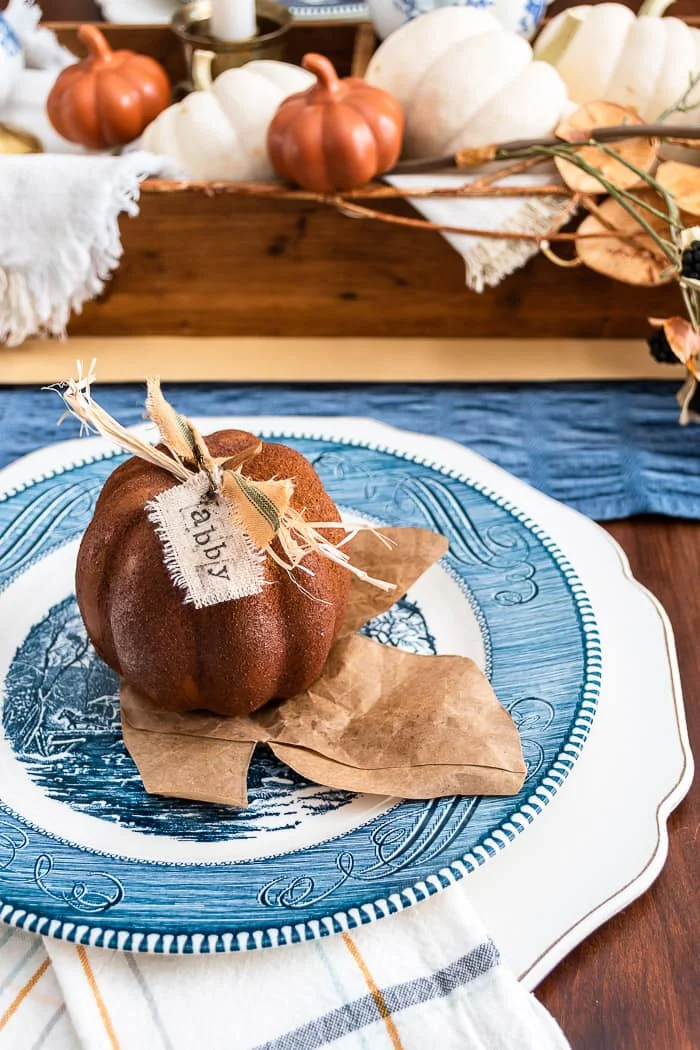
I placed each pumpkin onto a paper bag leaf (
see the how to here) for each place setting. That just keeps them away from the feast that will
soon be overflowing on the plates!
I paired them with vintage blue Currier and Ives dishes that I inherited. You
can see more of my dining table centerpiece
here, although I did move things around a little bit, added the faux black berry
stems and my
dollar store blue and white porcelain pumpkins and a brand new pleated paper table runner that I'll be sharing with
you very shortly!
I hope you're inspired to give these primitive DIY pumpkins a try! Please do
let me know in the comments and I would love to see a picture if you make
them!

-min.jpg)




Oh goodness... these pumpkins are decadent! They just have such a natural moody vibe that certainly chimes in with a cozy fall! Beautifully done!
ReplyDeleteThank you Donna, I'm so happy you like them!
Delete