Dollar Store DIY Shamrock Wreath
Make an easy shamrock wreath with dollar store supplies, paint and scrapbook paper!
This post may contain Amazon or other affiliate links. As an Amazon
affiliate I earn from qualifying purchases.
My full disclosure policy can be found here.
Hey friend, do you decorate for St Patrick's Day? 🍀
I think last year was the first time that I ever did! I added a few DIY St
Patrick's Day crafts to my coffee bar and it looked really cute! You can see
the budget friendly St Patrick's Day decor and how I styled my coffee
bar
HERE. Some of the items I made for it were:
- frosted crystallized shamrocks
- green painted jar with shamrock window
- clay mushrooms with polka dots
We're in a new home this year, and I've used my handmade St Patrick's Day
decor, as well as a few additional items, to decorate my pine hutch with a
vintage St Paddy's day theme. I'll be sharing all those details in a few days,
it really turned out cute!
But today, I'm going to show you how to turn some dollar store items into the
cutest DIY shamrock wreath
(my fingers keep wanting to type 'shamrock shake' LOL, and now I want
one!)
How to make a dollar store shamrock wreath 🍀
You'll just need a few supplies from Dollar Tree for this easy wreath, as well
as a few additional craft supplies that, like me, you may already have on
hand! I enjoy making seasonal decor that costs very little!
Supplies
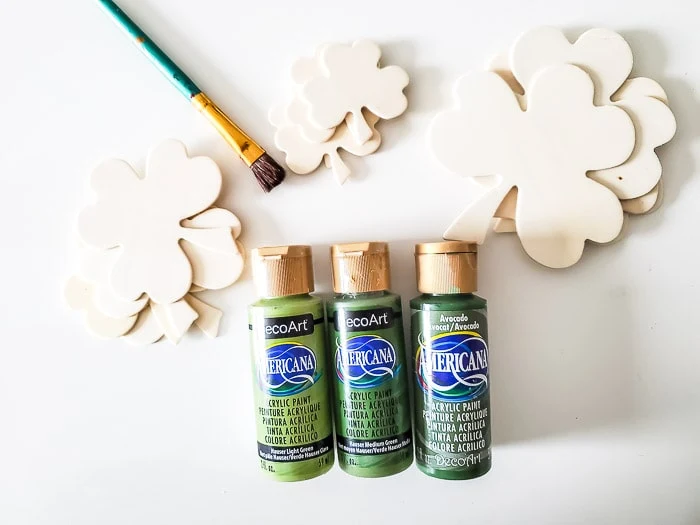
- wood shamrocks (I found mine at Dollar Tree, but if you can't find them, you can also get them HERE on Amazon)
- small wood bead wreath (again, from Dollar Tree! I was so happy to find this for just $1.25!) You'll pay more on Amazon, but HERE is a link if your Dollar Tree doesn't carry the wood bead wreaths
- green craft paints (I used three different greens in these colors: Hauser Light Green, Hauser Medium Green, and Avocado, all DecoArt acrylic paints)
- green patterned scrapbook papers
- hot glue
- craft brush
- scissors
- pencil
- craft glue or Mod Podge
- green ribbon (purchased at Hobby Lobby)
Step One
Paint shamrocks
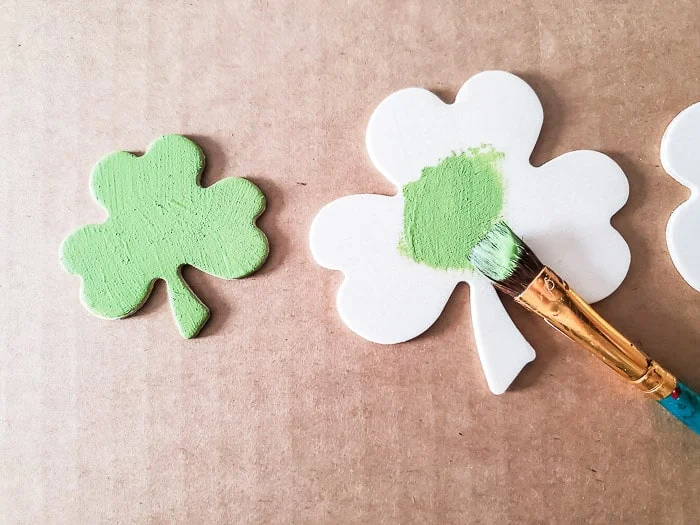
The Dollar Tree shamrocks come in a package of assorted sizes. I started with
the lightest color of paint and painted 1/3 of the shamrocks, giving them 2
coats of paint. After lightly wiping off my brush, I moved on to the next
darker color, finishing with the darkest color. This way I didn't have to wash
my brush in between!
Step Two
Cover shamrocks with scrapbook paper
I had some polka dot and check papers that were the right colors, and decided
to cover a few of the shamrocks with the patterned paper just to give this
easy wreath a little more dimension and interest!
To add patterned paper to the shamrocks, trace a shamrock onto the paper of
choice with a pencil and cut along the marked line with scissors. Brush a thin
but even coat of white glue or
Mod Podge
on top of the wood shamrock and lay the paper cutout on top*. Lightly press
with fingers until it's completely adhered and set aside to dry.
Normally when I decoupage I paint a coat of Mod Podge over the top, but
opted not to do that for this wreath.
* adding decorative paper to the shamrocks was a last minute decision, if
you plan to do this, you don't need to paint those shamrocks!
Step Three
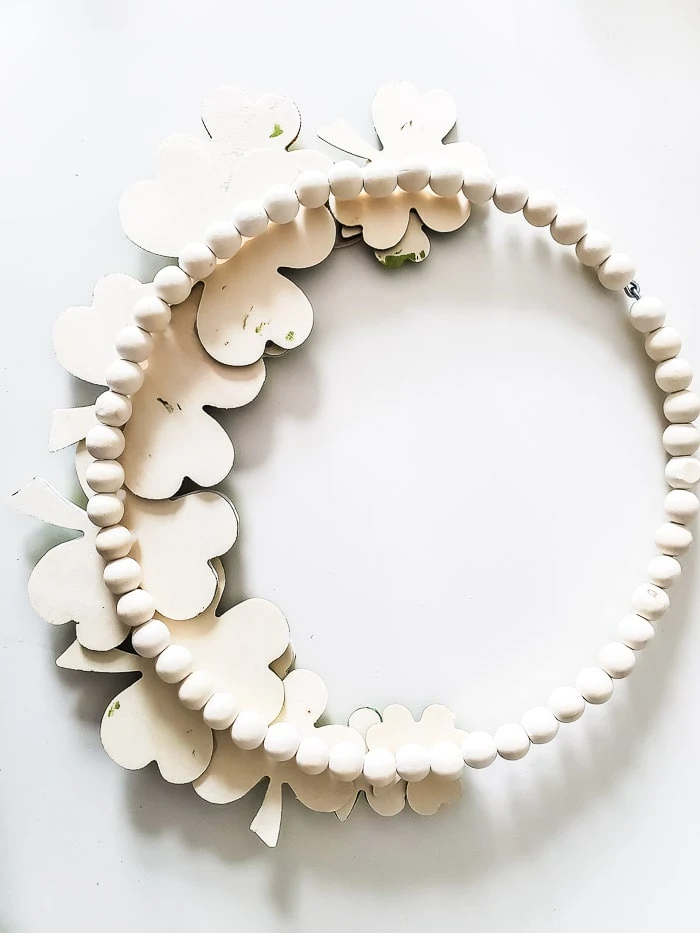
Play with placement
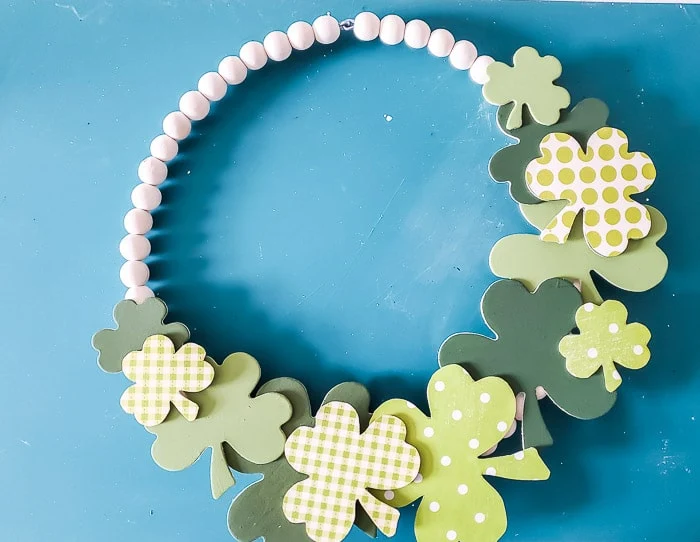
I always like to play around with the placement of the wreath elements before
permanently assembling them, to get an idea of how I want the finished wreath
to look. In this case, rather than evenly placing the shamrocks around the
entire wreath, I liked the look of keeping them to one side, overlapping a
few. By placing the patterned shamrocks on the top, they're visible.
Once I was happy with the placement of the shamrocks, I took a picture of the
wreath with my phone so I could refer to it as I was finishing the wreath.
Step Four
Assemble wreath
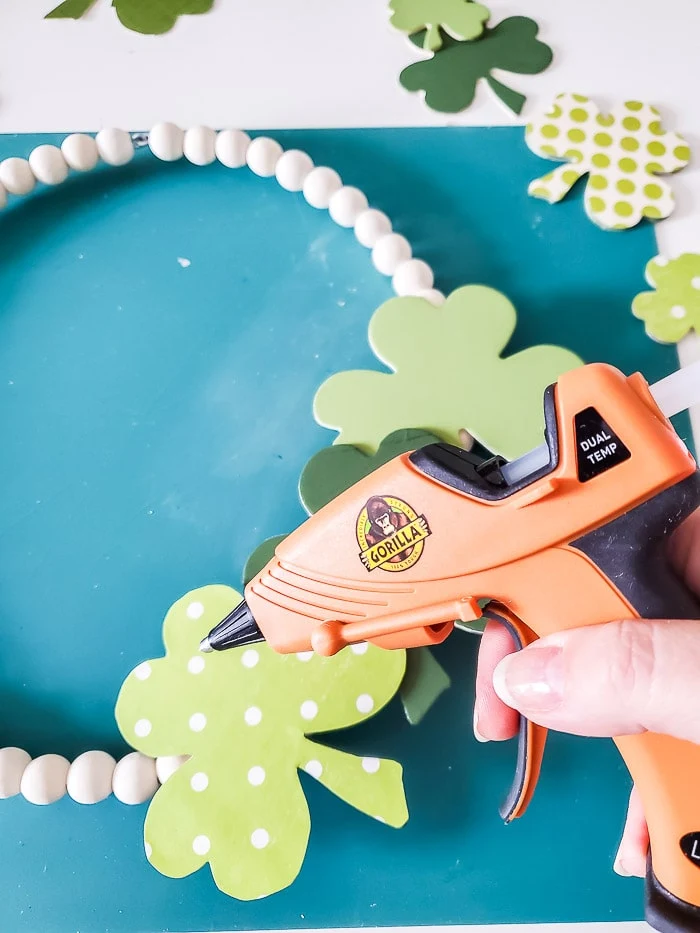
I glued the shamrocks to the wood bead wreath, starting with the largest
shamrocks, and following my picture as much as I could. Because the wood bead
wreath base is narrow, it's best to either add the glue to the wood beads, or
position the shamrock and then place the glue where it will connect with the
bead wreath. By overlapping the shamrocks, it makes the wreath a little more
stable!
Tip: go slowly with this step so you don't end up with excess glue oozing everywhere! Hold shamrocks in place for a minute until the hot glue sets up before moving on to the next one!
Here's how the back of the wreath looks.
This quick and easy St Patricks Day wreath was fun to make and personalize!
You can paint all your shamrocks the same color or each one a different color!
Think about how you want the finished wreath to look and go from there. You
can pick up green patterned scrapbook papers from the craft store on online at
Amazon
HERE.
I tied a length of green velvet ribbon around the top of the wood bead wreath
form to hang my wreath.
I also played around with layering the shamrock wreath on a larger wreath. In
my case, it was the
DIY winter wool wreath
I made using
wool roving
and a textured crochet chain (I have no idea how to crochet, but making chain
is really easy - you can watch me
make crochet chain on this video)
If you're going to layer the wreath, I suggest using a neutral wreath for the
larger wreath base, that will really highlight the shamrocks! You could even
use an inexpensive grapevine wreath base.
I hung my fast and easy DIY shamrock wreath on the front door of my primitive
pine cabinet. This cabinet is the one I've decorated with faux vintage St
Patrick's Day items, and I'll be sharing all my tips in a couple of days.
I hope you love this easy shamrock DIY wreath 🍀and decide to make your own!
Be sure to tag me (@diybeautify) or send me a picture so I can see your
finished wreath!
Pin to Save 🍀
Pinning and sharing my images is a great way to support my site, thank
you
❤






This is so cute. I don't tend to decorate for St Patrick's but this wreath is so fun I want one, and now to find that dollar store wreath with beads. Awesome craft idea.
ReplyDeleteThank you! I love that Dollar Tree is carrying the beaded wreaths now!
Delete