How to Make a White Wood Cottage Style Shelf
Scrap wood from an old barn is turned into the cutest cottage white shelf with black metal farmhouse hooks. Read on for a step by step tutorial.
This post may contain Amazon or other affiliate links. As an Amazon
affiliate I earn from qualifying purchases.
My full disclosure policy can be found here.
A quick note to subscribers - If you've subscribed but aren't getting my posts, please make sure to check your spam! You can add me to your inbox or flag my emails as 'safe' to continue seeing them!
As I've been sharing the updates we've made to the guest room in our
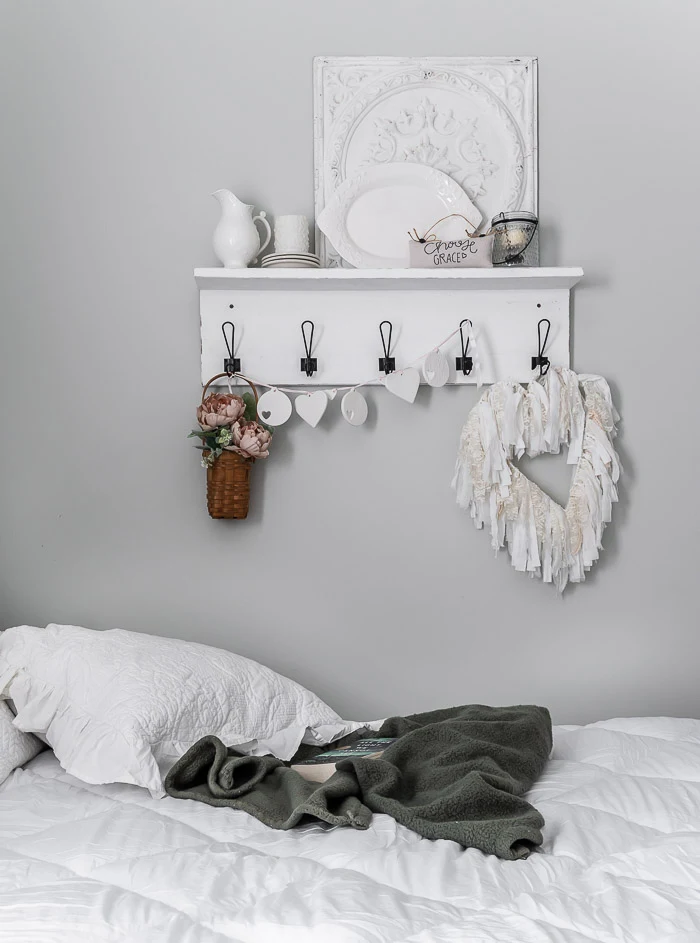
Mississippi rental, I've had several of you ask about the cottage white wood
shelf hanging on the wall above the bed. Mr DIY and I built this together from
some rough wood scraps we purchased at a barn sale, and I finally got around
to writing the tutorial for how we built this DIY shelf.
Note: we used wood from an old barn and planed it ourselves, removing the
rough edges to create nice and sturdy boards. I will link to similar boards
that you can pick up at the home improvement store if you don't have any
scrap wood.
How to DIY a white wood cottage style shelf
I envisioned this cottage shelf being a piece that I could really play with
for the seasons. It's the single decorative piece hanging on this large wall
in our guest room that becomes our daughter's room when she's home from
University.
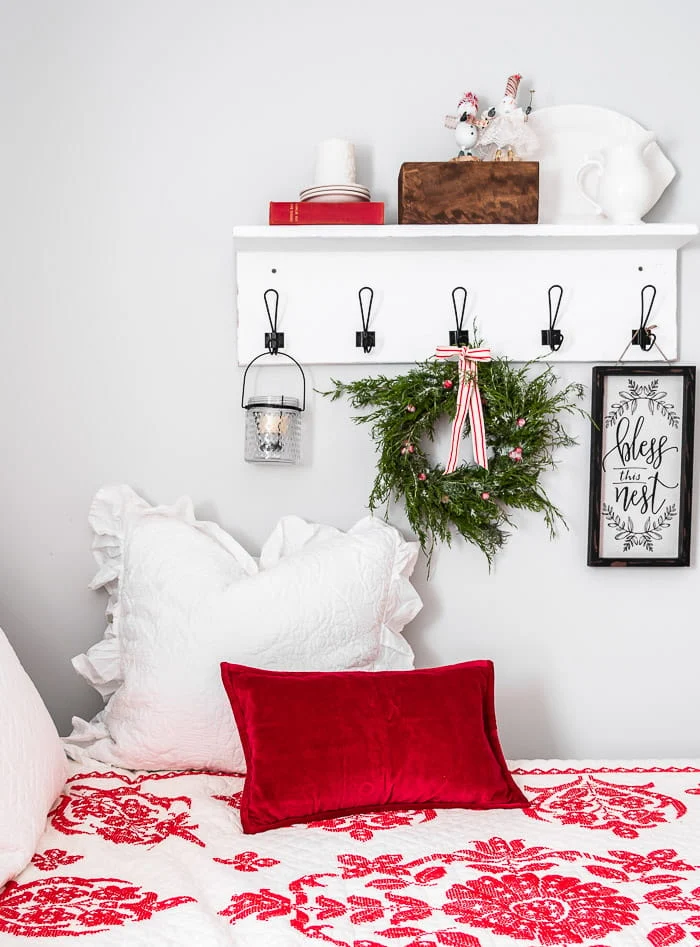
Here's a peek at how I decorated this cottage shelf for Christmas.
So let's get right into the tutorial. I feel like I need to say that Mr DIY
and I don't consider ourselves 'experienced builders'. We've built some very
simple projects, definitely nothing too difficult but we certainly are novices
and don't own all the building tools! All that to say, if we could build this
shelf, I know you can too, and I've included links to more of our easy builds below!
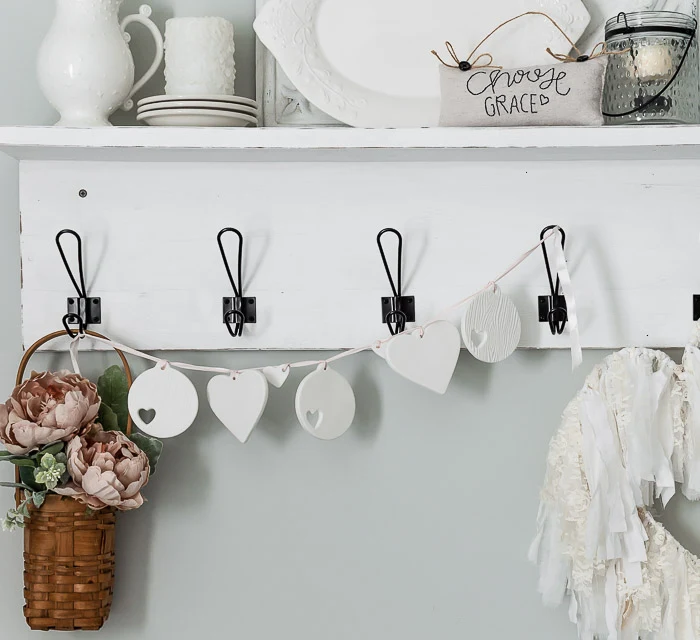
WHAT MAKES THIS SHELF COTTAGE STYLE?
- it's white, the most popular color in cottage decorating
- the back board is extra wide, giving it a vintage look
- it has a plate groove so you can display pictures, platters and more
- the hardware has a vintage cottage vibe, even though it's a brand new piece
ADDING COTTAGE CHARM
If you want to add even more cottage charm to your DIY shelf, you could use a pair of wood corbels (brackets) to join the top shelf with the back board at the edges. I chose to omit these because I wanted an open look on the ends.
You could also cover the back board with
beadboard paneling, hugely popular in cottage decorating. You'll have to buy a sheet of it but
there are so many other ways to use the excess around your home! Or, fake the
look with
this beadboard wallpaper. It's paintable so it will look cohesive with the entire shelf. I love this
look and may go back and add this at a later date. For a similar visual, you
can see how a single
wall of shiplap
at the entryway in our TX home added charm and character to a small corner.
You can make your cottage shelf as wide as you want or need for your space. We
went with 35", which allows us to use 5 of the rustic hooks.
The plate groove lets me decorate vertically with platters, stacks of
ironstone, even pictures to create interest on this otherwise blank wall.
Important tip: Have an idea of what you want to display on the top shelf so you'll know how wide to make it to accommodate your accessories! I wish we had made our shelf a couple inches wider.
Supplies
- 1"x8" board for the back piece*
- 1"x4" board for the top piece**
- long screws
- black rustic hooks
*our back board measures 1"x9"
**our top board measures 1"x6"
Directions
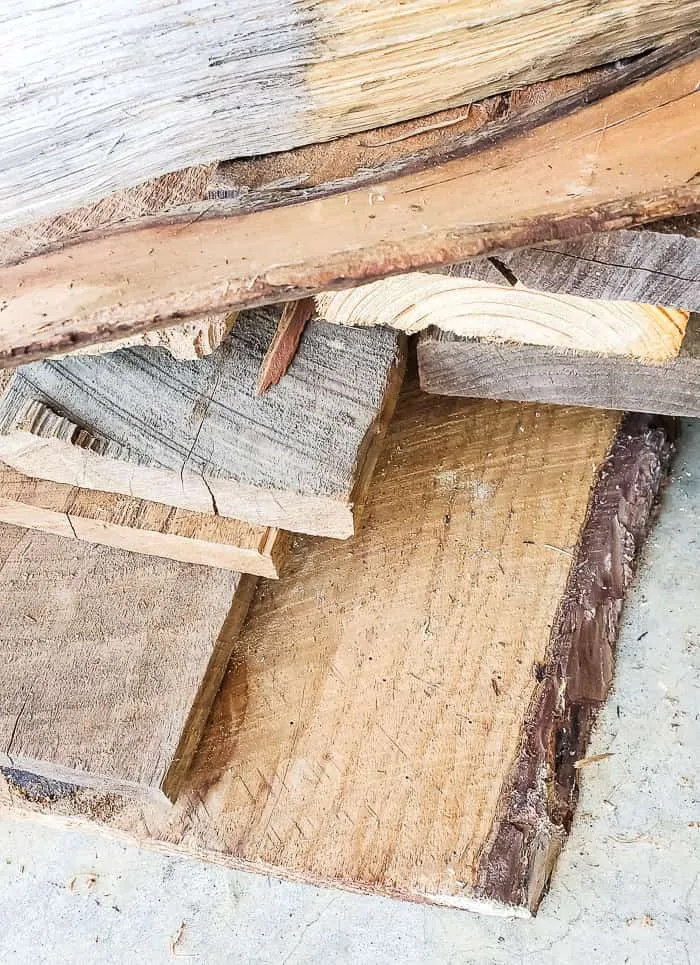
As I mentioned, Mr DIY chose wood from a pile he bought at a barn sale. He
used a piece of cedar with raw edges, that he planed and cut down to 1"x9"
size (cutting off the raw edges) with a
skilsaw.
He cut a 1x6 board to the same length of 35". This is all rough lumber,
different from what you'll find at the home improvement store (where it's
already been planed and cut to size). Your boards may be slightly smaller but
you should still be able to create a similar looking cottage shelf.
The rest of this wood will be heading to our son and daughter-in-law's
backyard soon as Mr DIY and our son Braden will be building raised garden beds
this spring!
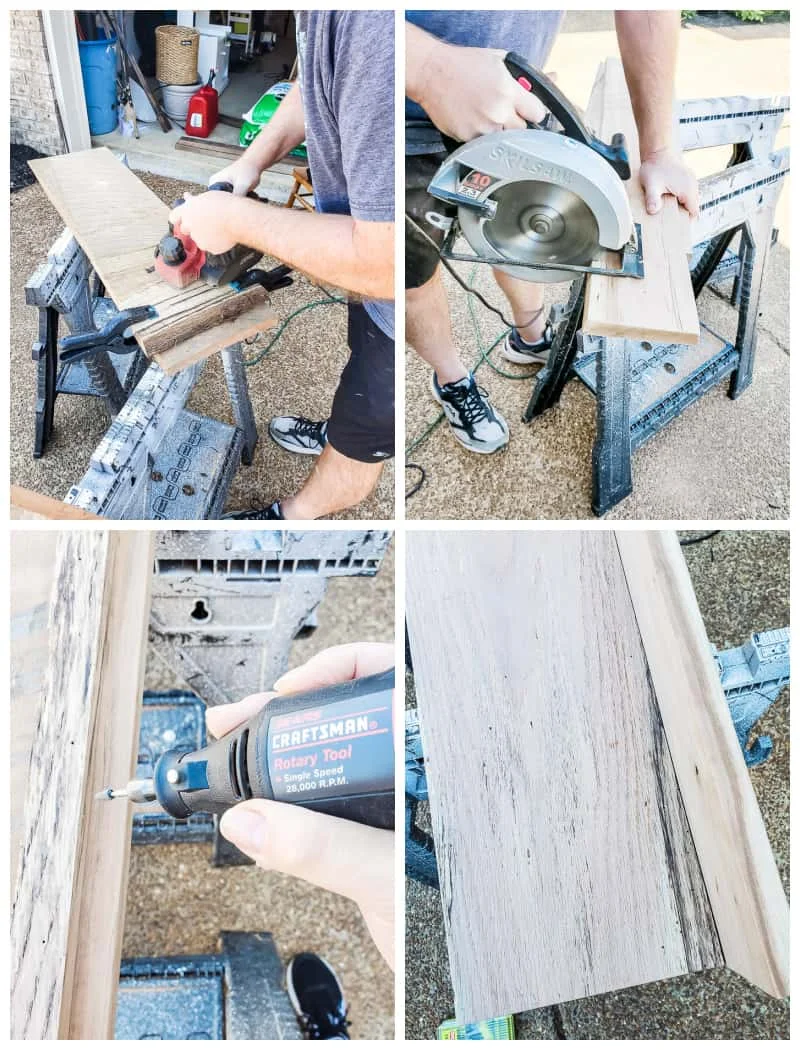
Here's a few pictures of the process of turning this rough lumber into nice
cut boards. I let Mr DIY handles the big tools!
We used a
rotary tool with a pointed bit to create the plate groove along one edge of the top
board. To create a straight line, Mr DIY clamped a narrow piece of wood on top
of the shelf so I could drag the rotary tool along it, back and forth,
creating the groove. There is a specific tool that would make this job even
easier, but we don't have it (and I can't think of the name of
it...anyone?...).
Next, Mr DIY attached both boards together at the top with screws. You want to
use nice long screws to really anchor the boards together.
Prep the wood for paint
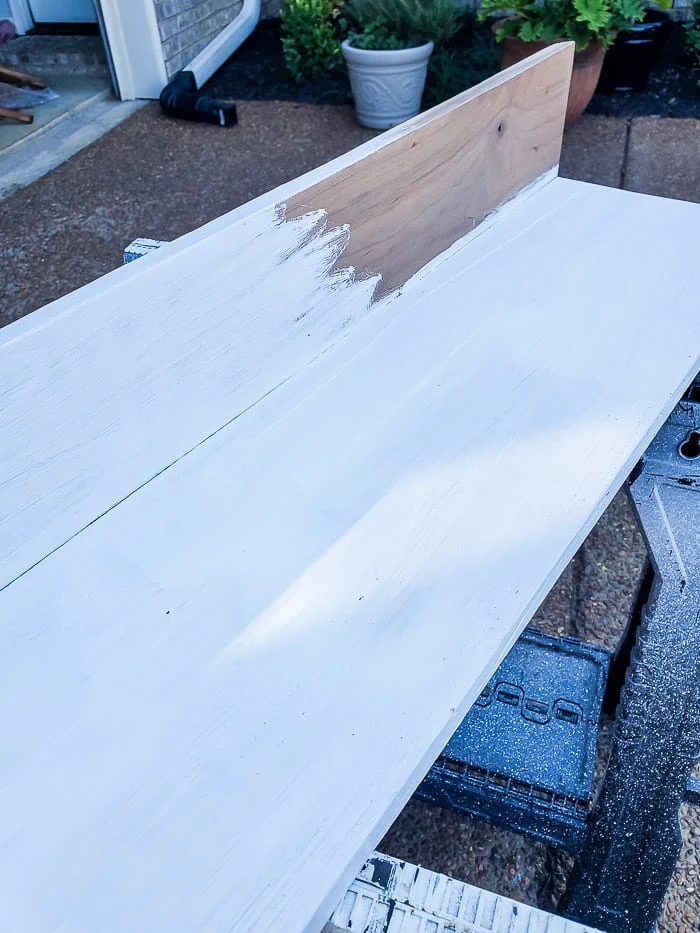
I was worried about bleed through (often an issue with wood species that
have red undertones), so I painted a coat of
Dixie Belle Boss, which block stains. It goes on white but dries clear. I recommend this
product anytime you are chalk painting a dark piece of wood furniture.
Next, I painted on three coats of
white chalk paint, letting each coat dry before painting the next (which takes just
minutes!). I love the powers of chalk paint! There's no prep (other than
making sure your piece is clean), and no priming needed!
If you're new to chalk paint, I have several helpful articles to get you
started. I recommend you read this post first,
Chalk Paint 101, an Overview for Beginners. I link to the other articles from this post, including tips for making
your own chalk paint (and my DIY chalk paint recipe), as well as the best
top coat options to protect your painted pieces!
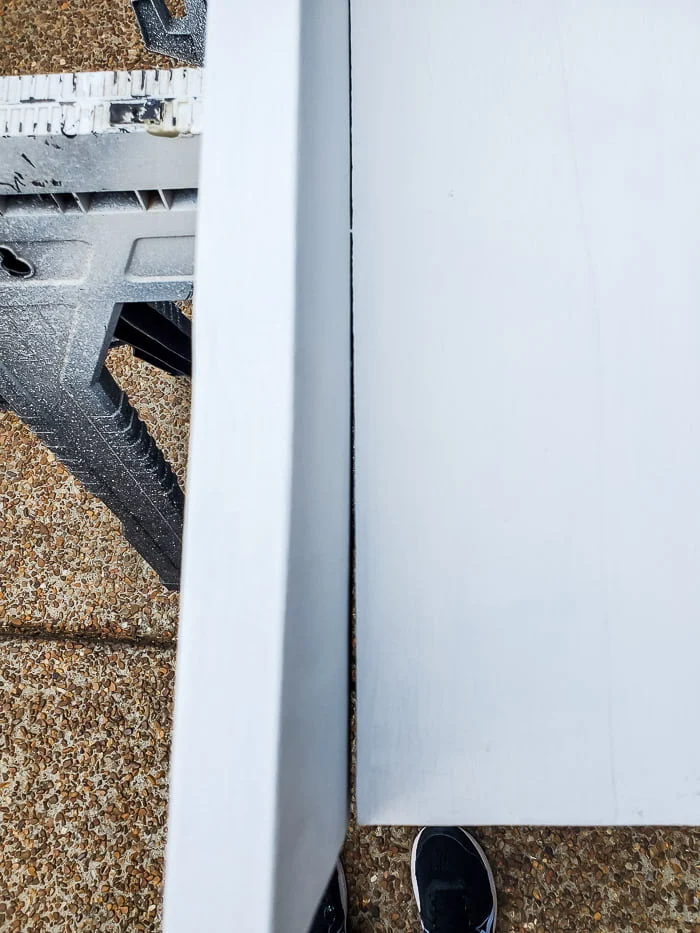
Finally, I filled in the gap along the edges with
white silicone. Don't neglect this step! It really gives your piece a finished look and
once those gaps are concealed, it's like magic! The piece looks like a
single unit. By the way, the top board looks way more wonky here that it
really is, I think it's the distortion of my phone lens!
Tip: Be sure to use paintable caulk so you are able to paint over it
(especially noticeable on colored pieces) and disguise it!
The last step before we hung up our DIY cottage white shelf was adding the
farmhouse hooks. These hooks are from Amazon and you get 10 for $10.99, so it's a great
deal. We used these on the built-in mudroom in our hallway. The hooks give
me just the look I was wanting with this new but vintage-looking shelf unit!
Mr DIY hung the shelf with anchors because it's very heavy. I didn't bother
patching the screw holes because I like the rustic look, but you could fill
those in if you wanted to.
I hope this easy build tutorial was helpful, please do let me know if you have
any questions ☺
Want more easy build project ideas for your home? Check these out:
Pin to Save
Pinning and sharing my images is a great way to support my site, thank
you!
bringing beauty to the ordinary,






Love this shelf! Thanks for the DIY.
ReplyDeleteYou're very welcome Melanie, thanks for visiting 😉
DeleteLove this shelf! Thanks for the DIY.
ReplyDeleteYep... I've already decided this shelf design WILL end up in my home somewhere, someway, because I adore it! Those hooks are made for it! Beautiful outcome, Cindy!
ReplyDelete