Tarnished Silver Tray Upcycle + 5 Ways to Decorate With Dishes
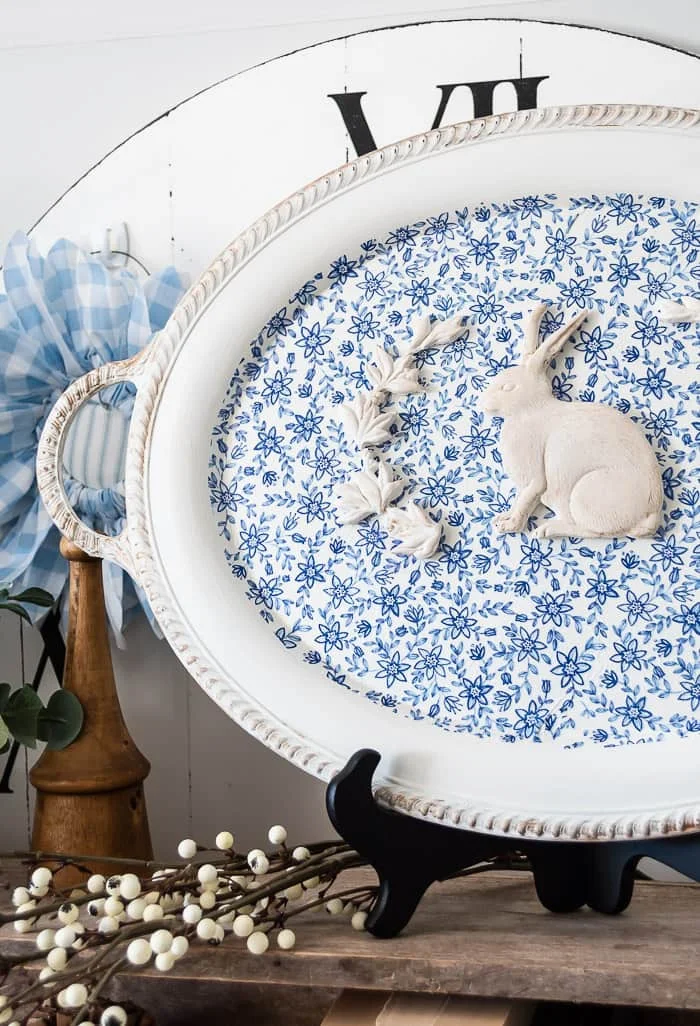
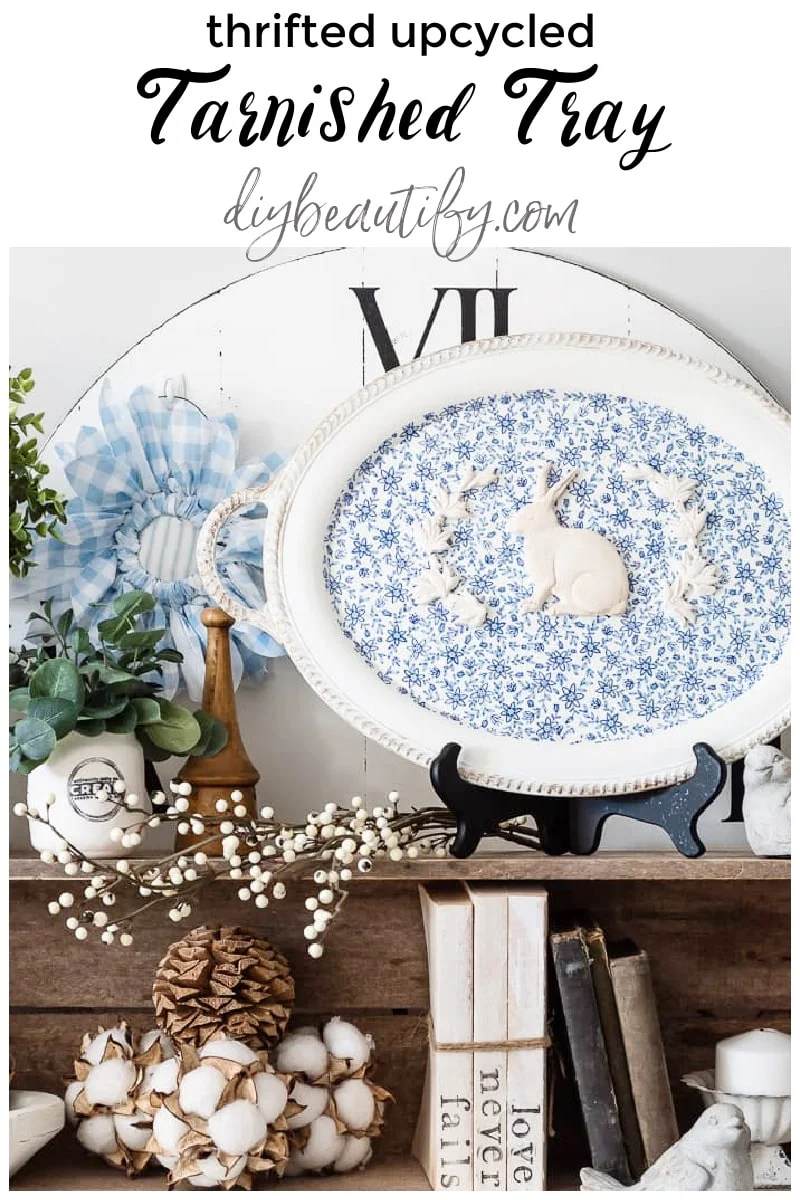
A tarnished silver tray gets a new lease on life with a thrifty upcycle using a blue and white napkin and decorative bunny mold. This tutorial, plus more ideas for decorating with vintage dishes, is just ahead!
This post may contain Amazon or other affiliate
links. As an Amazon affiliate I earn from qualifying purchases.
My full disclosure policy can be found here.
Hey friends welcome! I'm so excited to share this silver tray upcycle with you
as well as 5 ideas for decorating with thrifted dishes. I'm a vintage dish
hoarder and until we recently moved from Texas to Mississippi, I admit I had
no idea
just how much thrifted ironstone and dishes I actually had collected! Mr DIY helped me pack the boxes, and it was a little embarrassing when
it became apparent that I might have a slight problem! However, dishes are for
so much more than just eating off and below I'll show you some fun ways I use
them in my home.
I'm so happy to join Thrifting with the Gals as their guest this month. TWTG is a monthly series hosted by Rachel of The Ponds Farmhouse. Every month friends from around the country share their thrifting hauls and how they use their items to decorate their homes! It's so fun to see what thrifted goodies are being found from coast to coast! Stick around and see what everyone is sharing today.
Thrifted Silver
Over the years I've found many unique silver pieces at the thrift store, and
recently I scored this large and very heavy silver tray for just $2.99. If you
saw it in its before state, you may have passed it by because it looked so
bad...one of the worst tarnished trays I've ever seen! However, I've
upcycled silver trays
before, and I had an idea for turning this one into a beauty!
How to Upcycle a Tarnished Silver Tray
Let me tell you my vision for this sad looking tray, and then I'll show you
how I accomplished it!
I have painted silver trays before, but wanted to try my hand at decoupaging
one. I'm a huge fan of vintage blue and white transferware, and a couple years
ago found blue and white floral napkins. The napkins are such a great match to
my vintage ironstone collection as well as my blue and white dishes, so it
just seemed like a no-brainer to decoupage this silver tray. Here are a few
other items I've decoupaged with these napkins:
-
How to Recycle Old Ornaments with Napkins
-
How to Make High Gloss Porcelain Pumpkins
-
Easy Blue and White Decoupage Chargers
SHOP THE LOOK
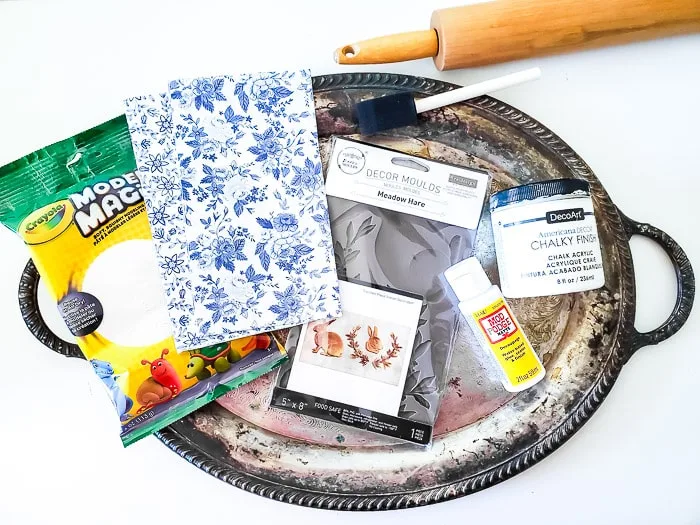
Supplies:
- silver tray
- chalk paint in Lace
- brushes
- blue and white napkins
- Mod Podge
- Crayola Model Magic white clay
- vintage rabbit wreath mold
- Exacto knife
- E6000 glue
- clear wax
- dark wax
- rolling pin, pencil, scissors
Step One - Paint and decoupage tray
I did clean this tray first, and recommend you always clean an item before
painting it! You want to remove any grease, stickiness and dirt so that the
paint will adhere.
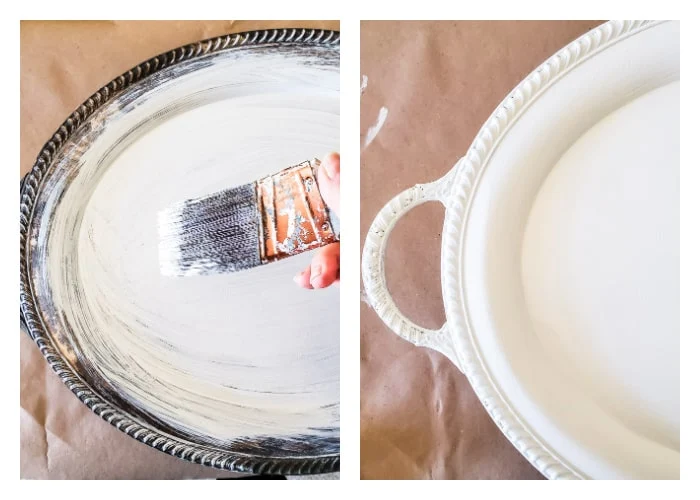
Paint tray
My home is a mix of vintage and new, and even when I add primitive pieces, I
like it to look bright and fresh! With that said, I prefer a creamy white
color rather than stark white, and this paint is the perfect happy medium!
I painted two coats of creamy white chalk paint onto the tray, front and back
because the back looked just as bad as the front! As soon as all that tarnish
was covered, the details of the tray showed up so much better!
Decoupage tray
Here are the steps I used to decoupage a napkin onto this thrifted tray:
- I spread a napkin over the tray to make sure it would fit. I chose to decoupage just the flat surface of the tray.
- Pressing the napkin flat, I traced around the tray's inner edge with a pencil.
- I cut the oval shape out.
- I removed the tissue layers (napkins usually have 3 ply).
- Working in sections, I spread a thin layer of Mod Podge onto the surface of the tray and then carefully pressed the napkin onto it.
- Finally I brushed a thin layer of Mod Podge to the top of the napkin and set it aside to dry.
Step Two - Create rabbit mold
I fell in love with this vintage rabbit mold set and knew it would make a
charming embellishment for my decoupaged tray. The details on these silicone
molds from Prima are outstanding! The rabbit's fur and features are so
clear! These molds can be used with all kinds of clay and are a great way to
give home decor and even furniture a unique look!
SHOP PRIMA MOLDS FOR DECOR
I chose to use Model Magic in the mold. It's my new favorite clay to use
because it is soft and squishy, easy to work with, and leaves no messy
residue on your hands or work surface like other air dry clay! I recently
used this clay to make some faux
DIY antique ironstone broody eggs, and have lots more projects in the works!
I took a piece of clay and worked it in my hands to soften a little, then
pressed it firmly into the rabbit mold. It's very easy to peel out.
Next, I needed to remove the excess clay from around the shapes, and cut this
away with an Exacto knife.
I used a wood dowel to press any rough edges to flatten them, and then set the
shapes aside to dry. It took a couple days for the shapes to dry, and I
flipped them over halfway through.
Step Three - Antique the rabbit mold
The rabbit and wreath shapes needed some dimension. I wiped on a thin layer of
clear furniture wax, and then dark wax. I really worked the dark wax into the
crevices and grooves, and then wiped most of it off. This simple step did so
much to add texture and dimension and highlight the details of the molded clay
rabbit and wreath shapes, you can see the difference below!
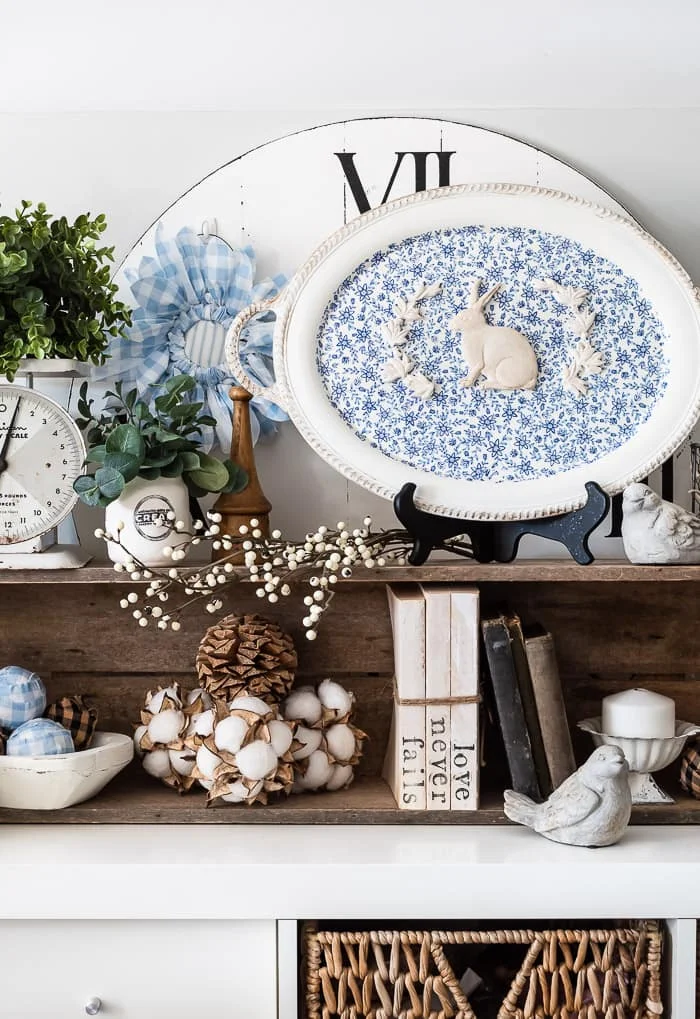
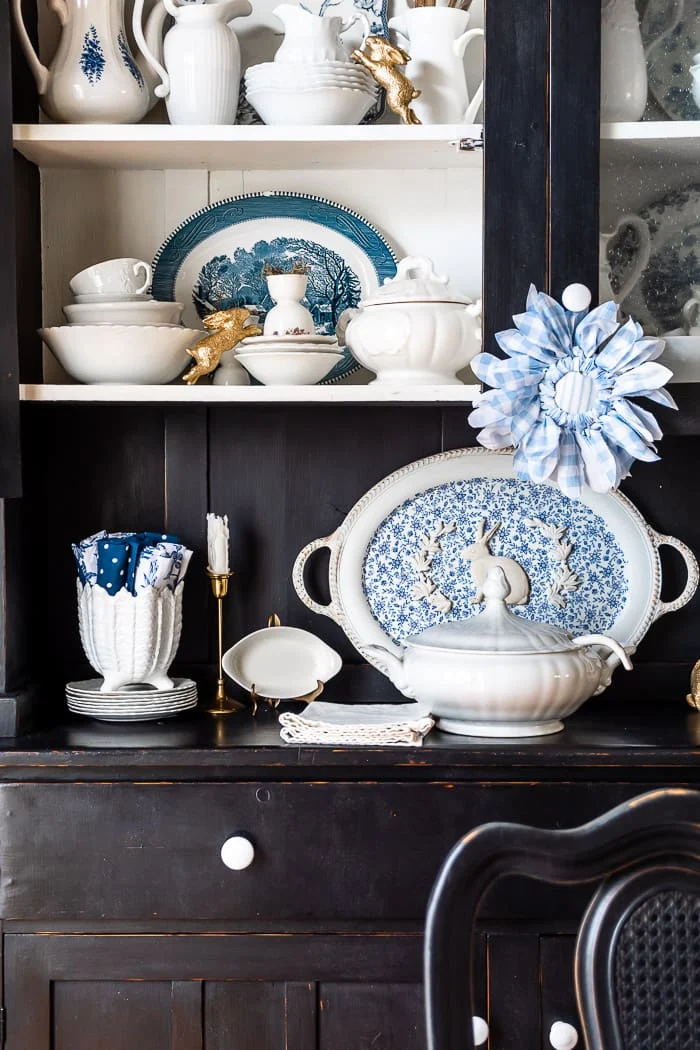
I also like the upcycled tray on my black hutch next to some of my thrifted
dishes. I'll be sharing my Spring dining room decor soon!
Pin to Save ❤
5 Ways to Decorate with Dishes
As promised, here are some ideas for using your thrifted or vintage dishes in
your home decor. The majority of my pieces were purchased for just a couple
bucks, so it's an affordable way to create a collection for your home.
1. Create a Gallery Wall of Dishes
The area above my bed needed something, but with such a tall headboard, I'm
limited in what I can hang. A gallery wall of vintage dishes, all in the same
creamy white, fills the space with vintage goodness!
You can see more of my Spring bedroom decor here.
2. Reinforce a Theme with Vintage Dishes
I decorated our guestroom for Spring in shades of white, blush and green. A
stained platter with pink florals was the perfect accent to this
Cottage Style DIY Shelf
that Mr DIY and I made. The ironstone pitcher and stack of dishes helps to
balance the shelf decor. You can see more details of this
Light and Airy Spring Bedroom
here.
3. Decorate a Bookshelf with Platters
Our living room has built-in bookshelves next to the fireplace. The TV is
mounted on top of the fireplace, which is not ideal for someone who loves to
decorate the mantel for every season!
To distract the eye, I've used the bookshelves as a place to display
decorative items. A thrifted plate rack I scored recently fit one of the
shelves nicely. I painted it white to blend in, and added vintage thrifted
platters as decor to the shelves, along with some of my vintage ironstone
pitchers. They are a great fit with my white bunnies. I'll be sharing my
Spring living room in a couple weeks, this is a great time to remind you to
sign up for my newsletter
so you don't miss a thing!
4. Add Vintage Charm in Unexpected Places
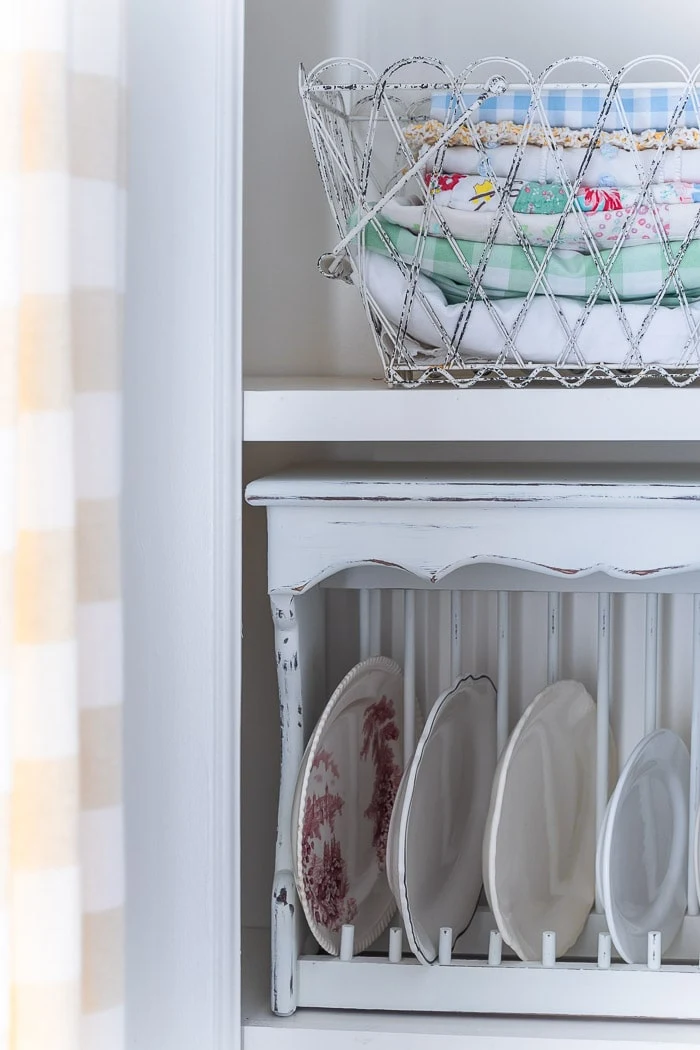
When we gave the laundry room in our rental a $50 makeover, I used the built
in shelves to store laundry and cleaning essentials as well as some of my
thrifted vintage ironstone! The pitchers are handy for storing brushes, rags,
soap, clothespins, and they add a little style to a utilitarian room. Laundry
is much more enjoyable to do in a pretty space!
You can see how we added style and function to our small laundry room for
under $50 here.
5. Fill a Cubby with Thrifted Dishes
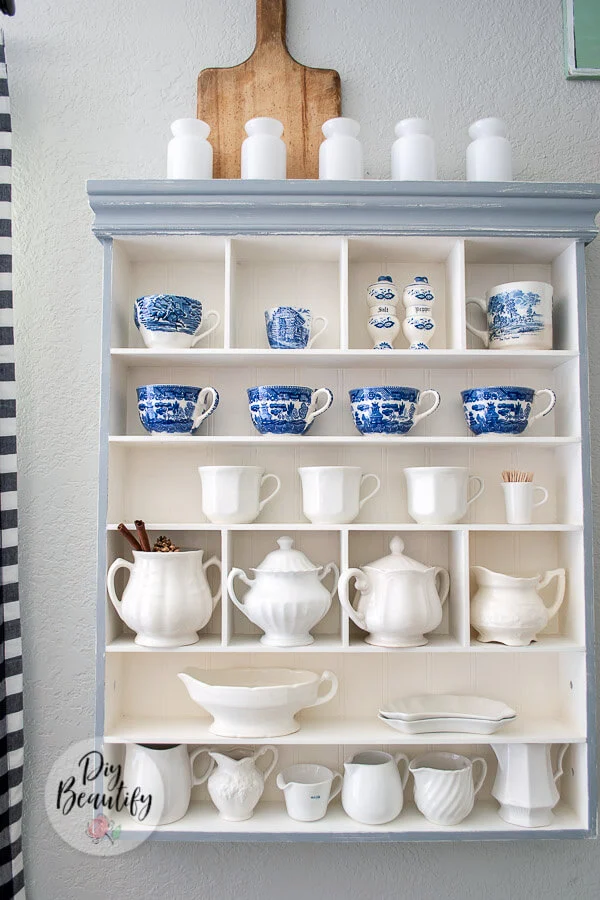
I hang vintage dishes on my walls, but I also love to display them as a
collection! This wall hung craft cubby was the ideal spot to not only showcase
my small ironstone creamers, it also functions as decorative wall art!
For more details on how I repurposed this craft cubby, click here.
If you can't find a craft cubby like this, why not add your thrifted smalls to
a primitive pie safe like
this one. The open front and sides allow your collection to be viewed from all
angles. You can see more of my
Vintage Valentines Coffee Bar here.
Of course, my favorite way to display my stacks of thrifted vintage dishes is
displaying them in and on top of my hutches!
Here are some additional ways to decorate with thrifted dishes:
- hang a wreath of vintage dishes
- decorate a hanging mug rack with a collection of dishes
- fill an awkward corner with a tote filled with dishes
- add stacks of dishes to a basket
- use vintage pitchers to hold kitchen utensils
-
make Spring nests in thrifted tea cups
Let's meet the Thrifting with the Gals team!
Rachel lives down a dirt road in North Carolina and is surrounded by amazing
antique and thrift stores. She has decorated her home, porch, greenhouse and
beach cottage with her signature farmhouse style and sustainable DIY and
crafts!
Ann has a beautiful blog where she loves to share decorating tips, vintage and
thrifty finds, DIY projects, and antiques from her collected homes in Vermont
and Coastal Maine. Her vintage collections are some of my favorites!
ROBYN of Robyn's French Nest - 10 Easy Ways to Decorate with Vintage Architectural Salvage
Robyn is from sunny Florida and has created a unique and one of a kind
French nest filled with salvaged treasures, from a builder grade house! I
know you'll love her decorating ideas!
KRISTIN of White Arrows Home - Summer Thrifting Wish List
Kristin lives in a lakeside log cabin in the Northwoods of Wisconsin and has
the best style and cozy decor that is sure to inspire! I love her vintage
collections!











Cindy, your tray looks amazing. I love all the details. Plus, I love collecting and decorating with old dishes. Thanks for these creative ideas. I’m so glad you joined us this month.
ReplyDeleteThanks Rachel, I love the hunt! It was fun to join you this month xx
DeleteCindy this is the cutest idea and I love the blue and white pattern you used. Thanks so much for joining us this month!
ReplyDeleteThanks so much Ann!
DeleteSuch a fun and happy idea! I have some platters that I didn't know what to do with and now I do! Love your creativity. And now I've also got to find a slim dough bowl/trough so I can line up teacups! Gaaaahhh! Thanks for sharing. Great post. pinned
ReplyDeleteHappy to inspire Cindy! Isn't that the way it goes...I just got back from thrifting bc Miss Mustard Seed shared some amazing ironstone cake stands she found. Of course I found nada 🙄
DeleteThis is so cute! What a great idea! Thanks for joining #thriftingwiththegals this month!
ReplyDeleteThanks so much!
DeleteThanks so much!
DeleteDear tarnished tray I don't like in my stash, thanks to this tutorial, your days just may be numbered. I adore how you made it your own, with a raised bunny no less! Those molds are so cool!
ReplyDeleteSo funny, and always happy to inspire ;)
Delete