How to Make Ruffled Flour Sack Towels with Gorgeous Long Ruffles
This tutorial will show you how to add beautifully lush farmhouse ruffles to inexpensive flour sack towels and an optional vintage inspired stencil for cute cottage decor. Dust off your sewing machine and make gorgeous ruffled towels for your home!
This post may contain Amazon or other affiliate
links. As an Amazon affiliate I earn from qualifying purchases.
My full disclosure policy can be found here.
Do you love ruffles?
I can't help it, ruffles make me swoon a little bit!
I recently came across some gorgeous ruffled flour sack towels and was about
to dish out a hefty price to bring them home, but after thinking about it for
awhile, decided I'd try to make them myself!
I am so glad I did because they're really not complicated, or expensive, to
make. And now I can have beautiful large ruffled towels in every room of our
home - sorry Mr DIY 😘 I may just go into the ruffled flour sack towel
business, that's how much I adore the ruffly goodness of these towels!
I cannot wait to share this easy DIY with you so you can add some farmhouse
ruffled tea towels (or large shabby chic napkins!) to your home too!
Disclaimer: while a no-sew option is a possibility, this tutorial shows how
I made the ruffled towels using a sewing machine.
How to make ruffled flour sack towels
The best part of any DIY is when the price is minimal! With less than $10 in supplies, you can make several ruffled towels for you home, or to give as gifts if you can part with them! I spent only $7 on supplies (some of the items I already had in my craft stash like the red check fabric that was leftover from Christmas projects). Use whatever fabric and trim you have to make your ruffled towels unique!Supplies
- I used these flour sack towels from Walmart
- sewing machine
- I used this red homespun fabric from Hobby Lobby
- I found this trim on clearance at Hobby Lobby but I think it's sold out. I did a little searching and found the same trim on Amazon
- navy gingham fabric
- DecoArt general store stencil (I found it at Dollar Tree!) but you can buy it at Walmart if your DT doesn't carry it
- stencil brush
- black acrylic paint
- straight pins
Step One - Rip Fabric
Yes, we are ripping fabric! Why? Well, first of all because it's way easier to
get a perfectly straight edge in seconds, than laboriously cutting! But
secondly because ripping gives you wonderful frayed edges and we are embracing
the frayed edges in these ruffled towels! No hems today, I promise ya!
You can make your ruffles as wide as you want, I chose my ruffles to be about
7" wide.
How much fabric do I need?
You will measure the flour sack towel (which I think is 21" wide) and then
double that to get the length you'll need. You could even double and a quarter
it if you want really full ruffles. I was trying to keep this as simple as
possible, so I doubled it.
For my white towels, I used another feed sack towel and ripped the two edges
off at 7" and then sewed them together to create one super long piece
measuring 42".
Make Ruffles
I finally figured out how to use my sewing machine to make effortless ruffles!
I've tried this so many times and it never worked, but after experimenting a
little bit, I found the perfect method that worked for me! You will need to
experiment with your machine, or maybe you already know how to do this and
have been making machine ruffles for years!
The trick to making ruffles on your machine is to have the stitch length set
to the longest (usually 4) and the tension on your machine at the highest
setting. I'm using my mom's vintage Pfaff sewing machine, straight outta the
70's and the tension goes up to 10. Every time I started sewing, my thread
would break. After being persistent with it, I found that the highest tension
I could go was between 5-6 and I was producing perfect ruffles in just
seconds!
Pin to Flour Sack
Find the center of your towel, and the center of the ruffled piece, and pin
them together, right sides out. I didn't pin the ruffle right at the edge of
the towel, I left about 3" simply because it gives a little extra stability to
the ruffles.
Once the center is pinned, pin the sides together. At this point, you may need
to adjust your ruffles so that they are spread out evenly.
Sew Ruffled Edge to Towel and Add Trim
Sew the ruffle to the flour sack towel (I left about 3/4" seam allowance so
I'd have a little ruffle at the top edge as well). If you're using trim, pin
it over the seam and sew to secure using a zig zag stitch.
Note: I added trim to the red check towel but not the white or blue gingham
ones.
Add Stencil (optional)
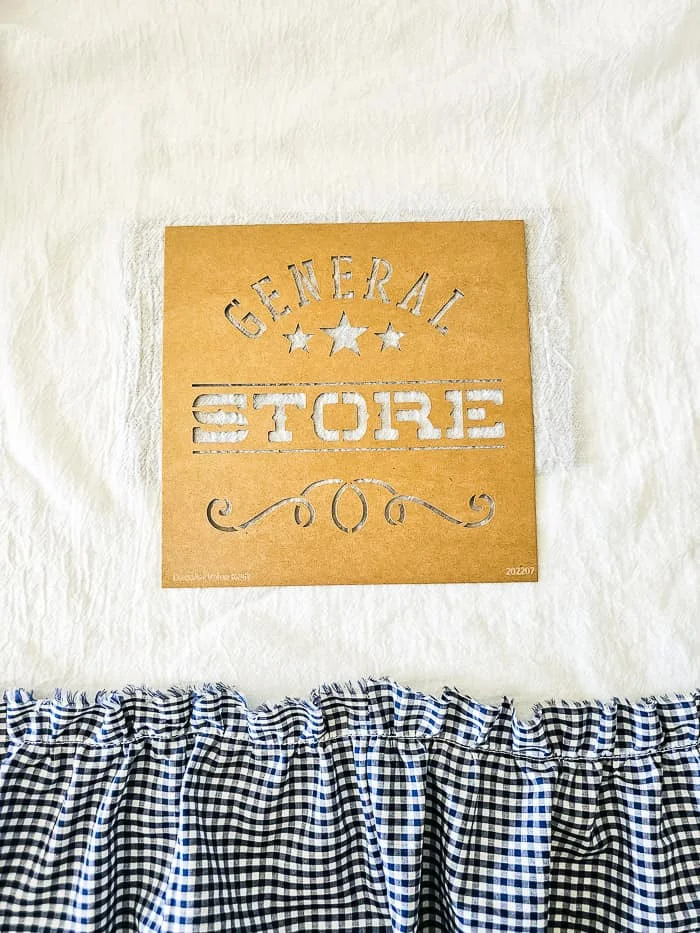
I thought the checked towels would look really cute with a stencil. These
grocery store stencils have a vintage vibe to them which works really well
with the homespun fabric.
Tip to stencil success on fabric:
- don't overload your brush with paint!
- tape the stencil down so it doesn't shift
- pounce brush up and down, starting at outside edge and working in
Because these towels have a old fashioned, vintage vibe, I wanted my stencil
to be soft. I loaded my brush with just a little paint, then pounced most of
it off onto a paper plate before taking it to my towel. The result is a
soft, worn look that is just perfect!
The only thing left to do is try to decide where you want to display your beautiful ruffled tea towels! The kitchen is an obvious choice, but if you want them to stay pretty, keep them away from the guys in your family lol! My guys are notorious for getting grime all over my favorite towels! I have no idea why they don't appreciate our pretty things 😐
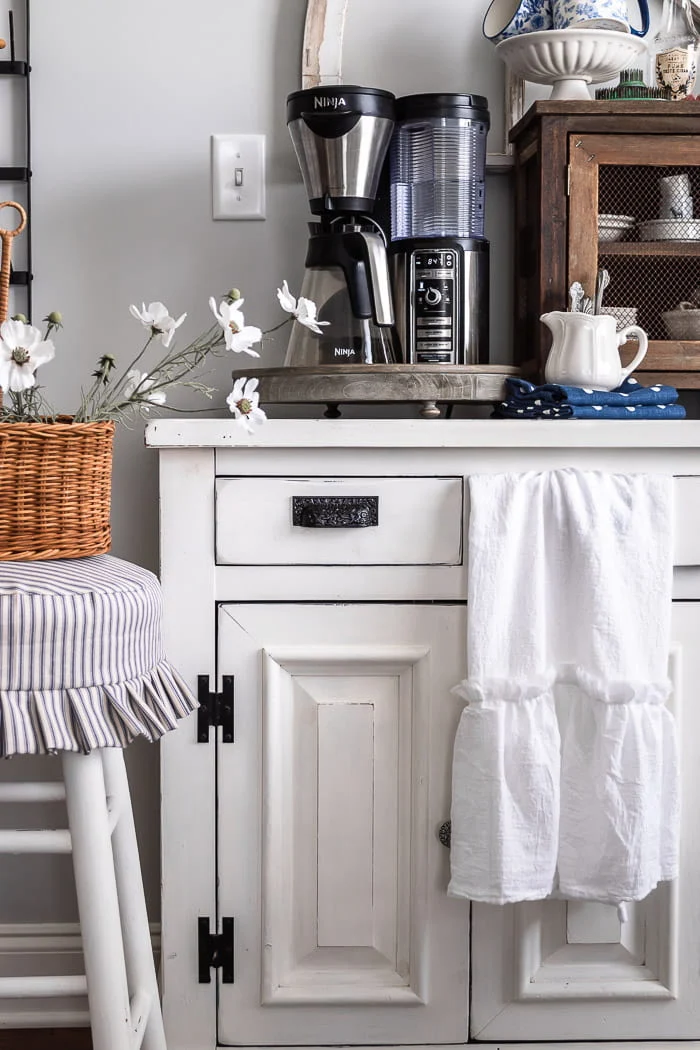
I hung mine from the
wall mounted mug rack (I love the vertical decorating power of this piece!) as well as my
coffee bar in my kitchen. This way, I'm silently signaling to the fam that my
sweet towels are for DECOR ONLY!
I also added one to the pine hutch in our dining room just because it looks so
good next to my vintage dishes!
I think saving a couple ruffled towels for a guest bathroom that's rarely used
is a great idea too. Or, use them everyday and just bleach them when they get
dirty!
I just bought another package of flour sack towels so I can make some more
gorgeous ruffled tea towels! Once you see how easy these towels are, I'm sure
you'll want multiple for your home too.
I hope you loved this tutorial and are inspired to make some of your own
ruffled farmhouse towels! Please let me know in the comments below, your sweet
comments keep me going when I'm tired 😉 As always, pinning my images and
sharing with friends is encouraged and appreciated!


I use the flower sack towels from Walmart for curtains at the farmhouse. I think I want to do the ruffle thing. They'd be soooo much cuter! Love each one you did. Happy Summer! pinned
ReplyDeleteThanks Cindy, I'm in love with them and they would make the sweetest curtains!
DeleteI love this idea, Cindy. Bought my flour sack towels and waiting for my stencil! Thanks for the inspiration! Sandra
ReplyDeleteYay! Let me know how they turn out Sandra!
DeleteNot only do I now need ruffled tea towels, I also want to paint my kitchen cabinets white. Your projects and photos are SO inspiring! These are gorgeous!
ReplyDeleteThank you my friend, that's so sweet of you! I am obsessed with these towels and their ruffly goodness!
DeleteThese are so cute! I also like your raw edges, hems are hard for me, but I can sew a straight seam.
ReplyDelete