Sew a Ruffled Stool Cover in Three Easy Steps
Change the look of your stools! Learn how to create a customized ruffled stool cover, no pattern required, in just three easy steps!
This post may contain Amazon or other affiliate links. As an Amazon
affiliate I earn from qualifying purchases.
My full disclosure policy can be found here.
Hello fellow ruffle lover! I can't wait to show you how you can make
customized stool covers with flirty little ruffles! If you hate your stools
(or you're just ready for a change), this is such a great way to transform
them and make them fit your decorating style! Slip covers are just that,
they slip on and off, so they're easy to wash and maintain.
I first saw a similar stool cover on
Miss Mustard Seed, but she didn't include a tutorial. After making my first ruffled stool
cover, and sharing it on
my Instagram page, you guys fell in love with them too! I've had a lot of you asking if I
had a tutorial, so I made another stool cover and this time took pictures
along the way, and that's what you're getting today - a detailed pictorial
for how to make stool covers with ruffles.
Perfect for the amateur seamstress
I found myself thinking about how to execute a ruffled cover for my stool, and
while I'm not a very experienced seamstress, and use my sewing machine only a
couple times a year, this is a very easy project! If it looks complicated,
it's only because I'm a details girl, and over shared 😉 Seriously though,
if you can sew a straight line, you've got this! And once you've made
one of these ruffled stool covers, the next one will come together even
faster!
Recommendations
For the best success of your DIY stool slip cover, I recommend the following:
- use a heavy weight fabric, such as cotton canvas or ticking
- keep a pencil handy to jot down your measurements
- wash and dry fabric first so you don't have shrinkage
How to sew a ruffled stool cover in three easy steps
The stool cover will consist of three pieces. The only fabric piece I cut with
scissors is the round top, the rest of the pieces I rip!
Why rip fabric?
I'm a lazy crafter, and take any shortcuts I can! Ripping fabric not only ensures a totally straight piece, and you can rip fabric in just seconds! Not only that, you'll be left with frayed edges which are perfect if you love farmhouse, country, primitive or tattered decor. I'm using black striped ticking fabric, which has a great weight for this sewing project.
1. Cut/rip all pieces
The first step is to cut out the top of the stool slipcover. Turn your stool
upside down over the wrong side of your fabric, and trace the circle with a
pen, pencil or
fabric marker. Next, cut the circle out, leaving a 1/4" seam allowance as you can see
below. By the way,
these are my favorite scissors for cutting fabric, and they're well under
$10!
The next piece to work on is the middle portion of the slipcover. You can make
this as wide as you'd like, but I recommend keeping it around 3-4" in width.
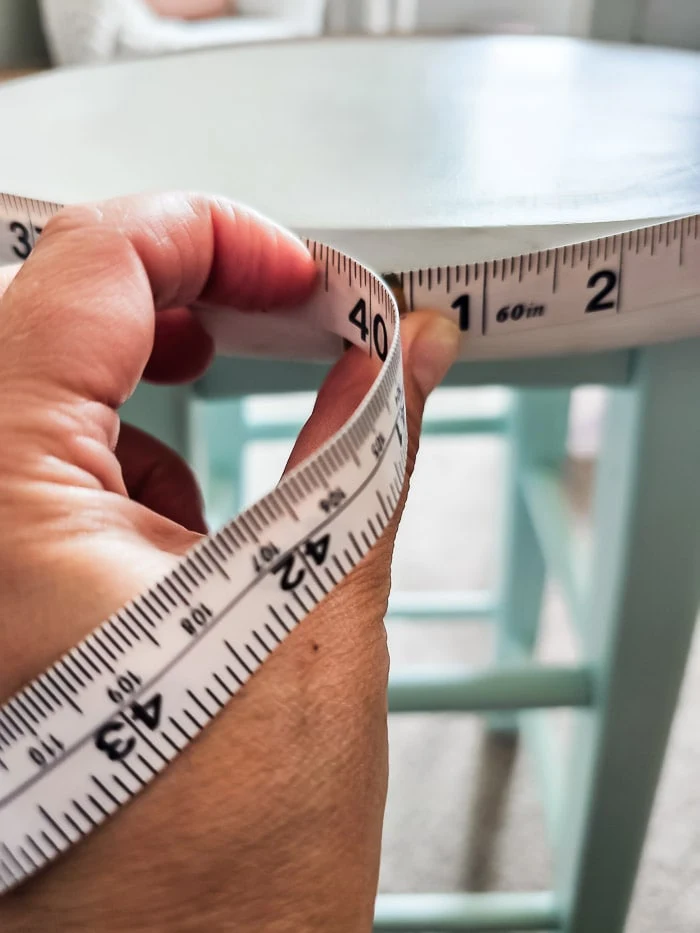
To find the length you'll need, measure the diameter of the seat as shown
below, and add 1/2" seam allowance before ripping fabric.
Finally, the last piece of this DIY slip cover will be the ruffle portion. For
the length, you'll double the measurement you took for the seat (in my case, I
need 80")*. As far as the width of this piece, the ruffles will stand out
better if you double the fabric. I made mine 4" wide so that I'd have 2"
ruffles on my finished slip cover.
*if you have enough fabric, I recommend making the strip a little longer
than you think you'll need because ruffles take up a lot of fabric!
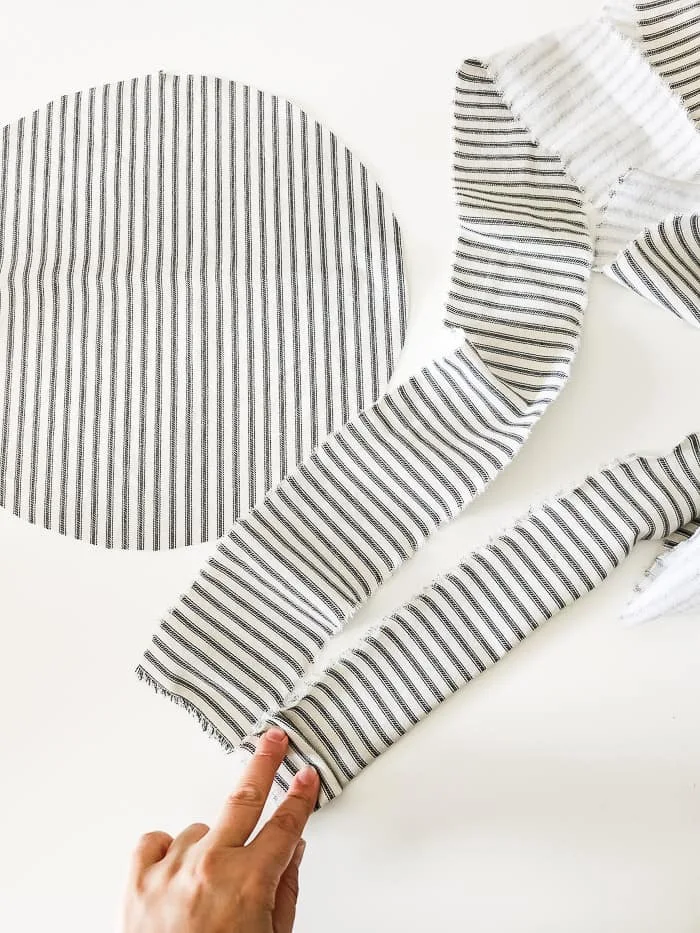
|
| Stool slip cover fabric pieces |
As you can see, each slip cover uses very little fabric which makes this sewing tutorial quite economical.
2. Sew pieces together
We'll be sewing right sides together, so keep that in mind. Pin and sew the
circle and the middle portion together. If you want to, hem the ends of the
middle portion first, or if you like the tattered look, you can leave it.
Anytime I am sewing something with curves, I use lot of pins to hold the
fabric in place! Sew with a 1/4" seam allowance, making sure fabric is
smooth.
3. Let's make the ruffles!
The ruffles are definitely the best part of this stool cover! They're flirty
and add charm and just something different. They might look difficult but
they're really very easy to make. Now, these aren't ruffles on the sewing
machine like I did for my
Gorgeous Long Ruffled Flour Sack Towels, the doubled fabric is too thick for that.
To make the pleated ruffles:
- Sew a narrow hem on each end, then fold fabric in half lengthwise and sew the edges closed. Turn right side out. You should now have a long, 80" x 2" ish piece of fabric.
- Pin one end of the ruffle fabric to one edge of the middle piece, right sides together (the folded edge will be up).
- Form pleats with your fingers, pinning them to hold them in place. Try to make the pleats all the same size, but be aware that you could run out of fabric if they're too wide! My pleats are about 1/2", giving a 1-1/2" ruffled look to each pleat.
- Work your way around until you meet the other end. You may need to adjust the pleats if you have too much fabric left over, or if you've run out.
- Sew the ruffles in place.

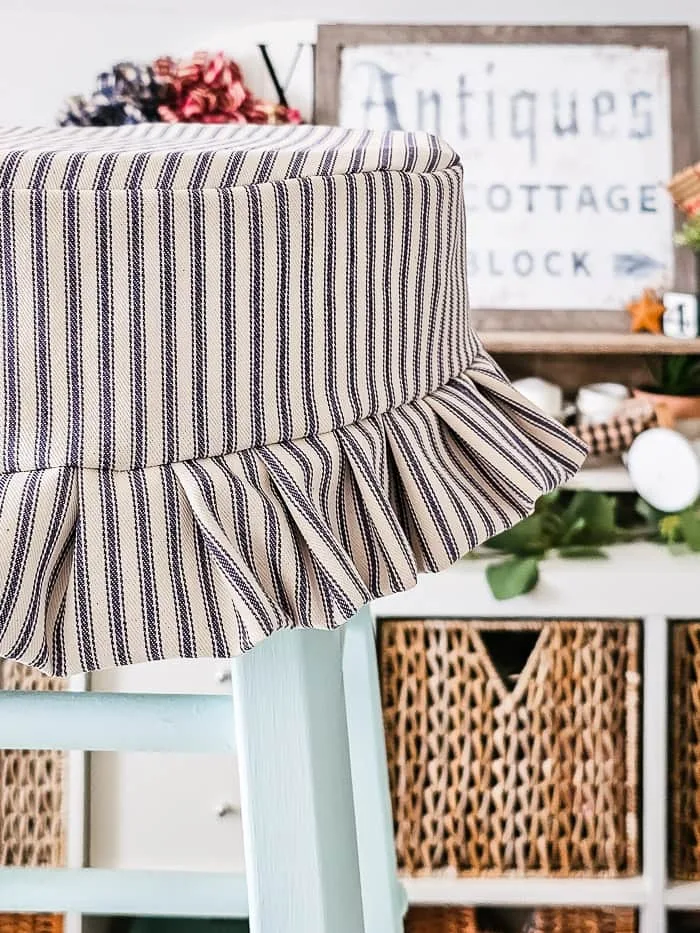
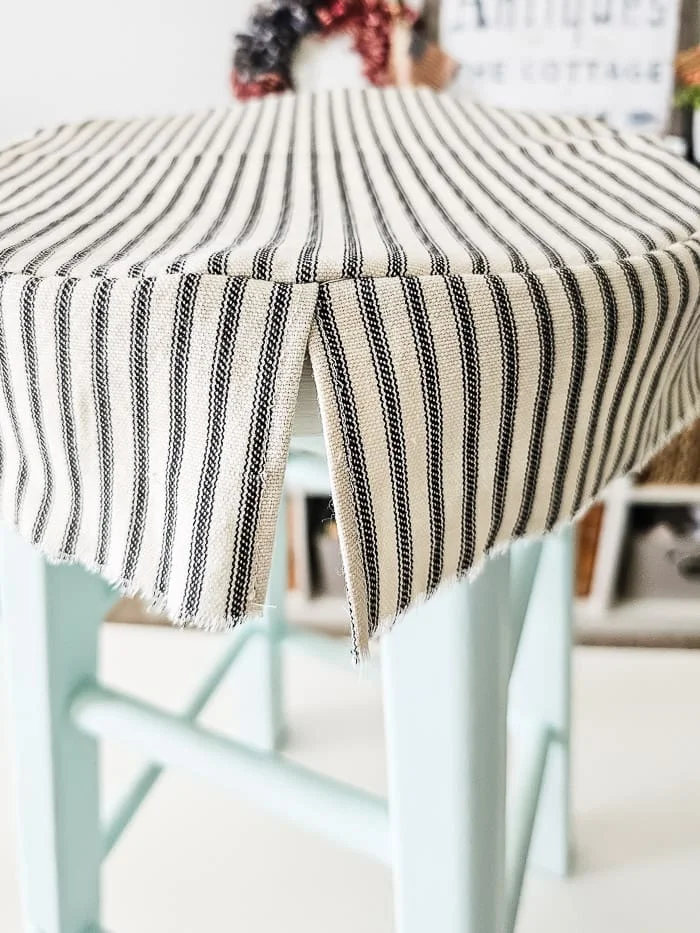
This is how the cover will look when you're finished. You can clearly see the three pieces in the finished ruffled stool cover below.
Slipcover on wood stool
As you can see, by doubling the ruffle fabric, we're left with flirty little ruffles that stick out a little bit, adding so much charm to this stool cover! The stool below is a wood top without padding. Keep reading to see how the slipcover looks on a padded stool, and I'll share a few additional tips below.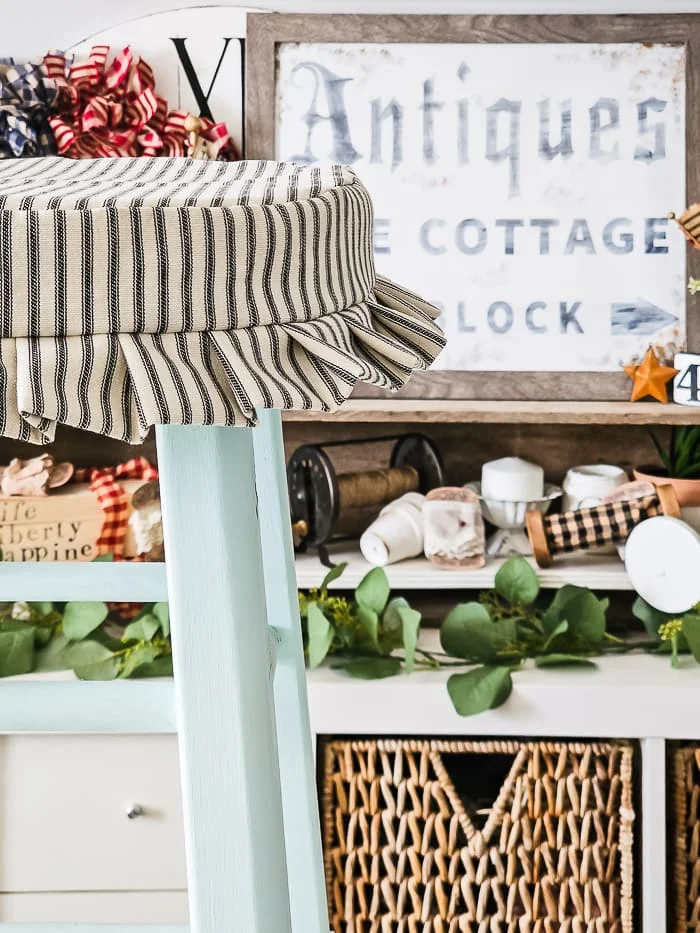
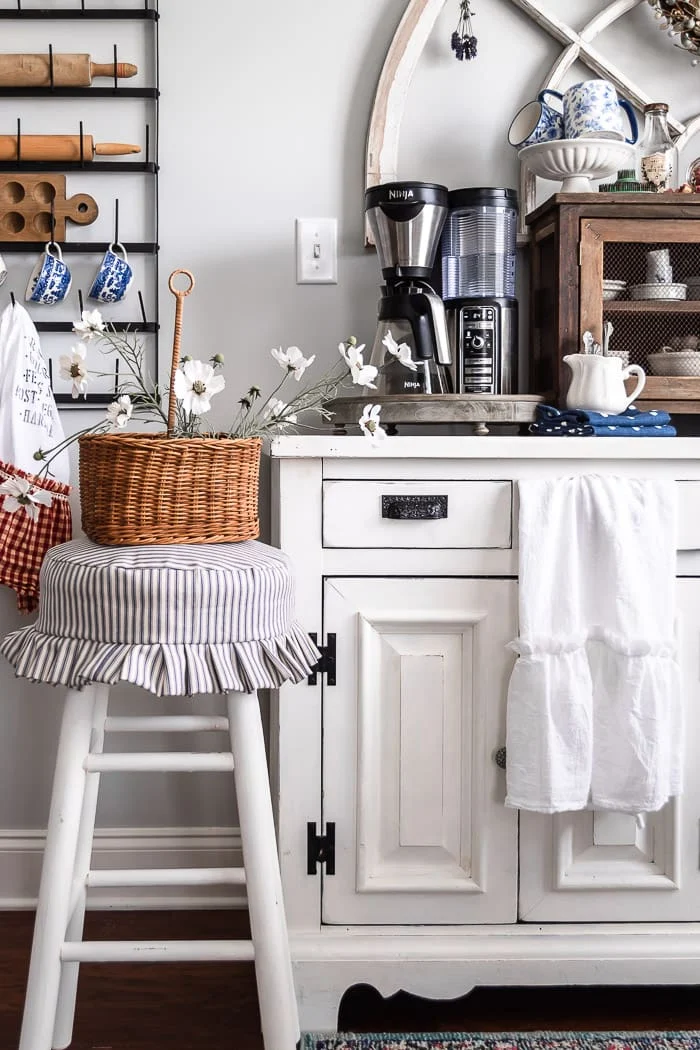
Slipcover on padded stool
This is the first stool slipcover I made, and it's on a padded stool. You
can see that I made the middle portion a little wider on this slipcover than
the one I just shared. You can look at the two to compare, and then adjust
your fabric accordingly!
Tips for success: To keep the slipcover from shifting on a wood topped stool, I recommend adding a few dots or strips of velcro along the edge of the seat cover. This will keep it in place.
Are you excited to sew some stool covers?
Please let me know in the comments below if you have any questions or need a
step explained better. If you make your own ruffled stool covers, send me a
picture! I'd love to feature you here ❤







Thanks so much for this tutorial! I look forward to making this as I have a stool, whose cover is stretched out and shot...
ReplyDeleteDid you use any kind of padding? I think I'll add some foam to mine.. Thanks again!
Debbie in WA Ü
Hey Deb, I did pad one of my stools and have plans to share that tutorial soon! Thanks so much!
DeleteThat's great! I look forward to that tutorial also!
DeleteYour stool cushions are decadent! And I just love the ticking fabric!
ReplyDeleteThank you so much Donna!
DeleteCindy these are SO pretty! I just found some beige linen for next to nothing while thrfting and I know how I'm using it now! Hugs- Tanya @twelveoeightblog.com
ReplyDeleteThanks so much Tanya, so happy to inspire you!!
DeleteLove these stool toppers, picked up a wonderful stool someone had sitting out for trash. I will give it a new look with paint and a topper. Thank you
ReplyDeleteLucky you! Happy crafting :)
Delete