DIY Antique Inspired Packing Tape Transfers
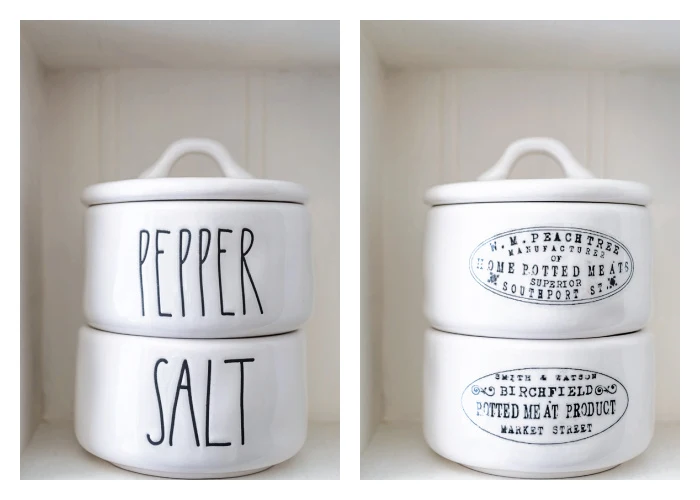
Transform the look of your ceramics or glassware with easy and inexpensive packing tape transfers! Learn how to create antique inspired advertising pots and crocks with my free sheet of printables.
This post may contain Amazon or other affiliate links. As an Amazon
affiliate I earn from qualifying purchases.
My full disclosure policy can be found here.
This easy project is perfect if you're looking for inexpensive ways to create
stunning home decor! I'm going to teach you how to create the look of antique
ceramics using packing tape transfers! Don't love antiques?
You can use any design that you find or create! Think personalized
mugs, custom wedding decor, seasonal decor, etc.
I am a lover of anything antique, specifically creamy white ironstone. I also
really like the look of antique food crocks with advertising labels but
they're nearly impossible to find in the wild. For that reason, I came
up with this super cheap way to add designs to my ceramics using packing tape
transfers. It's really easy, and I'm sharing the step by step instructions
below. Whether you like antique or modern (or anything in between),
this is a great project to create removeable stickers to decorate your home
with!
Table of Contents
Jump to the desired section:
Pieces of history
You might not know this, but antique food crocks, bottles and more (with
gorgeous antique advertising) are being dug up from European landfills and
collected by people the world over! These pieces are treasured by many people,
but are nearly impossible to find unless you make an expensive trip to Europe!
They are highly collectible, so extremely expensive to purchase. If you have
no idea what I'm even talking about, take a look at these examples
HERE and
HERE.
Now, you might think I'm crazy to want to decorate with something that
advertises..say... bloater paste...
um, what even is that anyway, lol! But I assure you I'm not the only
one! Many people are enamored with the idea of owning a little piece of
history. These antique pieces are the pickle jars and toothpaste tubes of an
earlier century!
Part of what makes these old food and medicine crocks so desirable is that
they are made of ironstone. Over time, they develop stains and crazing and, if
you like that kind of thing, are pieces of beauty.
Faking the look of an antique
When you can't afford to buy expensive pieces,
or you just can't find any in your price range, faking the look is the
way to go! Even though these designs are just transfers make from cheap
packing tape, I think they look surprisingly realistic!
If you think so too, read on for the tutorial and free printable sheet of
antique inspired advertising labels that I made to resemble the real
version.
What is a packing tape transfer?
A packing tape transfer is simply a sticker or decal made from packing tape.
The printed design is imprinted onto the sticky side through the easy method
I'll share below. The decal is removable with little effort and leaves no
residue behind. Packing tape transfers are a great way to create temporary
designs for your decorative accessories. This could be especially fun if you
like decorating for seasonal holidays
(think numbers and/or pictures to turn plain ceramic pieces into Halloween
spookiness, etc) are looking for easy ways to customize shower or birthday decor, or even
giftable items like personalized mugs.
These sticky transfers work best on glassware and ceramics. You don't need to
stick with black and white! Colored designs work just as well. Get creative
with the designs you choose to print and transfer.
Laser Jet or Inkjet
One important thing to note before you start printing all the cute things. You
must use a laser jet printer for this project. Unfortunately, the ink
from an inkjet printer (ones that most of us use at home) is not water
soluble, which means the design will not last once it gets wet. I save my
designs to a flash drive and print them at Office Depot. It's inexpensive and
that way I know my designs will transfer cleanly!
Okay, with that said, let me show you how to create the easiest decals using
packing tape and how to transform your ceramics and glassware.
Supplies Needed:
- printed design
- scissors
- bowl of water
- packing tape
- vessel of choice (glass or ceramic - see below for options)
- rubbing alcohol
- paper towel
SHOP CERAMICS
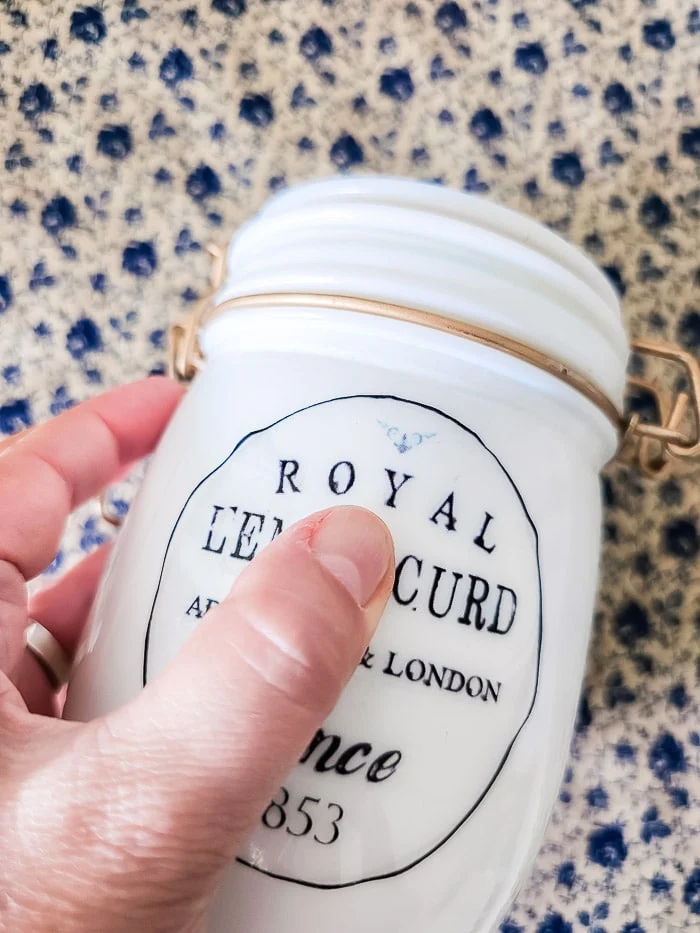
I recently found this white milk glass mason jar at the thrift store, and
thought it would be cute with a vintage inspired advertising design. Here is
how to make these packing tape transfers to transform your housewares.
How to Make DIY Packing Tape Transfers
Step 1: Print and cut out design
Print designs onto regular copy paper. Use scissors to cut out the design. I
like to cut as close to the printed design as possible.
Step 2: Cover with packing tape
Cover the design with a strip of packing tape. You may need an additional
strip to cover the entire design. Make sure to slightly overlap the packing
tape so the design stays together. Use something stiff like a credit card or
craft stick to burnish the packing tape over the design, removing any air
bubbles and just making sure it is securely stuck on.
Step 3: Trim design
Trim around the design again, making sure to cut off any of the sticky
exposed tape.
Step 4: Add to water
Put your design in water, paper side down, for a few minutes to soften the
paper. The edges will likely curl a little and this is normal.
Step 5: Remove paper backing
Put the wet design tape side down on a piece of paper towel and rub lightly
with your finger to remove the paper. Don't rub too hard. Once you think you
have it all off, put it back in the water! There is usually another lighter
layer of paper that needs to be removed. Repeat as needed until all the
paper has been removed.
Read on for tips and FAQs!
Once the transfer is completely clear
(you can check this by looking at the front of your decal - any paper
residue will show as white), set it aside to dry. You'll find that the stickiness disappears when the
decal is wet. Once it's dry, this activates the adhesive on the packing tape
and your design will be tacky like a sticker.
If you've got a detailed eye, you'll notice that my design changed
between steps 4 and 5 above! That's because the original printed design I
used was older and I couldn't remember if it was a laser jet print or not.
Once it got wet, the ink bled and my design disappeared!
For the best results, make sure whatever vessel you're going to apply the
decal to is clean, free of fingerprints and any oils. The best way to do this
is to clean it with a little rubbing alcohol on a paper towel and set it aside
to dry completely while you're working on the transfer.
When the transfer is sticky once again, apply it to your vessel. You'll want
to rub and press it from the inside out, to remove any air bubbles.
Designer Tip: try to avoid a heavily curved vessel, as it will be
difficult to get the transfer to lay flat.
I'm so pleased with how this vintage inspired lemon curd label looks on my
thrifted milk glass mason jar. Doesn't it look like an antique?
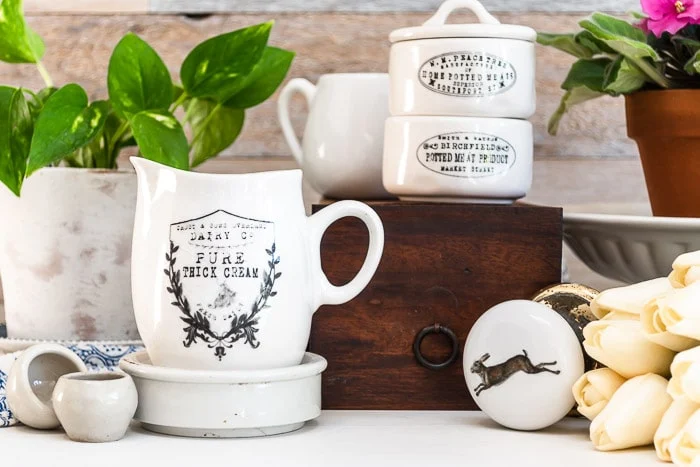
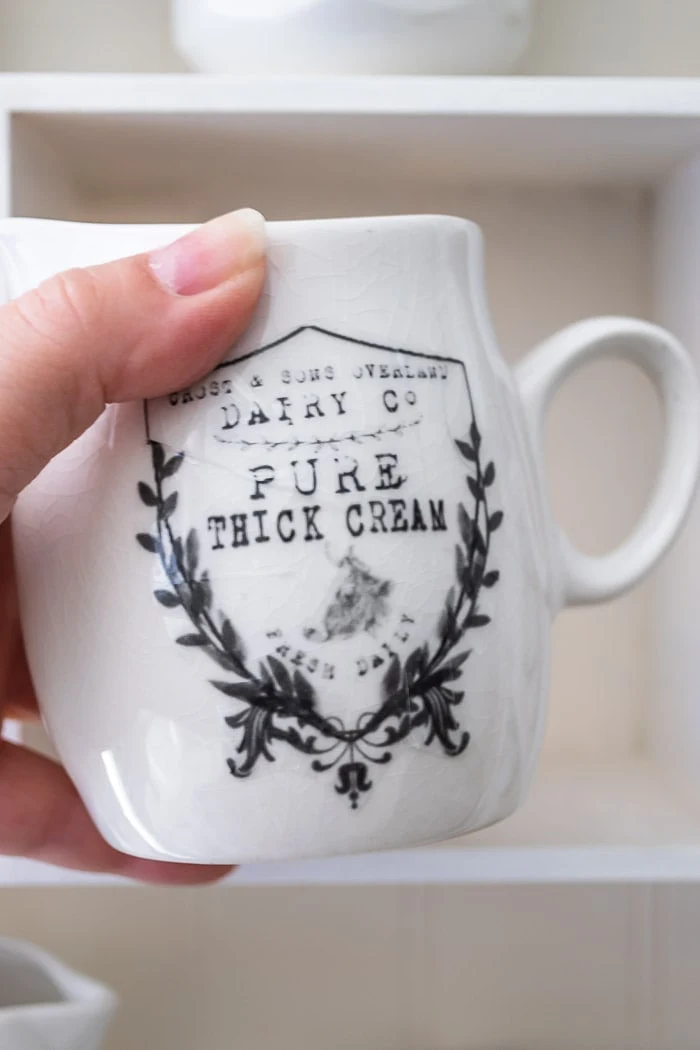
Here are a few other ceramic items that I transformed with this easy packing
tape transfer technique. I like that the crazing on this creamer shows through
the clear transfer.
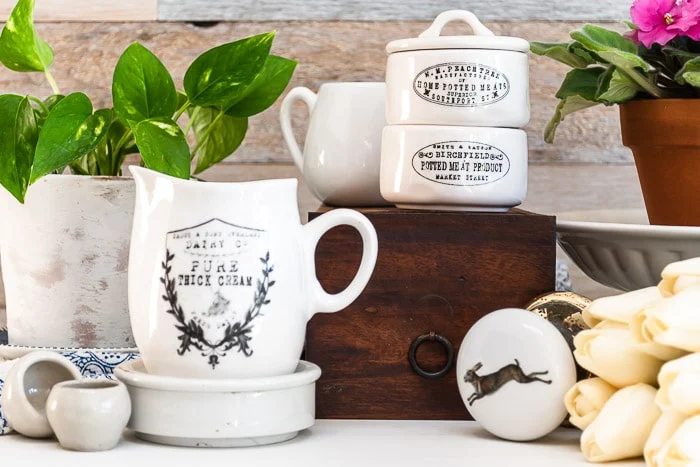
You can make a whole set of vintage inspired ceramic pieces to decorate with!
Any ceramic or glass piece is just waiting for a packing tape transfer to
transform it! Mugs, platters, plates, creamers, pitchers, vases, candleholders
- anything with a smooth, hard surface. I found ceramic door knobs at our
local Habitat ReStore and made
vintage style packing tape rabbit transfers!
WHERE CAN I FIND FREE DESIGNS?
I love using the vintage and antique designs, many of them authentic, from
The Graphics Fairy. They are free for personal use. If you're a subscriber to DIY Beautify, you
can download my printable sheet of antique-inspired designs for free! Not a
subscriber yet?
Sign up HERE.
HOW LONG WILL THE TRANSFERS LAST?
The transfers can last indefinitely, especially if you're just using them on
items for home decor that don't get daily use. If you applied them to say, a
mug, they may come off when the mug is hand washed, but if so, just set aside
to dry and you can reuse them!
ARE THE TRANSFERS EASY TO REMOVE?
Yes! They are like a cling-on sticker, without that annoying adhesive on the
back! You can easily peel them off and reuse on another vessel, or save to
reapply later.
I really hope you enjoyed this project and try making packing tape transfers
to use in your home decorating! Let me know if you have any questions in the
comments below.







Love this project! I am a subscriber, however I do not seem to be able to find your library!?!
ReplyDeleteHi Shirl, thank you! The link is always at the bottom of the Sunday newsletter. If you need it now, send me your email and I'll email it to you right away!
DeleteThese vintage label transfers look so authentic! Goodness how I love this look. Thanks for offering a way so we can make our own!
ReplyDeleteWell, you've just helped every person out there with a Rae Dunn collection. And I must say your side is waaaaay cuter! Love how amazing they look. You make it look easy but something is wrong with me. I'm so intimidated by things like this. I need a computer lesson. And a flash drive. Maybe that should be my New Years goal?! Loved this post and the fun idea.
ReplyDeleteThis is such a fun idea. I need to try this. Hugs and blessings to you. Merry Christmas, my friend.
ReplyDeleteThanks so much Renae!
DeleteCindy this is such a cool idea! I have not seen this before. The transfers are so real looking I had to double take. Genius! And Merry Christmas!
ReplyDeleteKelly @thetatteredpew
Thanks so much Kelly!
DeleteHello, I'm a subscriber but I don't recall getting access to the free printables, especially the antique labels.s
ReplyDeleteCindy:
ReplyDeleteOops, looking for free antique labels, buy forgot to give my name: Anna at fishfood91@aol.com
Thanks Anna, I emailed you.
Delete