How to Make a Decoupage Pumpkin Centerpiece
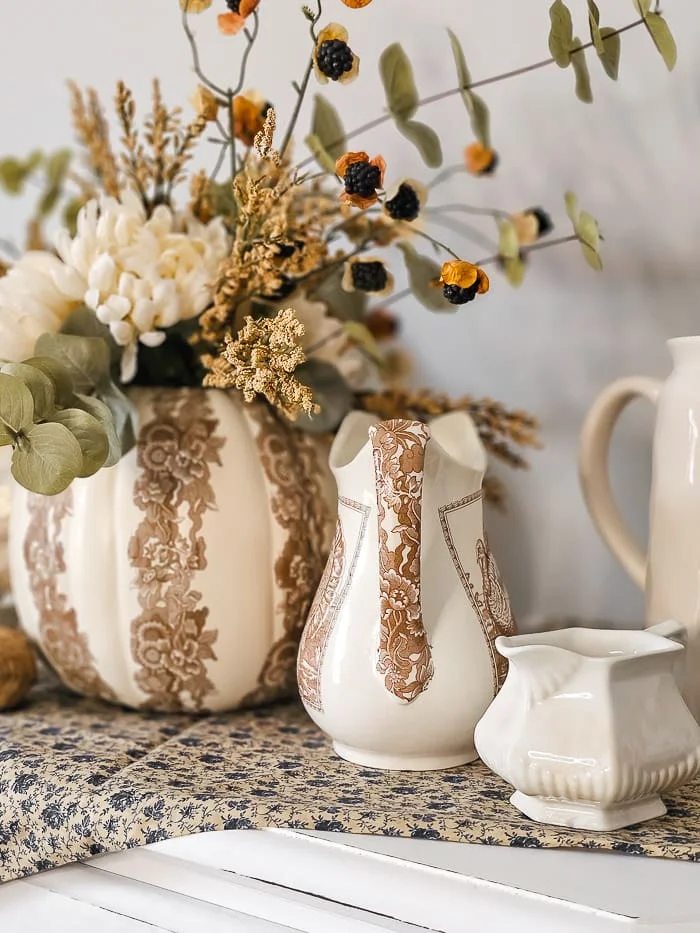
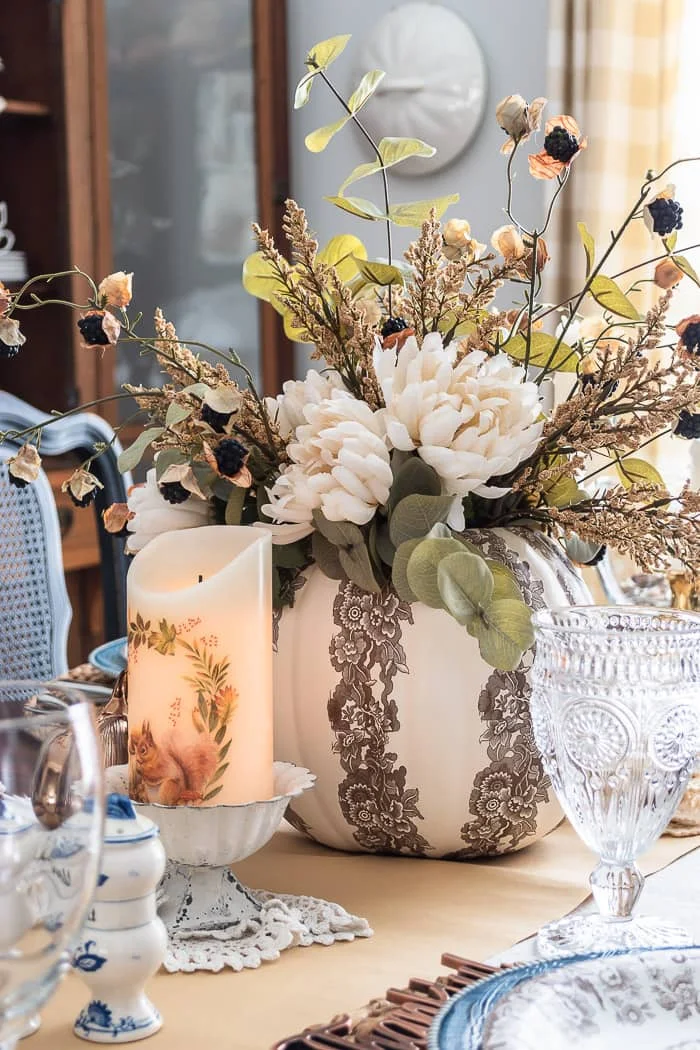
A beautiful and elegant decoupage pumpkin centerpiece that will be the showstopper on your Fall or Thanksgiving table.
This post may contain Amazon or other affiliate links. As an Amazon
affiliate I earn from qualifying purchases.
My full disclosure policy can be found here.
If setting a Thanksgiving table intimidates you, you need this decoupaged
pumpkin centerpiece in your life! It's easy to make, inexpensive and is sure
to wow your guests! I'll show you step by step how to accomplish this
beautiful centerpiece and tips for filling it with real or faux florals.
Tip: Now is a perfect time to purchase supplies for this project as they're all on serious discount at the craft stores!
I'm thrilled to be joining several talented DIY and home decor bloggers to
share our Thanksgiving ideas and inspiration with you! Thanks to my sweet
friend
Laura of Decor to Adore
for hosting this Grateful Gatherings round robin. If you hopped over here from
Yvonne at Stone Gable, a special welcome to you!
If you're new here, I'm Cindy, a 10-year veteran home decor blogger, and I love to share my DIY and craft tutorials and home ideas with you to show you how to create a beautiful home no matter your budget!
How to make a decoupage pumpkin centerpiece
I recently shared some tips for creating faux brown transferware pieces to add
to your Fall or Thanksgiving table or hutch when I showed you how I
set my table with mismatched dishes.
The pumpkin I'm sharing today beautifully matches the pieces I already
created, because I'm using the same napkins. I found
these napkins, they're the Woodland pattern by Spode. The turkey and the brown
pattern was so perfect for this beautiful pumpkin centerpiece!
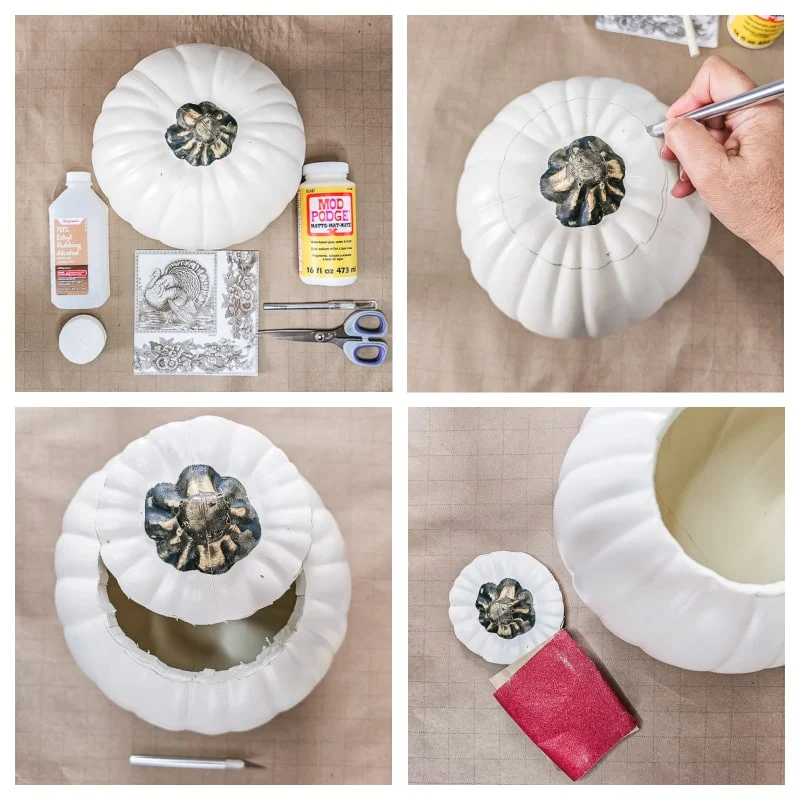
Supplies you'll need to decoupage pumpkin:
- medium white craft pumpkin (I used one I found at Michaels)
- napkins of your choice
- Mod Podge or any decoupage medium in matte
- rubbing alcohol
- pencil
- X-acto knife
- scissors
I tried to link to the pumpkin I bought but couldn't find it anymore on the
website. Now that Christmas decor is out in stores, all the fall and
Thanksgiving will be drastically marked down, so now is a great time to shop
for discounted supplies!
Step 1 - Cut top off pumpkin
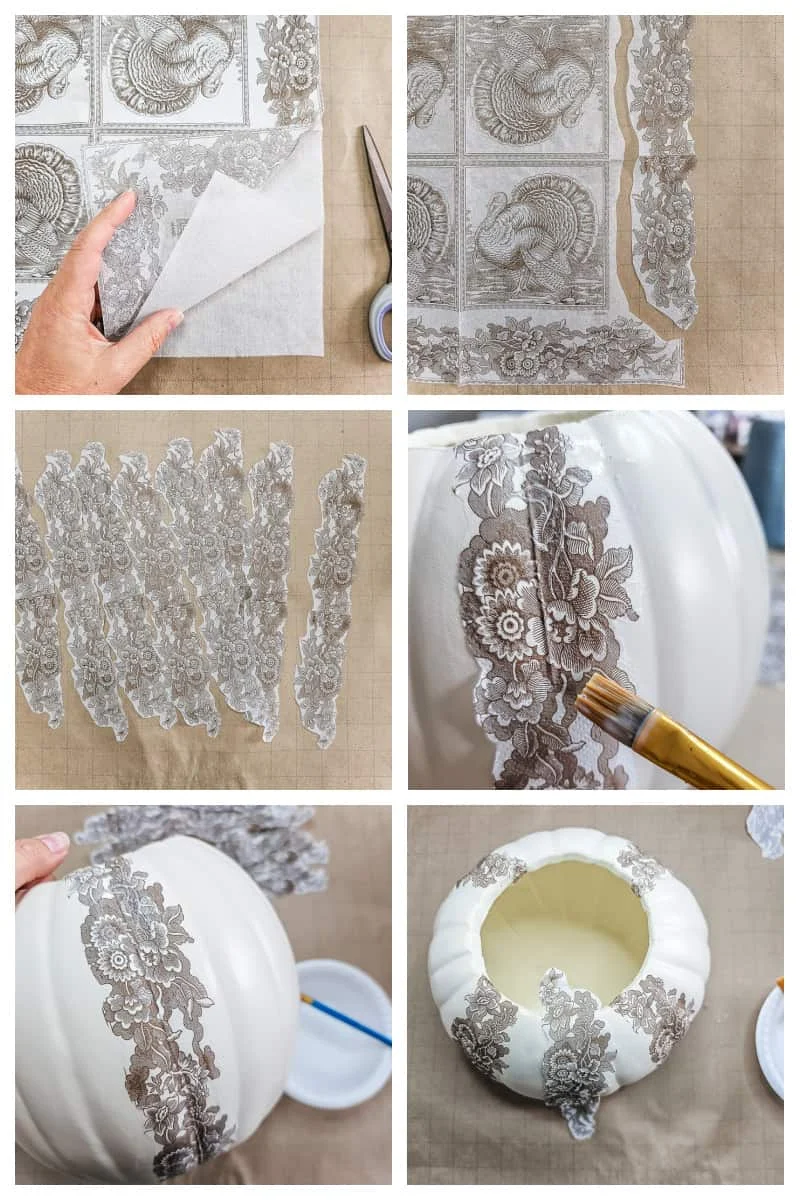
I traced a jar lid with pencil, then used my Xacto knife in an up and down
sawing motion to remove the pumpkin top. I had a few rough bits, so took a few
minutes to smooth the edges down with sandpaper.
Step 2 - Cut napkin
I chose to cut the edges from my napkin and decoupage the strips around my
pumpkin. Depending on the napkins you're using, you may choose to go another
direction.
Just remember to remove the extra ply (there's usually 2 extra) from your
napkin so you're working with just the design portion.
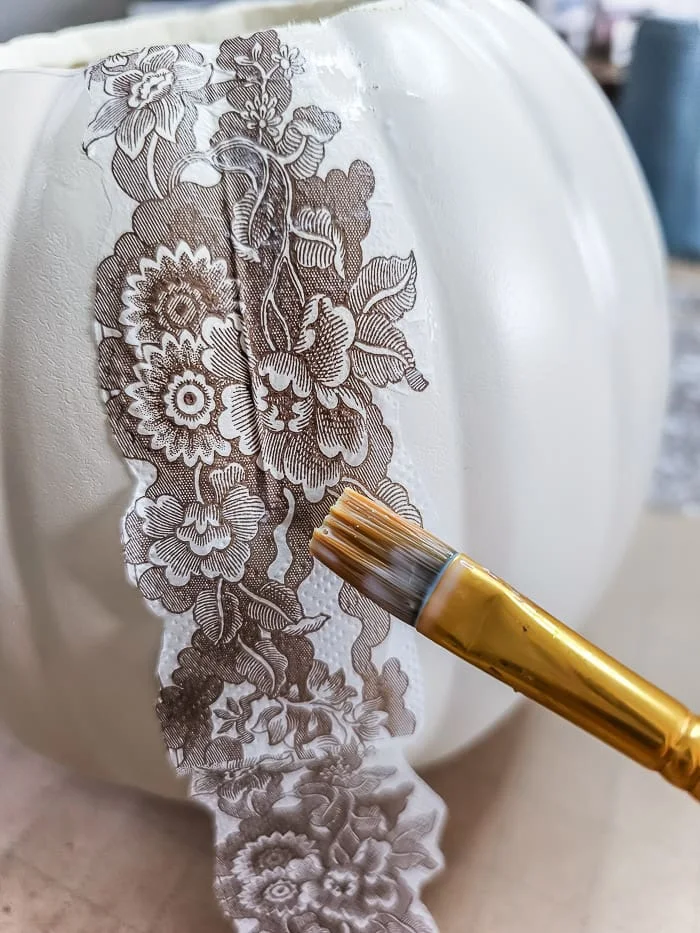
Here's a decoupage tip
I mixed my matte Mod Podge with a little bit of water to thin it out. This
way, rather than having to brush Mod Podge onto the pumpkin, lay down the
napkin, and apply more decoupage medium, I cut out that step!
I simply laid my napkin strip where I wanted it and brushed on the watered
down Mod Podge right on the top of the napkin.
In no time at all I had 8 strips of napkin decoupaged onto my pumpkin. Now I
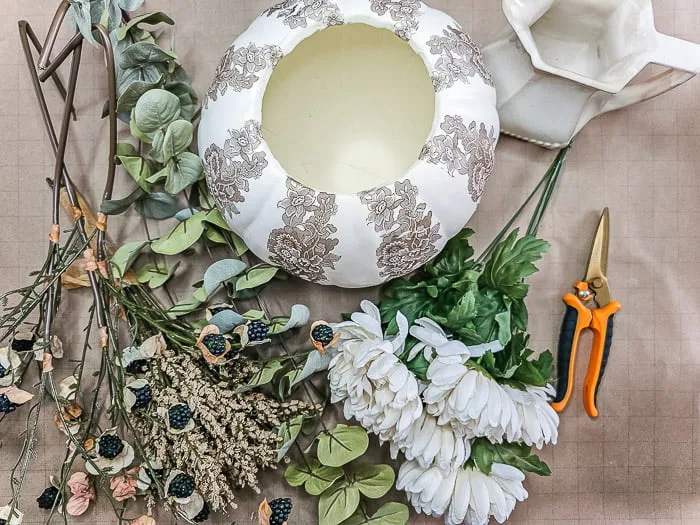
turned to the faux greenery and florals.
Helpful Tips: I cut the eucalyptus into small sections, as well as bent the long stems of
the other florals so they would fit nicely into my pumpkin. Then I simply
tucked everything in until it looked right.
Note: You can use fresh florals too! Place a glass or mason jar of water in
the middle of the pumpkin so your stems stay fresh longer!
bringing beauty to the ordinary,





Absolutely beautiful! Such a clever idea. Blessings to you.
ReplyDeleteThank you Renae!
DeleteCindy I absolutely adore this gorgeous centerpiece. Such a clever craft. It truly is the perfect finishing touch for a lovely table.
ReplyDeleteThank you Laura, I know it will be a piece I enjoy pulling out each season! Happy Thanksgiving!
DeleteI love your decoupage pumpkin. It looks so elegant and so perfect for your table. Your floral arrangement is stunning also. I haven't done anything with decoupage in years, so I enjoyed the tutorial.
ReplyDeleteThank you Marty, hope I inspired you to try a new decoupage project! Happy Thanksgiving!
DeleteI've tried this with smaller pumpkins but never even thought to try a big one for a centerpiece. This is such a beautiful idea! I love how it looks like transferware too. It's so pretty! Hope you and your family have the best Thanksgiving, CoCo
ReplyDeleteThanks so much CoCo! Enjoy your Thanksgiving!
DeleteHi Cindy, your Spode "transferware" pumpkin is perfect for a Thanksgiving centerpiece and flower container. Such a lovely table with your neutral placesettings! Have a wonderful Thanksgiving week!
ReplyDeleteThank you so much Debra and same to you!
DeleteYour pumpkin project is so pretty and is the perfect centerpiece for your table. Thanks for the tip about thinning the mod podge. Have a wonderful Thanksgiving!
ReplyDeleteThank you Angie!
DeleteHow cool that you found napkins to match your dishes! Great tip for just brushing the decoupage onto the napkin front when applying! Beautiful table setting. Enjoy Thanksgiving with your sweet family!
ReplyDeleteThanks Lora
DeleteWell you certainly fooled me. I thought you had a fancy ceramic pumpkin. Very clever.
ReplyDeleteThis is totally genius! I've always wanted brown transferware but can't afford it! I wonder if the napkins would show up on clear glass plates? Maybe keep the white part of the napkin? Thanks for sharing this. Love love love it! Happy Thanksgiving friend.
ReplyDeleteThank you Cindy, I've never tried it on clear glass so not sure how it would look. Let me know though, if you do it!
DeleteHow lucky to find Spode napkins with the perfect pattern! I love your pumpkin centerpiece Cindy! Such a smart smart project with beautiful results!! Happy Thanksgiving!
ReplyDeleteThank you Michele 😊
DeleteCindy, your decoupage pumpkin centerpiece is so beautiful! What a clever and creative project! The Spode napkins are just perfect! Best wishes to you and your family for a very happy Thanksgiving!
ReplyDelete