Valentines Day DIY Towels with Hearts and Trim
Brighten up your kitchen for Valentines Day! Cute trims and scrap fabric hearts elevate flour sack towels for the season of love.
This post may contain Amazon or other affiliate links. As an Amazon affiliate I earn from qualifying purchases. My full disclosure policy can be found here.
Hanging a seasonal towel in the kitchen is a simple way to decorate for Valentines Day and these towels are so cute and easy to make, I'll walk you through all the steps with options ❤
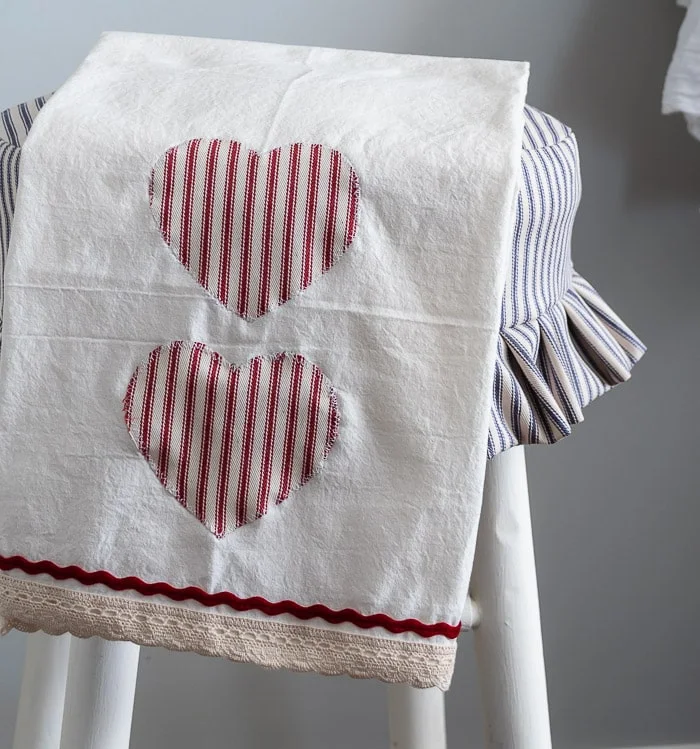
I made two different towels, both in red and white but one has more of a vintage vibe than the other, with red ticking fabric and embroidered trim. You can either sew the trim and hearts to the towels, or use fabric glue. I'll share some tips below.
How to make Valentines Day towels
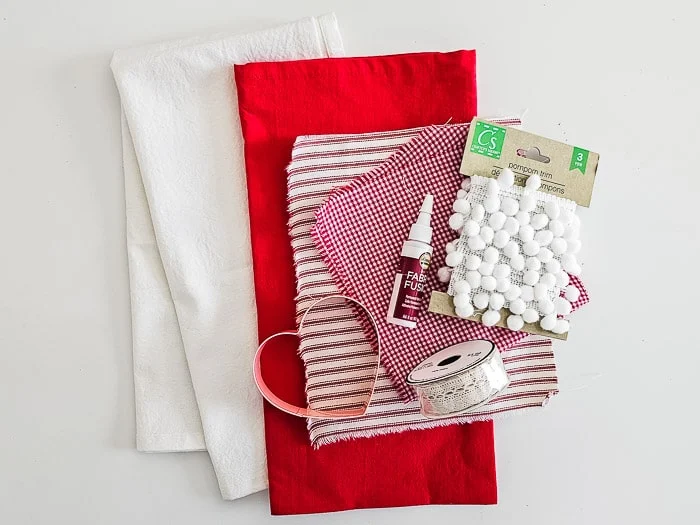
I used cotton flour sack towels for this project. You can find the full supplies list with sources below the tutorial.Step 1 - trace and cut out fabric hearts
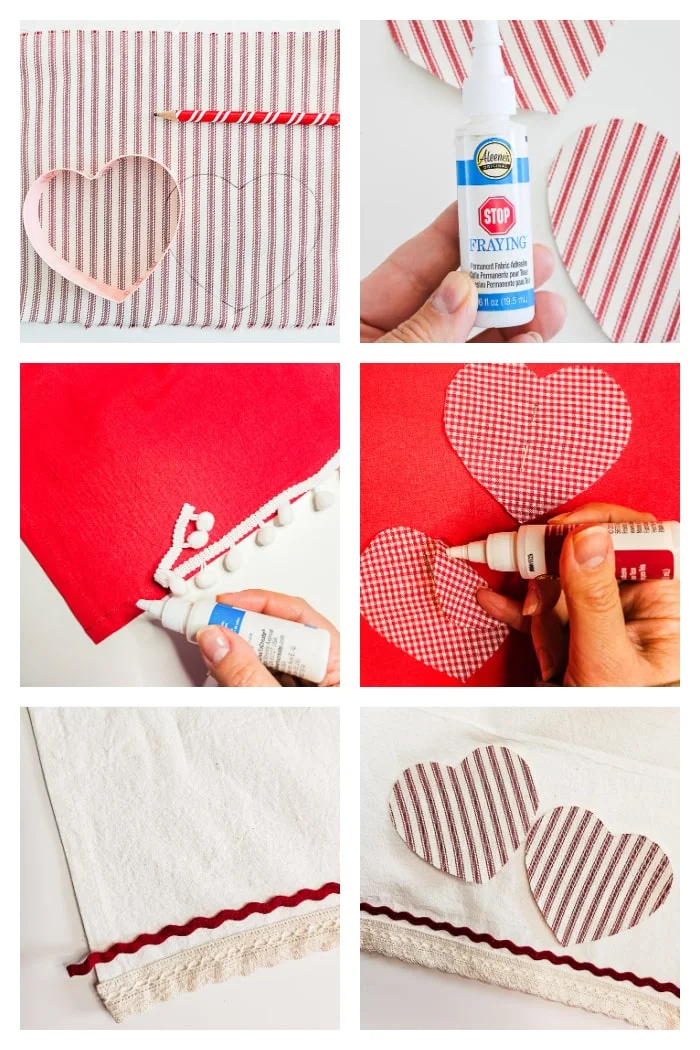
I used some scraps of red ticking and gingham fabrics for my hearts (leftover from Christmas projects). It was easiest to trace a heart shaped cookie cutter on the backside of the fabrics and cut them out.
Step 2 - fray check
To keep the hearts from fraying, I applied a thin line of fray check along the edges and set them aside to dry. Please note that it will take up to 12 hours to dry completely.
Step 3 - add trim
While the fray check is drying, go ahead and attach the trims you're using to the bottom edge of the towels.
Tips for gluing trim
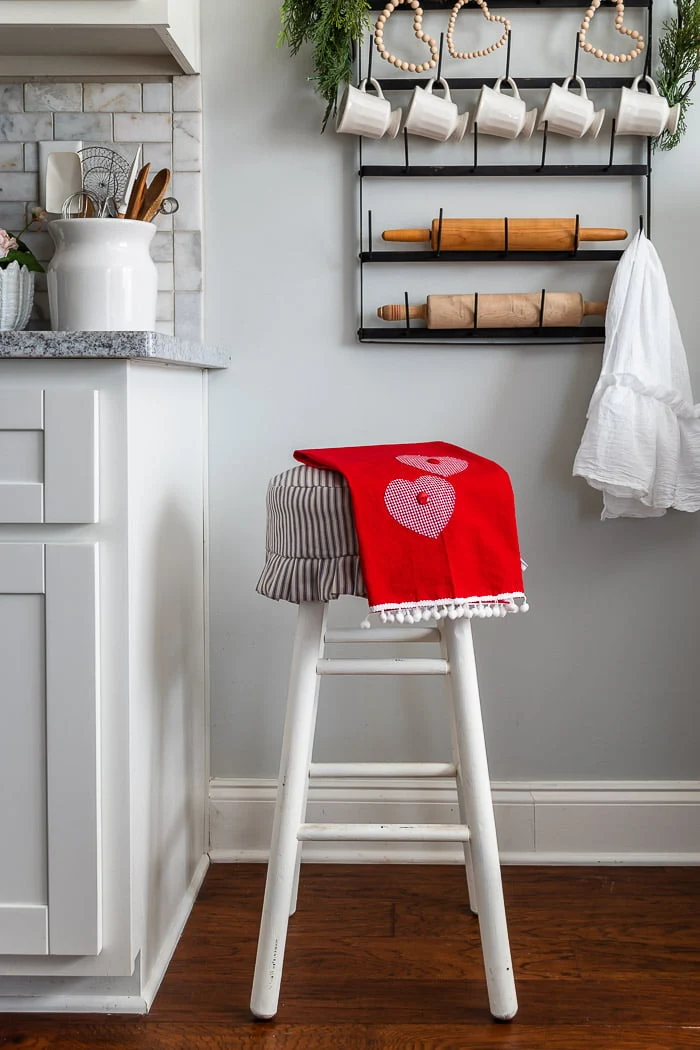
If you want to secure the trim with fabric glue, be sure to choose a lightweight trim, like the pom pom trim I used for the red towel. You'll need a large space to spread out the towel (protect surface from glue). Glue in 3-4" sections, pressing the trim to the fabric to secure. Set aside to fully dry.
To speed the project up, try Stitch Witchery (it's a bonding tape that you iron). I used this product when I made Millie some pup bandanas and I also used it to hem a graduation gown to shorten the length. It's inexpensive and works well - especially when you don't sew, and don't want to wait for glue to dry.
Tips for sewing trim
I prefer to sew trim because it's just faster, easier and less messy. You can use a heavier weight trim, like the embroidered lace and the ric rac that I used for my light colored towel. I used matching thread and sewed with a zigzag stitch.
Step 4 - add hearts
Use a straight pin in the center of the hearts to hold them where you place them, and then either add a narrow bead of fabric glue along the inside edge, or take them to your sewing machine and stitch in place. Again, you could use the bonding tape I mentioned above to quickly secure the hearts to the flour sack towel!
Tip: I added just two hearts per towel, but you could do as many as you want, even in different sizes and fabrics! Think of placement (what you'll see when towel is folded to hang) before you permanently secure!
I thought the gingham hearts looked like they needed a little something, so I hand stitched a red button in the center of each heart. You could also glue them in place.
These DIY Valentines Day towels were fun to make, and didn't they turn out cute?
Supplies used:
- red flour sack towel
- natural flour sack towel
- red ticking and gingham fabric
- white pom pom trim
- ivory embroidered lace trim (from Hobby Lobby)
- burgundy ric rac
- fabric fray stop
- fabric glue
- sewing machine
- straight pins
Note: Check your local Dollar Tree or Walmart for many of these items listed! I buy most of my fabrics from Hobby Lobby, and the red fabric is used for many Christmas projects, so I had leftover scraps. You could purchase 1/8 of a yard, or use patches or even heart appliques.


Ticking fabric has always had my heart, but you just made it even more precious! Adore the flour sack vibe these cute Valentine's Day tea towels took on!
ReplyDeleteThanks Donna, seasonal tea towels are so fun to make! Have a great weekend!
DeleteI love the vintage feel of the fabrics and trims you used for these lovely Valentine towels, Cindy!
ReplyDeleteThank you Beth!
Delete